Here is a message from carpenter Michal Lacko in which he explains his new method of working…using the free version of our carpentry software PolyBoard and partnering with a CNC service to cut, machine and edge the parts.
He saved a lot of time with this new workflow, and didn’t need to invest in software or CNC facilities to do it.
As well as the free version of PolyBoard, he used our CabinetFile Service to receive his cut list, plans and DXF files of each part, along with expert support on the forum…
Hello, my name is Michal and I’m a carpenter in Poitiers, France. Here’s how I work with PolyBoard.
When a client asks me to draw and make built-in furniture, I start with a site visit to measure the room and set the first lines of the project.
In this case, a client wanted some furniture to store dishes and various other objects (linen, small objects, some books…). In her house, built in the 1950s, the client tore down a wall separating the dining room from the living room, this enabled her to get more light into her living space.
The challenge was to propose a cabinet that can link the two parts of the new room. For technical reasons, a part of the wall surface is offset from the main surface, so we had to integrate this into the project.
Our furniture is made with locally produced materials and the finishing is without formaldehyde and VOC (volatile organic compound). I usually suggest poplar plywood panel with edging, painted on the outside and varnished inside.
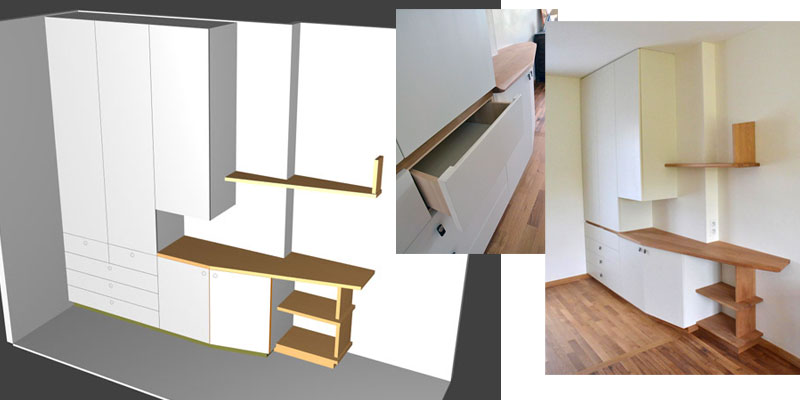
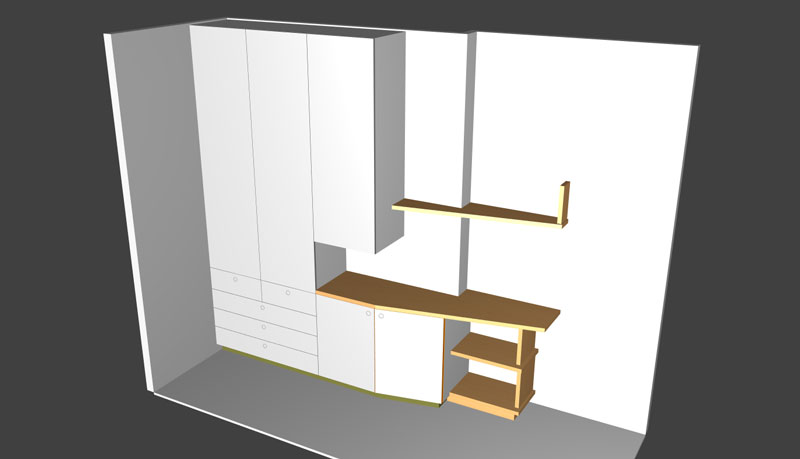
I used to present my designs in SketchUp, but here’s the 3D model in PolyBoard which is a fast and high quality way to present the project and it’s still easy to edit. Here is my client proposal:
After some minor modifications and tweaking of this customer’s project, we finally came to an agreement.
Currently my production resources are relatively limited so I wanted to process this job differently than with my usual methods.
I wanted to do the maximum amount of machining with CNC so I could focus on the ‘handmade’ details.
So I split the furniture into a few separate cabinets and drew them in PolyBoard.

This enabled me to get the parts made up using my supplier, equipped with CNC and an edge banding machine.
I’m used to working with Blum hardware, so I set up sub-methods in the software for hinges, drawer sliders and holes for shelves.
The WoodDesigner.org team helped me on the forum to resolve some details (doors on the lower right box which has an angled façade; that same box must have a wider right upright in order to adjust to the wall …).
Nesting of the parts was done with OptiNest, since my provider works this way: he puts the entire panel on the CNC machine and makes all the cuts and holes from the top.
This technique excludes drilling into the edge, but it’s no big deal, I assembled the boxes with the Festool Domino system which was very fast and accurate. And this reduced the cost for the machining of the panels.
Otherwise, if I wanted to drill the holes into the edges he would have have been obliged to move each piece individually on the CNC machine. This would have been very time-consuming and so expensive.
Here’s an image of a sample file with nesting. The purple lines are the edges: the panel comes whole out of the CNC machine, the operator only has to mark the edges to be edge banded before removing the different parts and then processing the part in the edge bander.
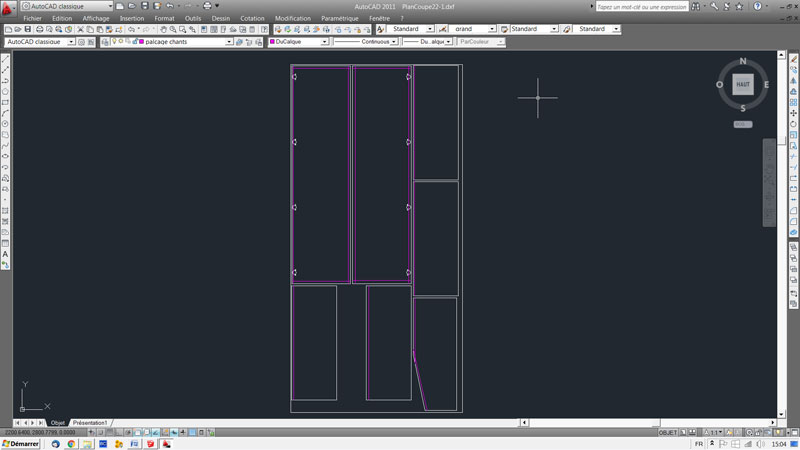
The machining of the panels was very fast and accurate. I used 4 panel thicknesses (10mm for the backs, 15mm for drawers, 18mm for the structure of boxes and 22mm for facades and I gave a distinct color for each panel in PolyBoard).
The assembly work of the boxes and drawers was incredibly fast (pre-drilled holes for hinges and blum sliders worked beautifully). I felt like I was assembling a piece of IKEA furniture. Anyway, I saved a lot of time on this step, which allowed me to spend a little more time to finish the solid wood parts.
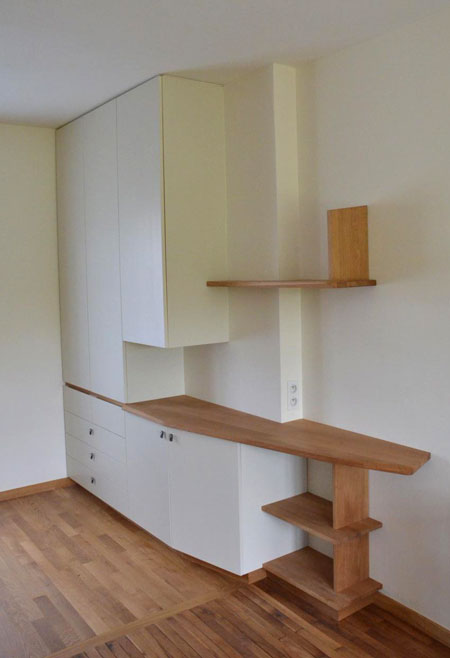
Here is the result: painted, varnished and installed in the client’s house:
In summary, a good grip of PolyBoard and use of sub-methods (box construction, materials used, sub-methods for edges, drawers and hardware settings) allowed me to build some quality bespoke furniture while remaining competitive on price.
For the next project I wouldn’t hesitate to use the same method.
Cheers and good luck with your projects.
Michal Lacko
Would you like try to PolyBoard yourself?
Using our CabinetFile service is a very cost effective way to access pro software without buying.
Alternatively, you may prefer to use the full version of the software, and have all the manufacturing output available for in-house production. If you’d like to find out more about how the software could help your workshop, please contact us for an online demo with one of our technical team.
You can also click on this link for more information on PolyBoard and to download.
Hi, would like to know more on how to degisn cupboards and wardrobes
Hi Tshepo, please check out our PolyBoard video tutorials, or request an online demo of PolyBoard via our contact form. Thanks