Following last week’s article on curved strings and handrail here’s a short example of a wreathed string built with laminates, that I’m actually building in the workshop. This stair is being built for an old farm house in the French Alpes in the Vercours region, not far from where I live.
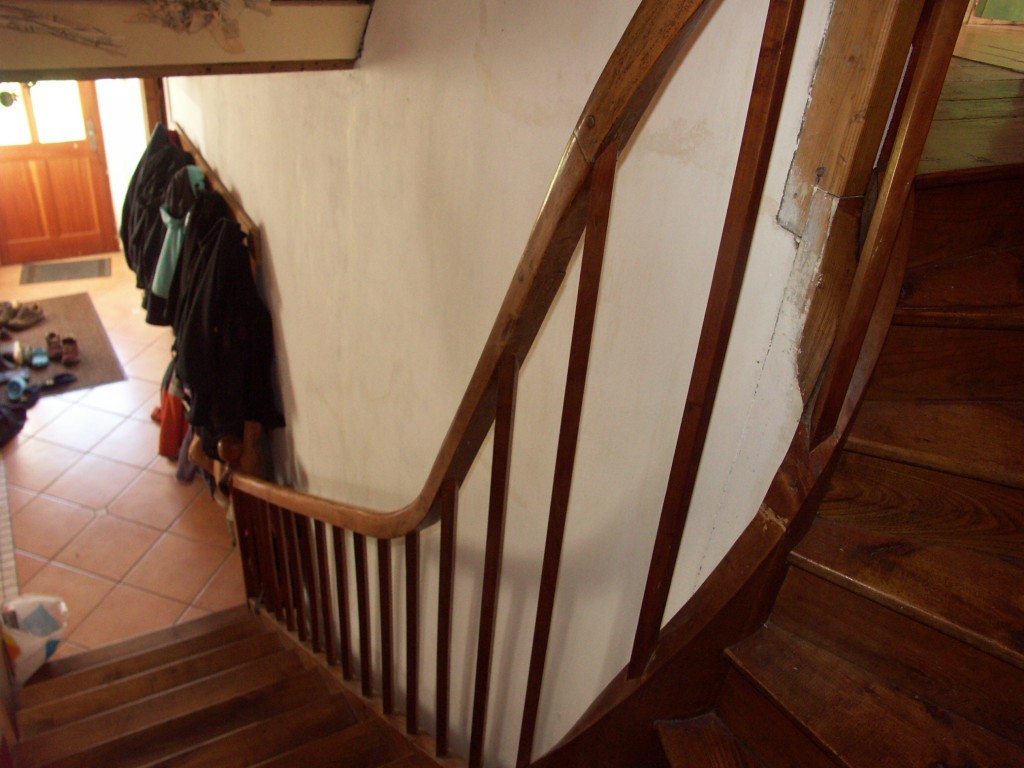
The particularity of this project is that the stair is following an existing stair. The original stair has probably been built by a village carpenter in the early 1900’s .
The original stair goes from the ground floor to the first floor and is made of a mix of woods ash, beech and some cherry, in facgt what ever the carpenter had at hand on the moment. All this together with rudimentary planning and a very rustique construction gives this stair a sort of charming very French country style.
My objective is to build a continuation of the stair, over the first stair, that climbs to the second floor while keeping the same style and movement.
Here is an over view of the different stages of building the curved parts for this stair.
Here’s a photo of the existing stair:

After taking on site measurements the first job is to make a detailed drawing of the stair well in Progecad.
This study will give me the exact dimensions to input into StairDesigner to calculate the stair.
To build the curved string and handrail I use the StairDesigner drawings that I edit in Progecad to design a form to bend the laminates.
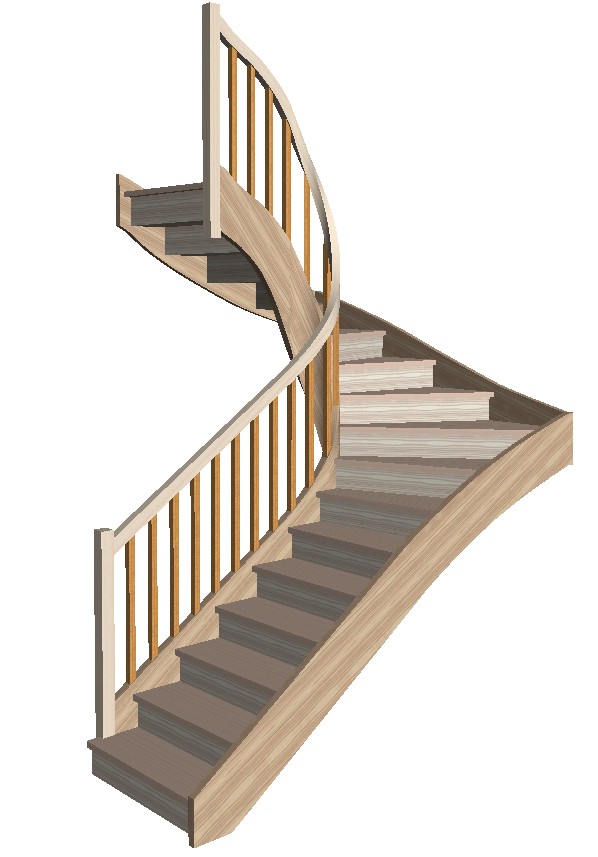
Here’s the project built by StairDesigner:
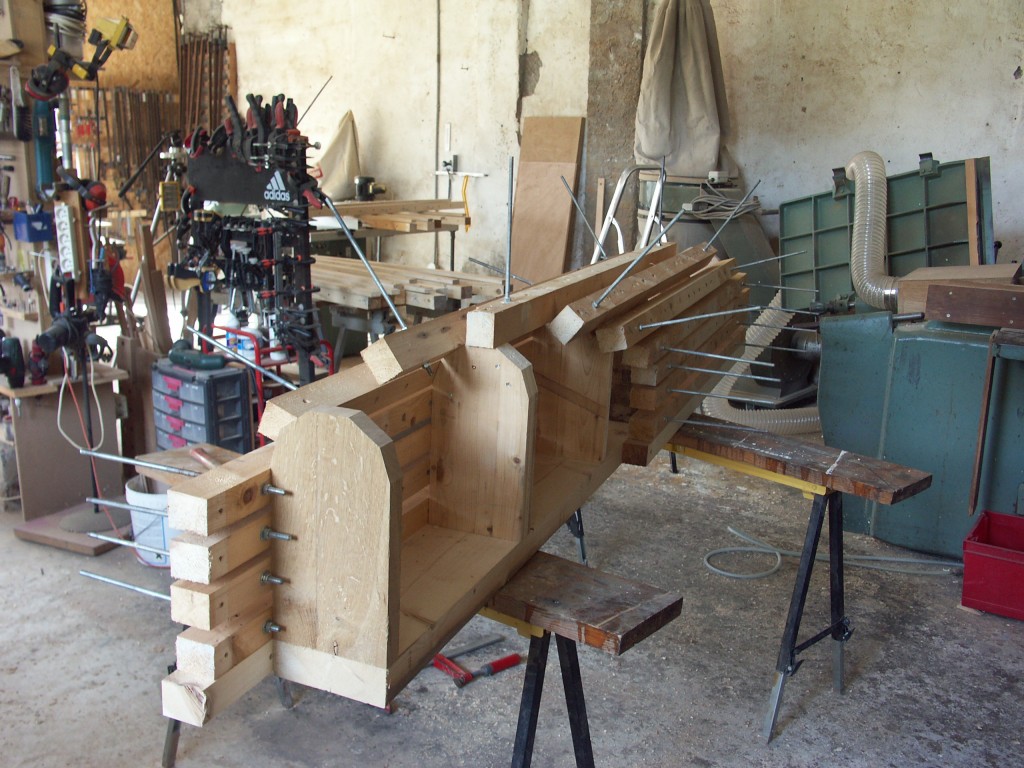
To build the stringer and hand rail I have first to build the form in the workshop.
Once the drawings from Progecad are ready this is really very quick and easy. As I always have vertical battens drilled up and ready I only have to cut out the appropriate curved shapes using the full size templates printed with Progecad.
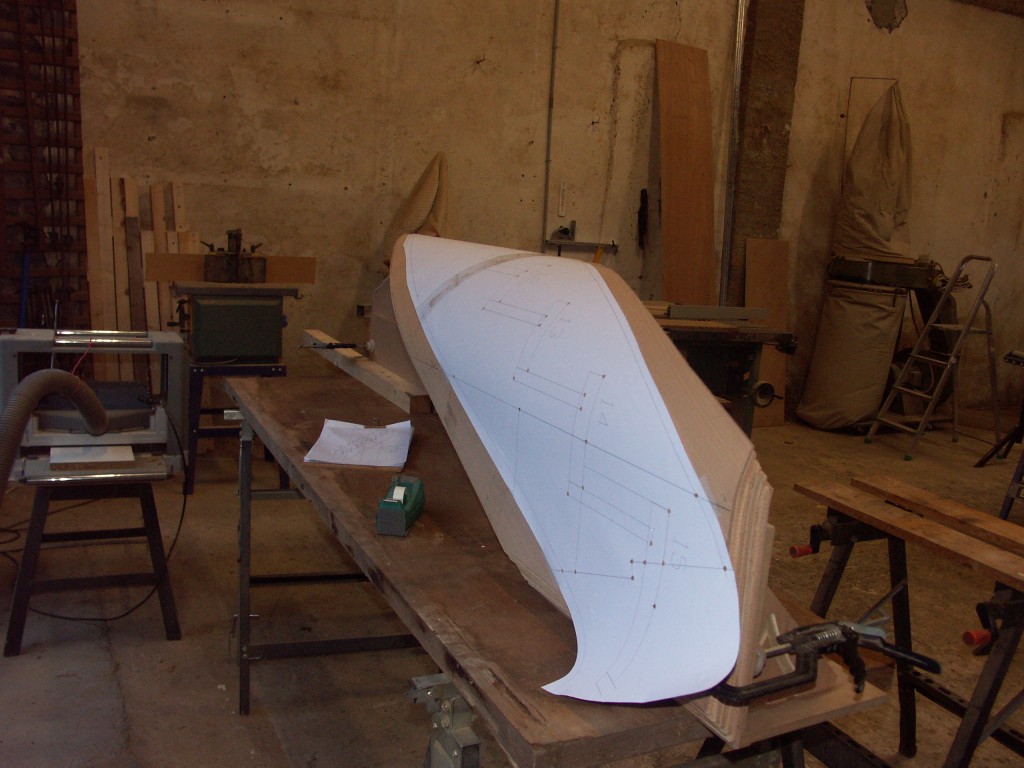
Here’s the form built in the workshop. Note how the vertical 60x60mm beams are drilled to hold threaded rods that will be used to pull the laminates into shape.
Here’s a photo of the form with the laminates clamped up and pulled into shape.
The battens that are pulled down with the threaded rods are themselves drilled for intermediate bolts that enable me to adjust and distribute the pressure along the whole length of the batten.

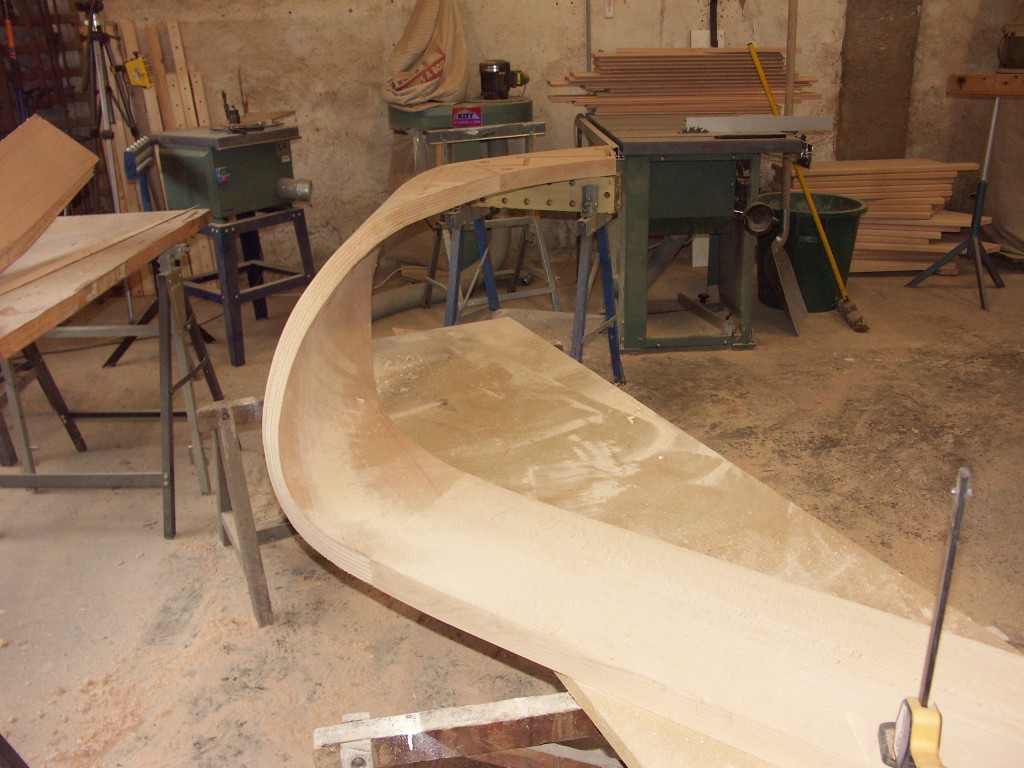
An here’s the stringer and hand rail ready for marking up :
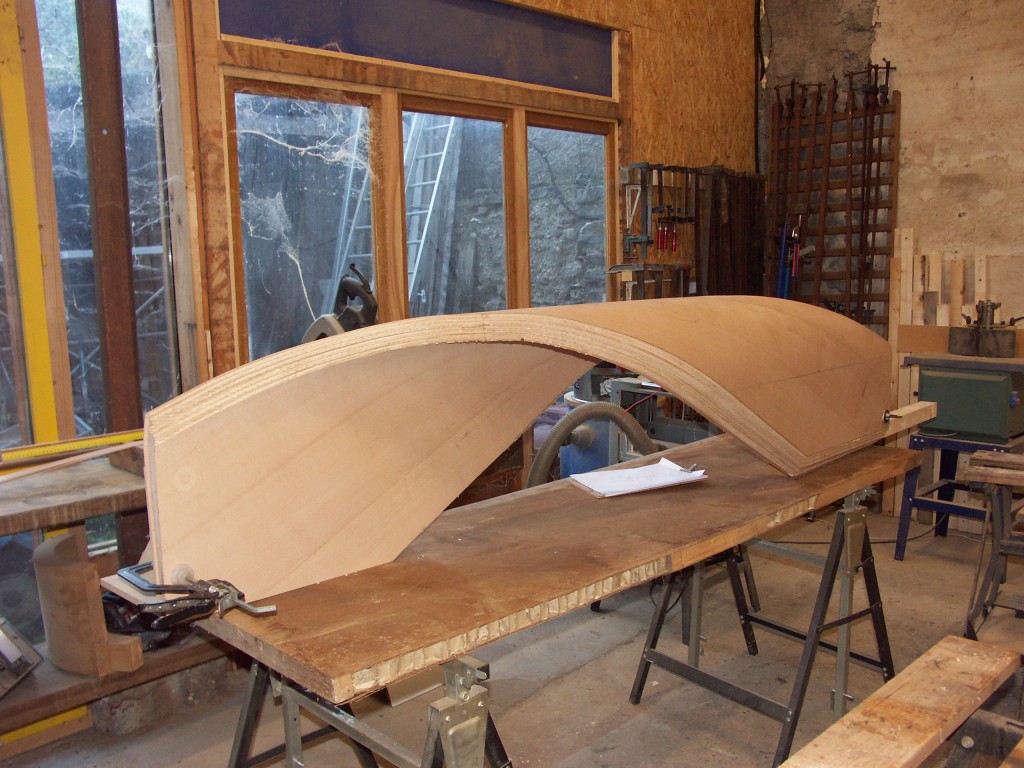
The stringer is marked up using the full size templates printed by StairDesigner:
I find the best way to do this is to punch small holes in the template at the intersection of lines. I then hold the template on the stringer with tape and mark the position of the intersections through the holes.
This is usually easier that trying to glue the template directly onto the stringer and machining through the template.
Once marked up the joints between the straight and curved sections of stringer are machined up with jigs and a portable router.

Le sections of the stringer are then assembled and the edge veneers glued up:
In this photo you can see me cutting the step and riser housings with a portable router.
I use bands of flexy ply pinned onto the curve as a guide for the router.
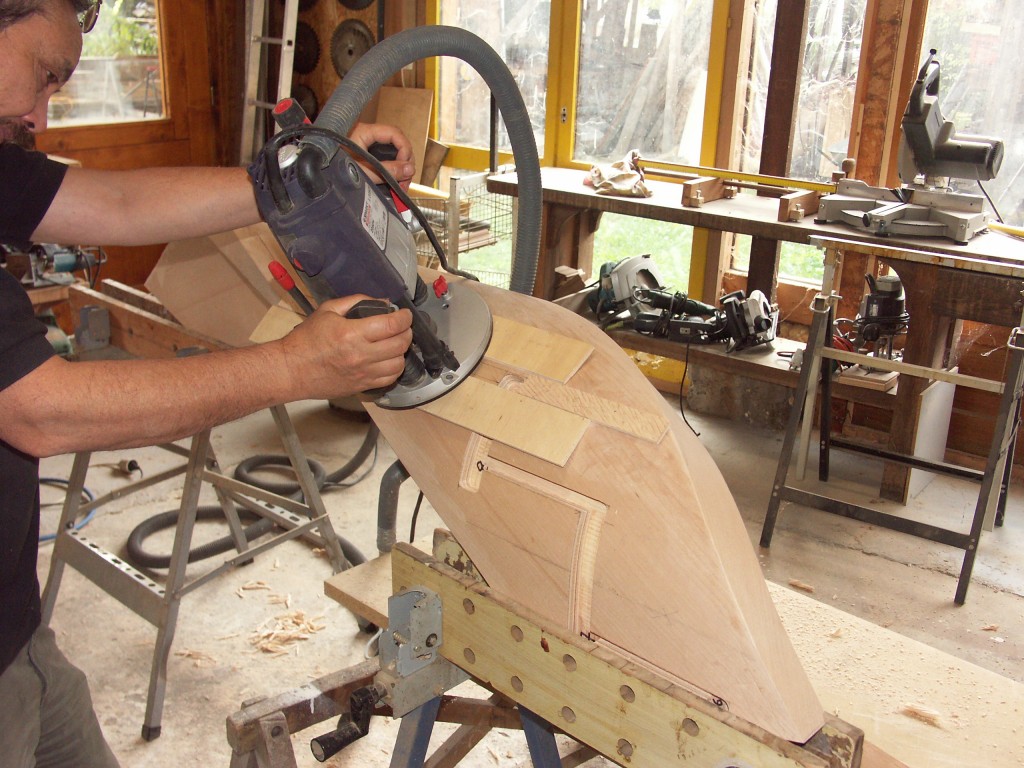
Once the housings are cut each step and riser is adjusted into their recesses.
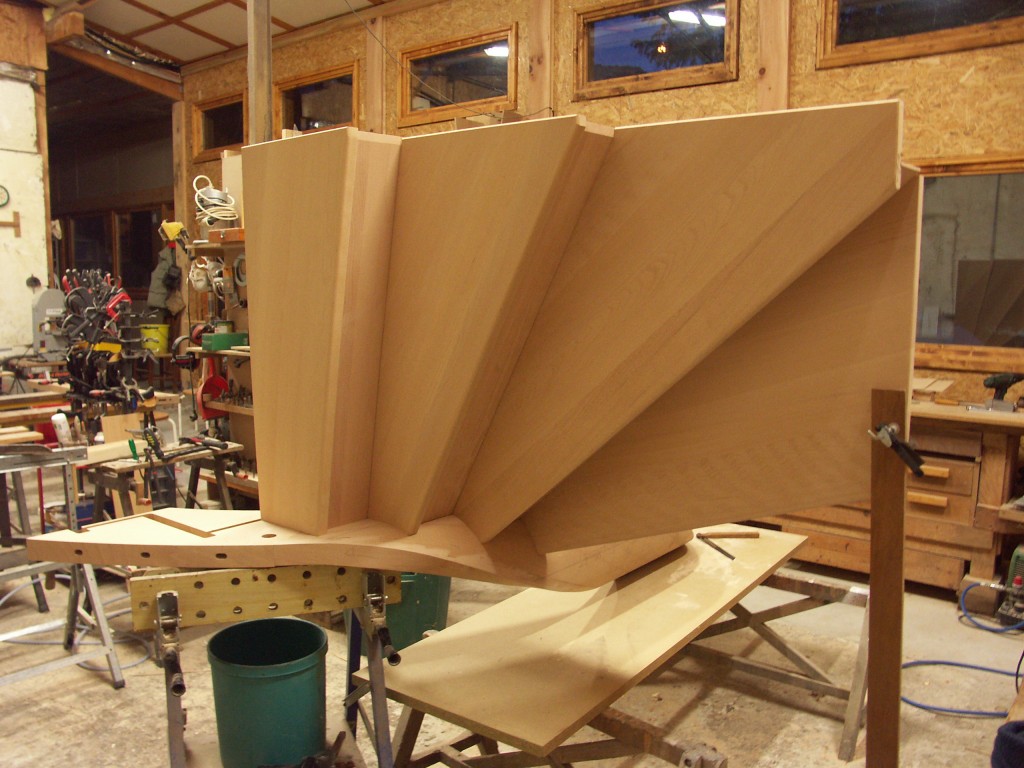
Here are the stairs assembled in the workshop.
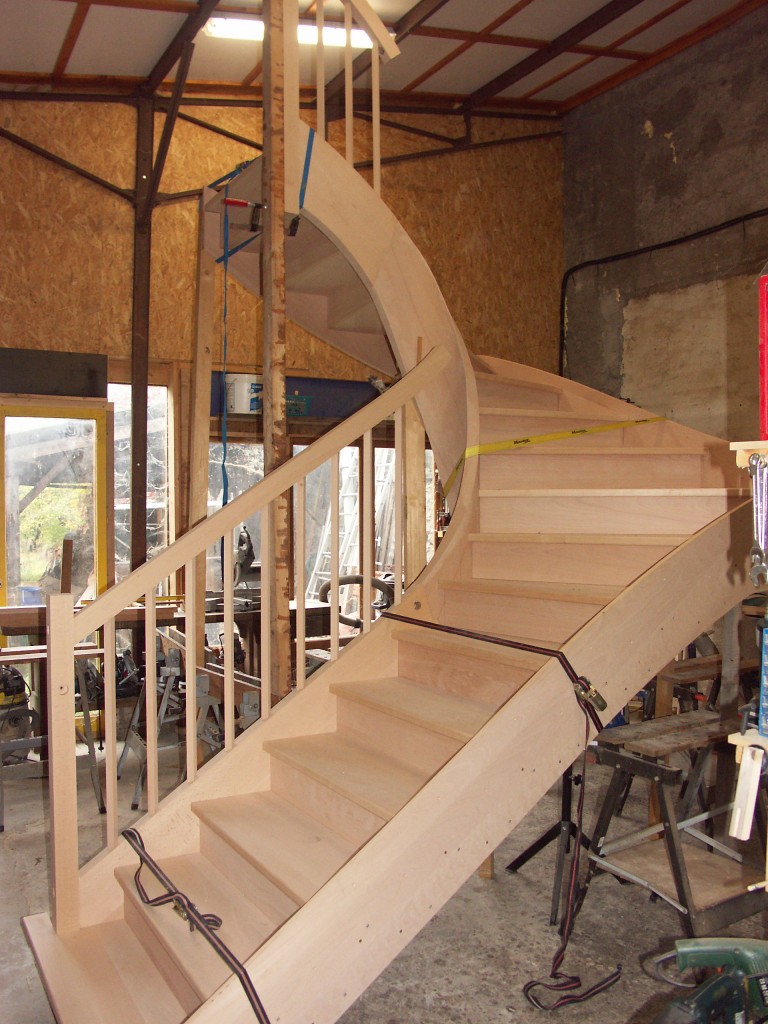
As you can see the stair looks very much like the 3D model made with StairDesigner.
The next job will be to build the hand rail from the laminated blank and assemble it onto the stair.
This stair has a laminated string that has roughly the same shape as the existing stair. The stair turns very tightly around a half turn of winders that make the string and handrail twist up very fast. As well as this the spindles are not parallel to the string but angled at 45°.
This is going to make it difficult to mark up the joints between the spindles and the stinger and hand rail.
We’ll see how I cope with this problem in my next article.
Happy wood working
Ness
Wow, that’s what I was seeking for, what a information!
present here at this website, thanks admin of this site.
Hi BA,
In the 1900’s the village carpenters were also farmers.
Here in the Alpes people were snowed in from November to April or May. That’s at least 6 months inside. Once the snow melt everyone was outside farming to get enough food for the next winter.
During the long winter months woodworking was a major activity. Time ran at a different pace in those days and a stair could takes years to make.
This stair was not made by a highly skilled craftsman. These craftsmen were in the towns working for the rich “bourgeoisie” whereas in the mountains everyone was a farmer, baker, Shepherd, woodworker, and more. Some were more specialized but usually everyone did everything. This stair was more whittled than designed and that’s what gives it a unique rough county style.
Parts where made slowly one by one probably adjusting each part onto the next by rule of thumb and eye than by calculation.
This is a very different style from the town craftsmen who used very sophisticated techniques to mark out and build stairs.
Each way of working give a different result. Each stair has it’s charm and beauty and expresses the craftsman behind it. That’s what make each unique and beautiful, the expression of the life of the men, women and children behind the craft.
@BA
How did the original village carpenter build this stair, with only the hand tools they had back then? Think about it, how long do you think it took him? Even today its amazing.
Do you have a mac version?
Hello Peter,
Sorry we don’t have a Mac version.
regards
Ness