Help with some things|Forum|WOOD DESIGNER

Avatar
Search
Forum Scope


Match


Forum Options


Minimum search word length is 3 characters - maximum search word length is 84 characters
sp_Feed sp_TopicIcon
Help with some things
Avatar
Ness
Forum Posts: 1939
Subscriber Since:
October 4, 2012
sp_UserOfflineSmall Offline
16
July 18, 2014 - 11:17 am
sp_Permalink sp_Print

Hi Terry,

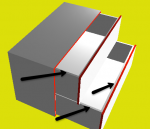
You have to use the drawer elements link to the top:

draw-top-edging.jpgImage Enlarger

draw-top-edging-3d.jpgImage Enlarger

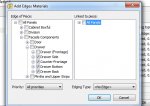
Using ManuMethods use the link to the drawer Top too:

draw-top-edging-with-MM.jpgImage Enlarger

All the best,

Ness

Avatar
Guest
15
July 18, 2014 - 9:58 am
sp_Permalink sp_Print

Hi there

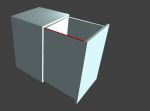
Has anyone got any idea how to edge the exposed (top) pieces of drawer box components. I’ve worked out how to do the applied front but after a few experiments can’t seem to figure the other bits


cheers

terryness-edge1.pngImage Enlarger

Laughness-drawer.pngImage Enlarger

sp_PlupAttachments Attachments
Avatar
Guest
14
July 17, 2014 - 5:02 pm
sp_Permalink sp_Print

Hats off to you Ness.

Im glad I’ve only got to do all this once!

The next wardrobe on a flat wall will be a 15 minute design breeze now I’ve got a decent template setup

And as time is money thats a great thingLaugh

Cheers

Avatar
Ness
Forum Posts: 1939
Subscriber Since:
October 4, 2012
sp_UserOfflineSmall Offline
13
July 17, 2014 - 4:33 pm
sp_Permalink sp_Print sp_EditHistory

Hi everyone,

As promised click here for my idea on kick frames and plinths.

Love to have your ideas too.

All the best,

Ness

Avatar
Guest
12
July 17, 2014 - 4:01 pm
sp_Permalink sp_Print

Ness looking at your reply made me double check the project from the underside. Well I havent done it properly! The applied plinth should be recessed 28mm LOL and its just snapped to the front! Anyway what I done was just create a cabinet from 12mm material added a double back 0 from the back and then got rid of all the other components. Then I took the measuring tool and measured the gap between the end deco panels and adjusted the cab to that size and dropped it in.

there was me thinking I am the clever one!……got alot to learn

I’ll wait for you video and see if that sheds any light

best


Terry

Avatar
Ness
Forum Posts: 1939
Subscriber Since:
October 4, 2012
sp_UserOfflineSmall Offline
11
July 17, 2014 - 3:32 pm
sp_Permalink sp_Print

Hi Terry,

Good to see that you have got around the plinth setup .

Love to know how you did it.

I’m uploading a video to show one way I’d do it and I’ll post the link as soon as it’s ready.

We’ve had some great tips and ideas from Jimbouk and Mark today so I’d also like to thank everyone who has participated in this project because I’m convinced that it’s by putting our brains together that we can move faster and better and most of all make life and work more enjoyable and rewarding. So big thanks to everyone!

Video is still uploading……

All the best,

Ness

Avatar
Guest
10
July 17, 2014 - 3:19 pm
sp_Permalink sp_Print

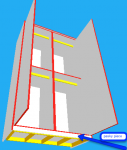
Had some great help on here today spent a good few hours learning quite a bit on the software. thanks again. I managed to get one part of the job planned out and even managed to figure out the pesky applied front. I think the software is finally sinking in and Ness the 2 videos you shot for me today were among your best yet.

Cheers

Ill change the colours on the drobe later they were just for my benefit so i could see what I was doing.

Oh and Stefan cheers for the tip on that jing software…..i can’t  stop using it….. great bit of kit lol …

Cheerswardrobe.pngImage Enlarger

Laugh

sp_PlupAttachments Attachments
Avatar
Guest
9
July 17, 2014 - 12:43 pm
sp_Permalink sp_Print

Thanks for doing this Ness  and thanks everyone else for their input. Hopefully eventually I will  be able to help other newer membersLaugh

Avatar
Ness
Forum Posts: 1939
Subscriber Since:
October 4, 2012
sp_UserOfflineSmall Offline
8
July 17, 2014 - 12:11 pm
sp_Permalink sp_Print sp_EditHistory

Hi Terry,

As promised, click here for the video on Edging with manufacturing methods.

Ness

Avatar
Guest
7
July 17, 2014 - 11:27 am
sp_Permalink sp_Print

Works very well Ness. Ive set up a few different types now for different types of work, alcoves, modular, and free standing.

To save me the aggro of working it out. Is there a easy way to do the kickframe applied front which goes on after?


Cheers


terry

Forum Timezone: Europe/London
Most Users Ever Online: 365
Currently Online: Sungdo Yusung
Guest(s) 20
Currently Browsing this Page:
1 Guest(s)
Top Posters:
Ness: 1939
Tom Cleaver: 162
mark nichols: 160
Conor Devoy: 145
brendan kavanagh: 141
Duayne Naugle: 130
Blake Simpson: 104
Zaheer Abbas: 100
Patrick Maylor: 64
Robert Coxhead: 63
Newest Members:
Randy Blue
Andrew Gabbitas
dermotcoll
TESTING TESTER
Anthony Andrews
Abderrahim Laroussi
anvari@idnc.ca
Jose luis Ferreyra De Moraiz
Sam Russell
sarlejla
Forum Stats:
Groups: 2
Forums: 7
Topics: 2195
Posts: 11919


Member Stats:
Guest Posters: 4
Members: 306
Moderators: 0
Admins: 11
Administrators: Stefan, Michel, Carole, Alex, admin, Laly, ipatrick, Crystal, Fatima, Darren, Isaac