The measuring tool and dimensioned plans
Accurate dimensioned drawings are critical for an efficient production and assembly process.
PolyBoard is able to output a range of dimensioned 3D and plan views.
You can measure and record specific dimensions that are of interest to you, whether that’s for an individual cabinet or wider project, or automatically toggle on and off dimension displays.
This video shows you some of the possibilities, with more details below, including creating cut throughs of your design and linking dimensions to those (this is the powerful Partial Views function).
The 3 measuring tools
These can be accessed via the Quick Dims toolbar, or the Measuring Tool menu; there are 3 measuring tools to choose from.
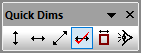
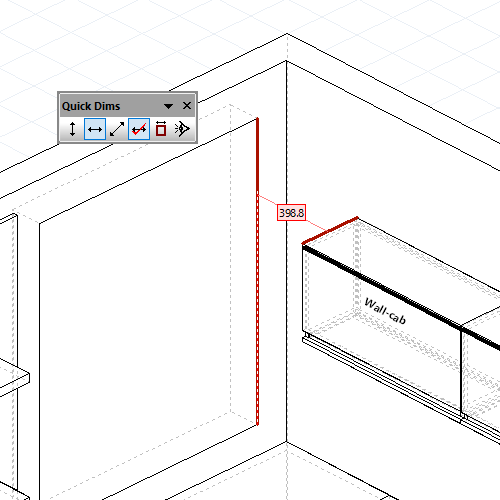
Horizontal measuring tool
In Project mode, this tool can be used to measure a range of dimensions (and, as we’ll see later, to set dimensions in your plans). Examples include:
- The width of a cabinet
- The width of a specific part within a cabinet
- The width between parts within a cabinet
- The horizontal space between a cabinet and a wall, door or window
- The horizontal space between two cabinets
Cabinet mode is for editing a single cabinet, so here the horizontal measure can be used for any cabinet specific measurements shown above.
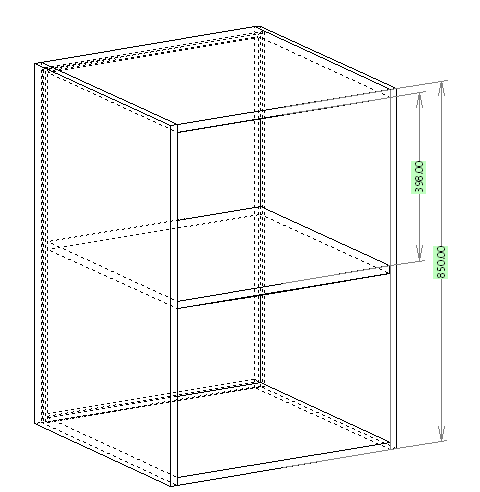
Vertical measuring tool
Identical to the horizontal measure, you can measure and set dimensions of the following (again limited to cabinet specific dimensions in Cabinet mode):
- The height of a cabinet
- The height of a specific part within a cabinet
- The height between parts within a cabinet
- The vertical space between a cabinet and the floor or a window
- The vertical space between a floor and wall cabinet
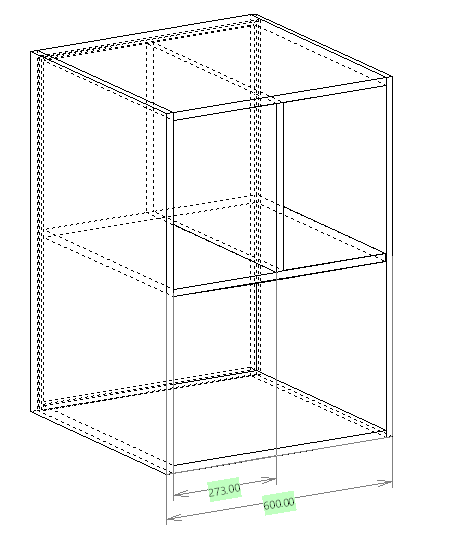
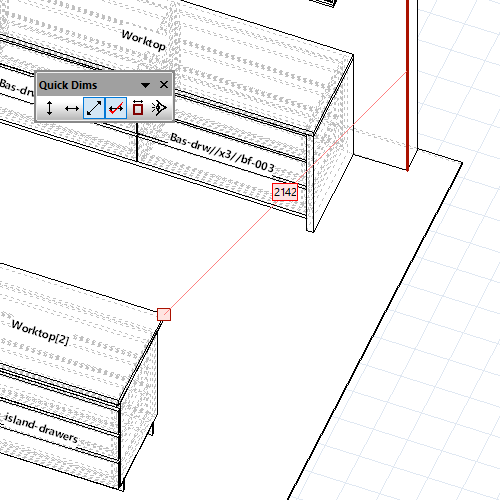
3D measuring tool
This powerful tool is able to measure between cabinets, within cabinets, and from cabinets to other design elements… across three dimensions.
So you could, for example, measure an external or internal distance from the top right of your cabinet to bottom left or, as shown in this image, from the corner of a cabinet to a wall:
Design capabilities of the measuring tools
The measuring tools used within Project mode are also a great design aid.
Set up your room layout then measure the gaps between units and between units and windows/doors/walls, and use PolyBoard’s parametric system to very quickly edit cabinets to fit perfectly.
It’s as simple as double clicking on a cabinet to edit the overall width: all elements will resize to fit, and your hardware and other assembly rules will update automatically too.
Display options
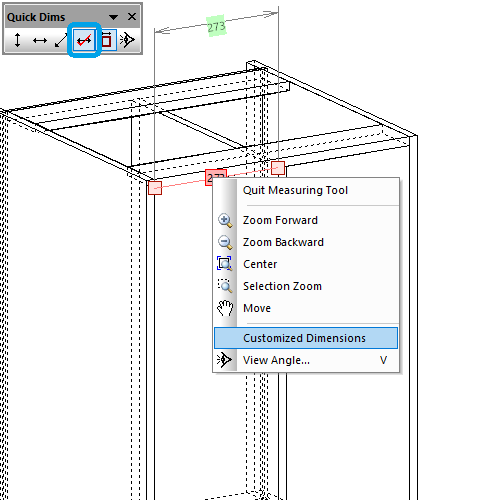
Custom dimensions
First, make sure Dimensions are activated in the View menu.
Then it’s possible to convert any measurement into a custom dimension, by right clicking on the value and selecting Customized dimensions.
These will then show in your workshop documents.
Cabinet dimensions
This is used in Project mode and, when applied, shows the overall dimensions of each cabinet in your project. The toolbar icon you need for this is shown below:

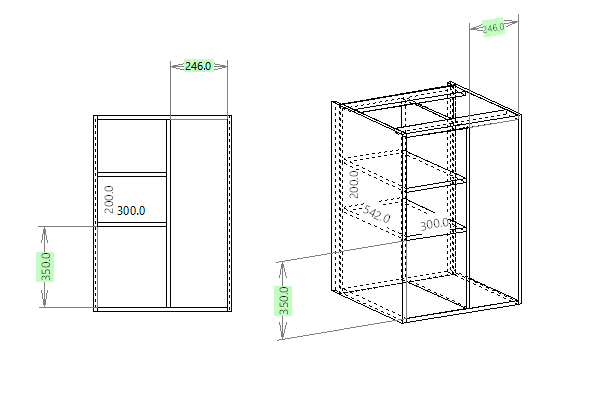
Permanent dimensions
In Cabinet mode this option will display the interior dimensions of the cabinet, both whilst you edit and on the workshop documents.
Right click after selecting the interior zone you’d like dimensions for, then select Permanent dimensions. You can select the entire internal volume or smaller zones or a group of internal zones.
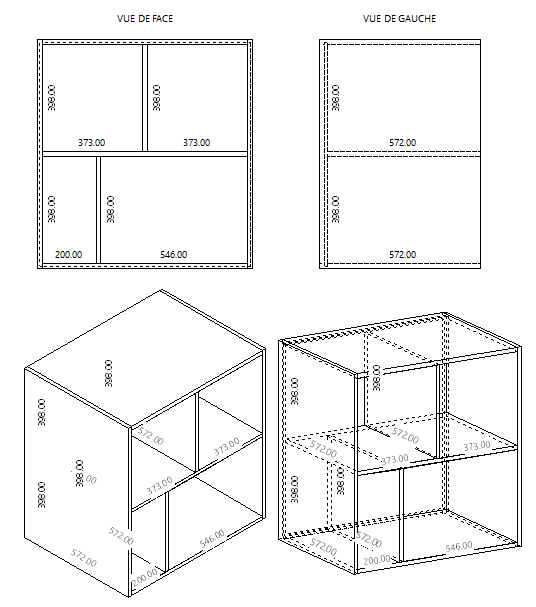
Cabinet multi-view
To edit the display of your complete cabinet in the workshop document, in Cabinet mode go to File > Print setup > Cabinet multi-view.
You can select a range of options depending on how much technical data you would like to include:
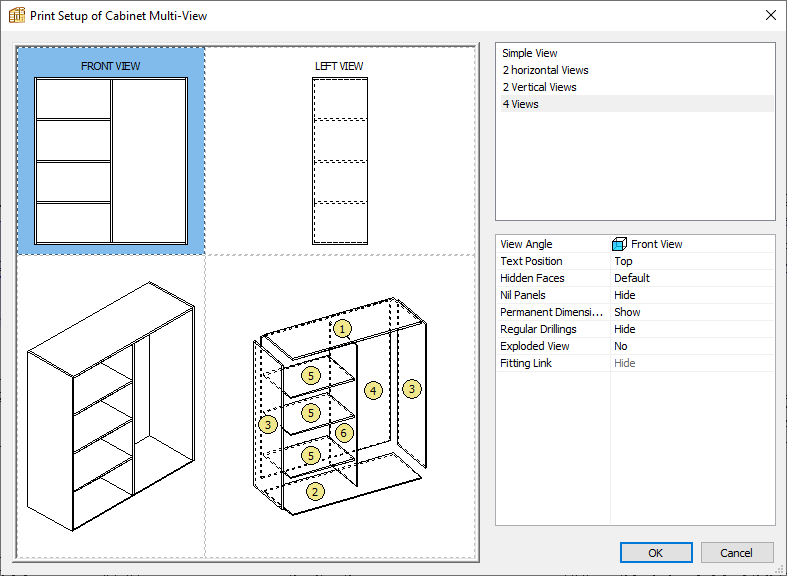
The number of views to display, and for each view:
- View angle
- Whether to display dimensions
- Turn on/off the display of various other display elements
This configuration will also be applied and shown for each cabinet individually when printing the manufacturing documents for a multi cabinet project in Project mode.
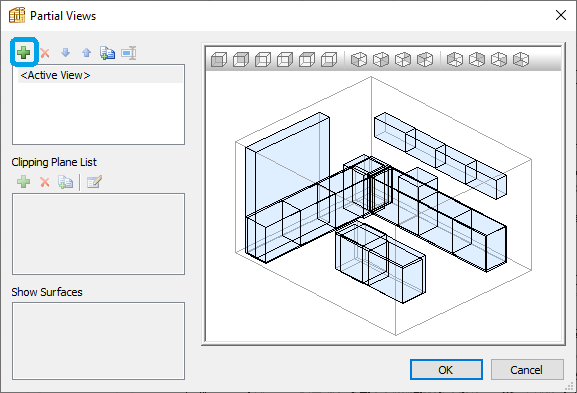
Partial views
In Project mode go to File > Partial views.
This option is available as soon as the project contains at least one cabinet.
It is configured on a project by project basis, and is able to create plan or section cuts where needed for a client presentation or to aid installation.
In this window, it’s possible to create a series of views from any perspective for inclusion in the workshop document.
Linked to each view, you can also add multiple clipping planes which define the point and surface at which the cabinets will be displayed.
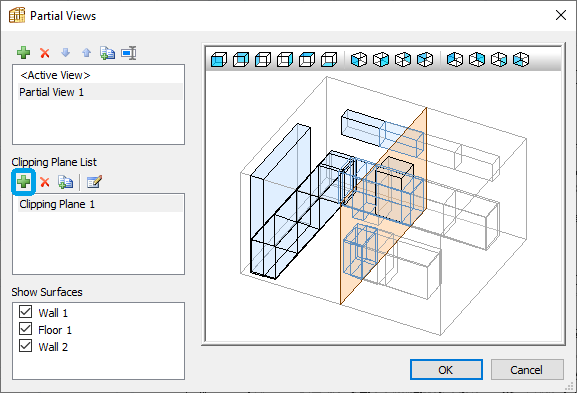
Double click on a clipping plane to configure its orientation for application to each view.
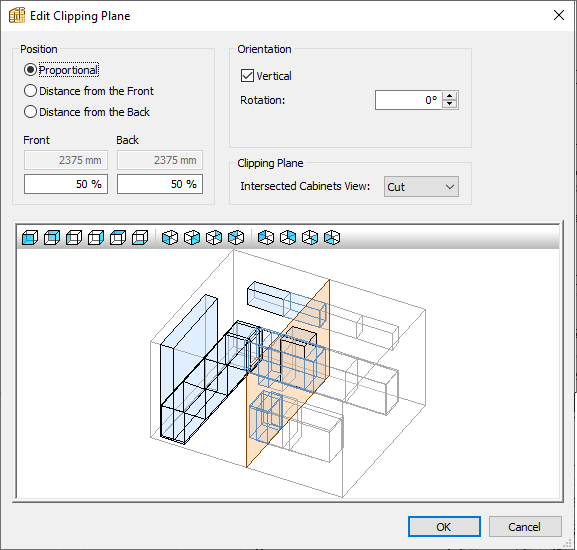
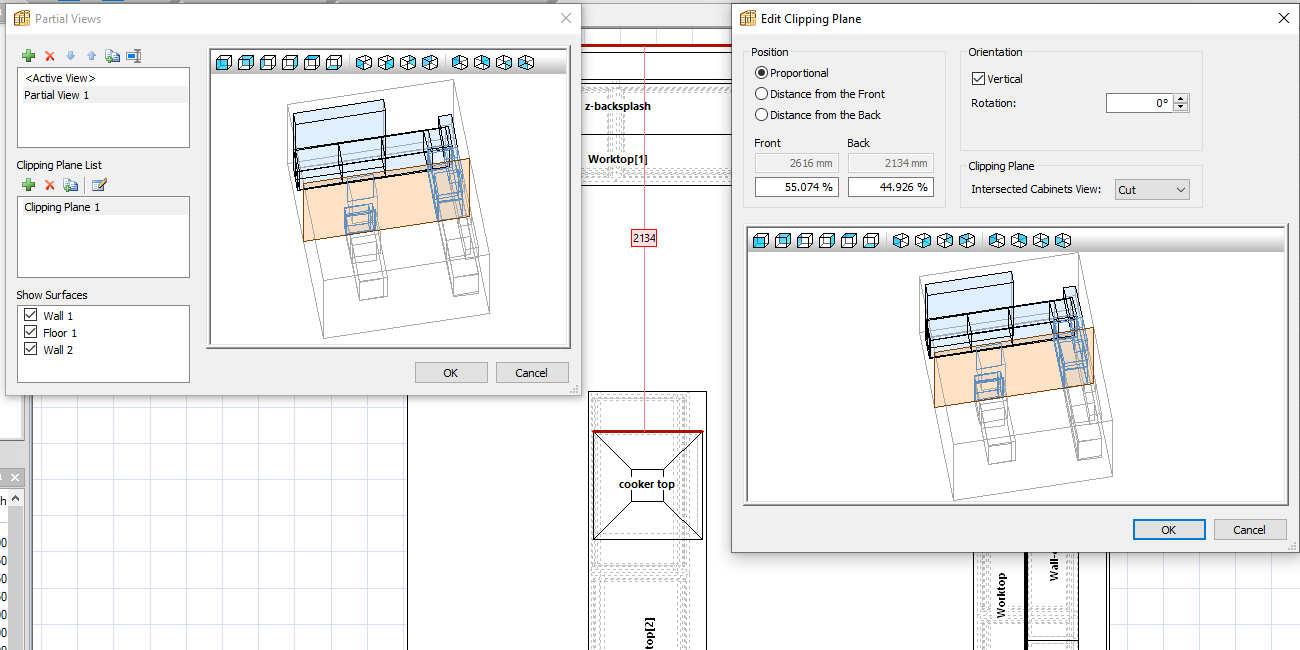
Position and orientation of cutting planes
Use the measuring tool to determine the correct positioning of the clipping plane. Then just like you’d position a double back in PolyBoard, set the position from the front or back in absolute values or proportionally.
For a horizontal plane, deselect the vertical orientation checkbox and position just like you would a shelf.
Intersection with cabinets
You can also choose how to view cabinets that intersect the cutting plane as follow:
- View in their entirety
- View section cut through of the cabinet where it intersect with the cutting plane
- Ignore or hide them completely
Adding more cutting planes allows you to add further clarity to your drawing in complex projects.
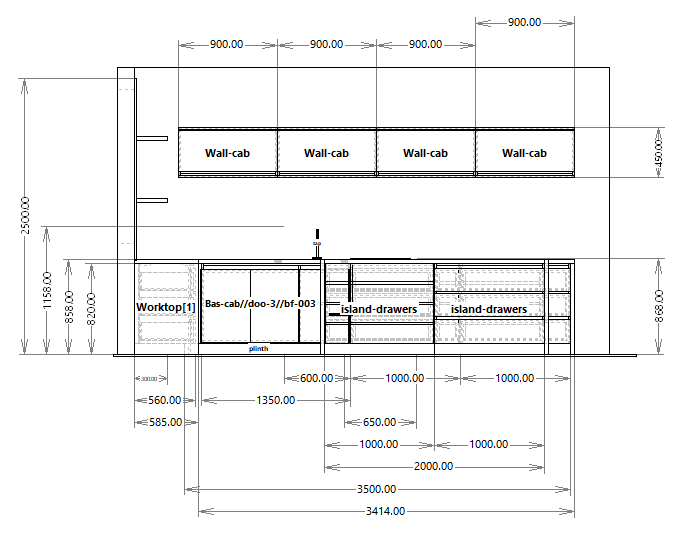
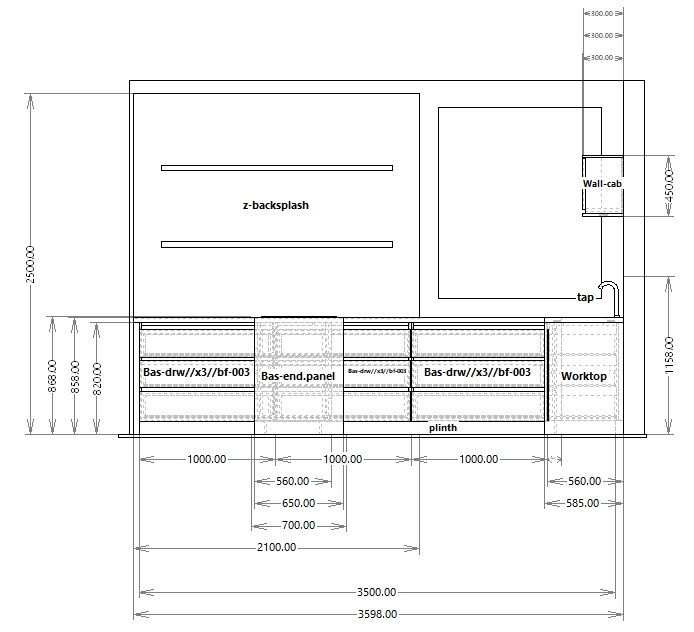
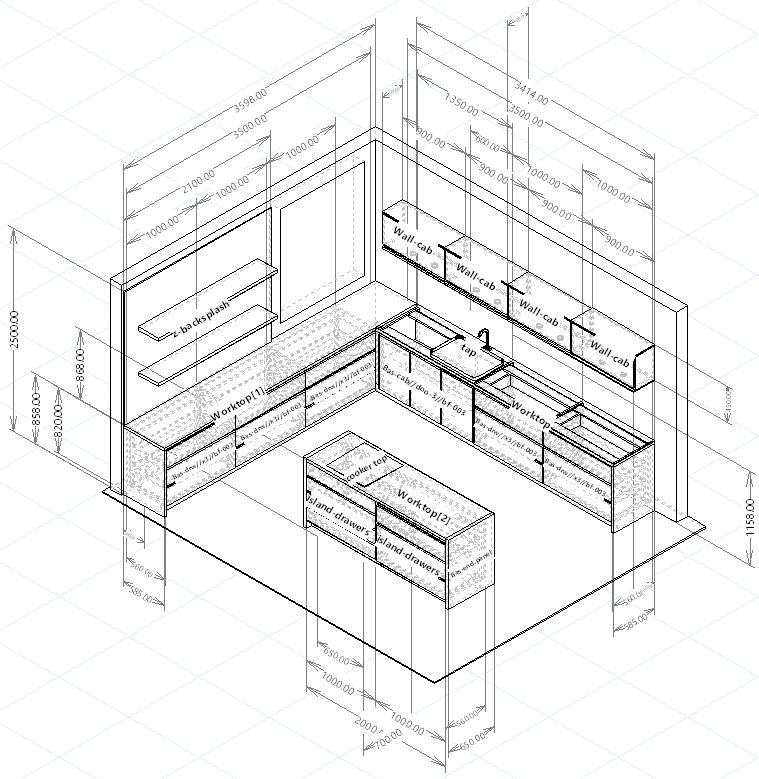
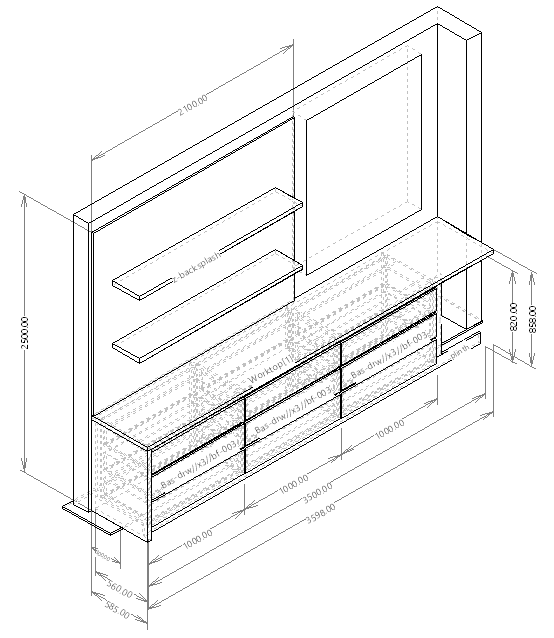
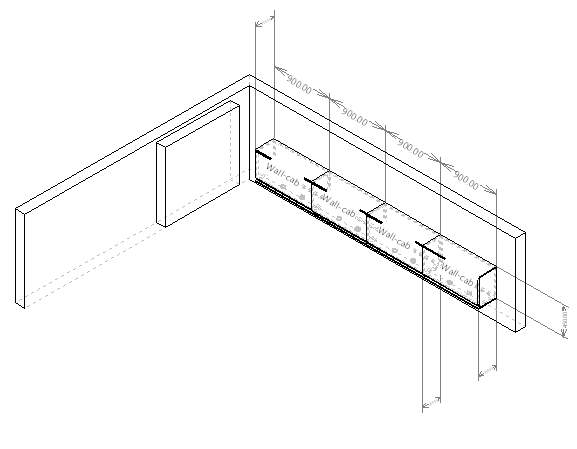
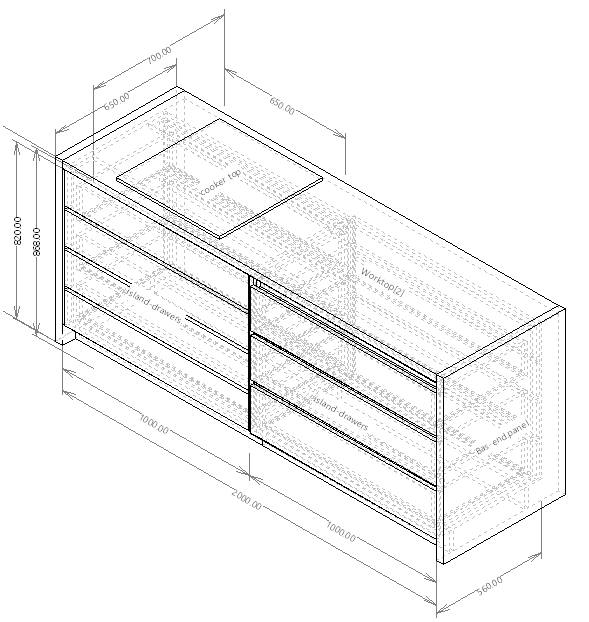
Here are a range of plans created from our handleless kitchen model (available in the Quick Design libraries folder):

Combined, these measuring and display tools allow you to create detailed dimensioned drawings as well as support a fast and accurate design process.