Basic design continued
PolyBoard Essentials: Previous | Next
- Delete design elements
- Undo and redo
- Saving your work
- Zone management and copying your internal layout
- Materials
- Hardware
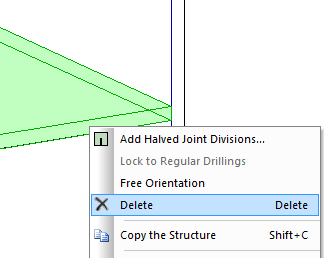
Delete design elements
To delete a shelf, drawer or any other internal element, select it then:
- Modify menu > Delete
- Right-click on part > Delete
- Select the part and press delete on your keyboard
- To delete a drawer, select the façade then delete
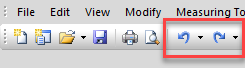
Undo and redo
You also have the option to undo or redo (add back in) any edit you do. These commands are available as toolbar icons or via the Edit menu:
Saving your work
Individual designs
PolyBoard includes an autosave feature in the event of your computer unexpectedly closing. Otherwise, we advise that you regularly save your design and create backups at a remote location of all your design files.
Quick Design libraries and other settings
It is also possible to save your settings, including your libraries and post processor configuration.
More details:
How do I save and restore my settings?
Your libraries can optionally be hosted on a cloud-based storage system, adding an extra level of security, and offering a simple way to share them across multiple computers.
Zone management and copying your internal layout
To make the design process as fast as possible, the video below provides some extra tips on how to:
- Select single and multiple zones
- Copy and paste design elements from one zone to the other (in a single cabinet and between cabinets)
- Delete everything within your zones
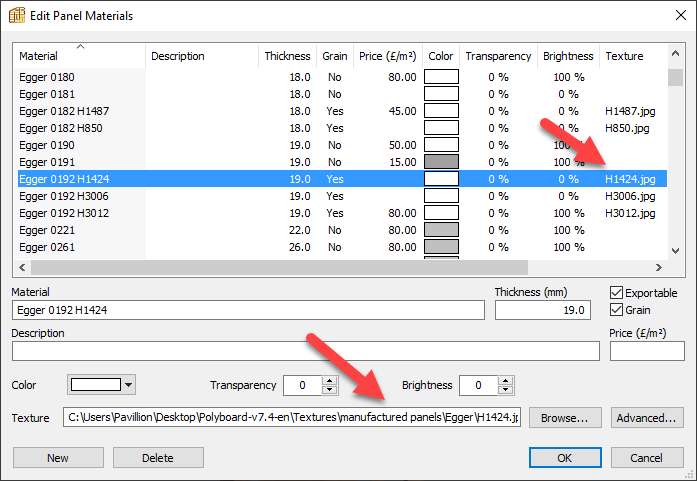
Materials
Panel materials
When you started your design, you would have selected a Manufacturing method for it, which includes material preferences. Using Manufacturing methods is the fastest way to manage materials in the long run.
However, an easy way to make changes is simply to select a part and change the material in:
Properties menu > Cutting list > Material section
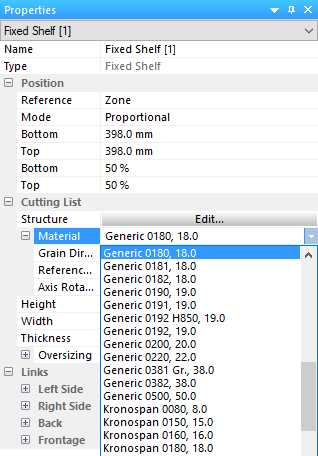
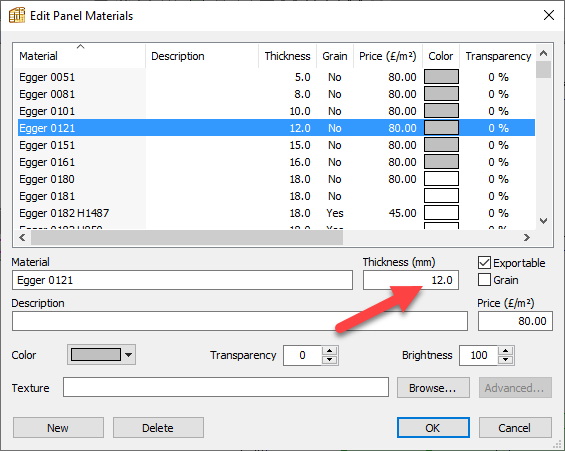
Materials (as shown in the drop-down list) are stocked in the Panel materials library.
We discuss libraries later, but to access the Panel materials library, go to:
Libraries > Panel materials or look for this Quick Design toolbar icon:
How do I change the thickness of a part?
It’s important to note that material thickness is not a parameter you change in the Properties menu.
Instead, it is a characteristic of the material you choose to use. So if you want to change the thickness, you either change the thickness of that specific material inside the library or select a new material with the correct thickness.
3D material textures
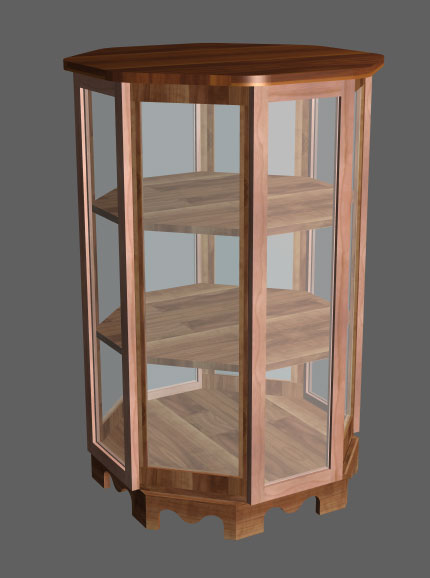
Each material can have a colour or texture (.jpg or .png image file associated with it). This is reflected in the 3D view, and can be used to display a wood or any other appearance for your materials.
Edging and bar materials
There are also edging and bar materials libraries which work in a similar fashion.
More on these later too.
Hardware
Again, this is covered in more detail later, and as with materials, hardware (fittings) is best managed using Manufacturing methods.
Nonetheless, it’s useful to cover the basic concepts here and show you how to quickly add hardware to a cabinet.
Most hardware in PolyBoard is made up of two components:
1. The machining for the hardware (Fitting)
For example, the diameter and depth of the pilot holes for a drawer slider, or the tooling for a hinge.
2. The location of the hardware (Rule)
Where exactly to apply the machining/tooling.
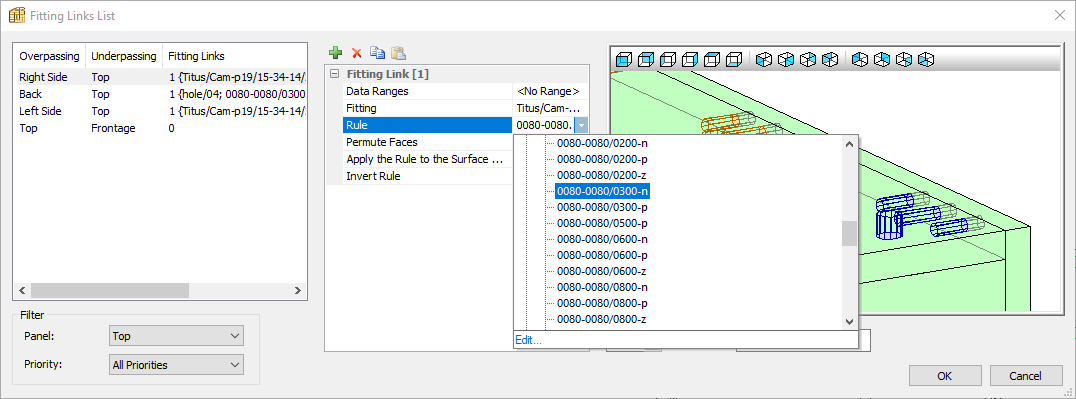
Add hardware to your cabinet
As an example, let’s apply a CAM and dowel assembly between the top and left side of a cabinet.
Select the top > Properties menu > Links > Right side > 1 Fitting link and select the 3 dot icon (…)

This opens the Fitting links window. In the middle dialogue box called Fitting Link [1], you can edit both the Fitting and the Rule.
For the fitting itself, we’ve chosen a Titus cam and dowel arrangement:
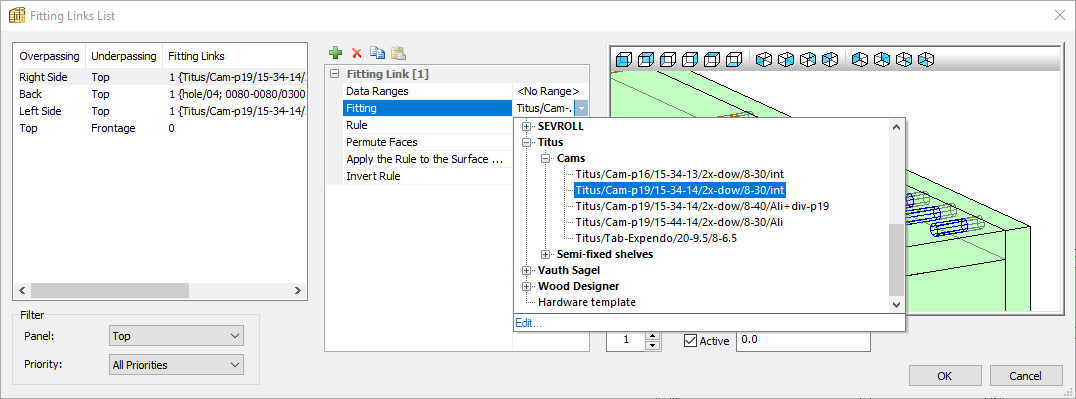
And then this positioning rule:
Manufacturing
Below is an image of the machining details for this cam and dowel hardware, visible in the 3D render wireframe view.
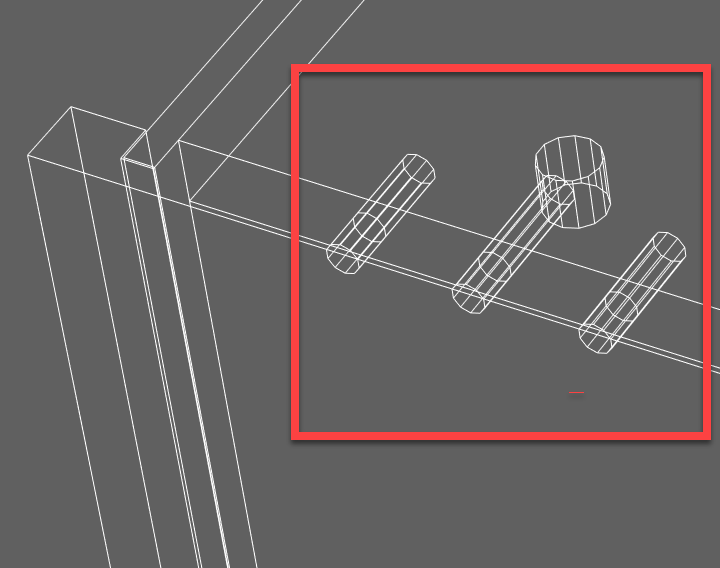
If you are working with a CNC, all machining details can be automatically sent to your CNC’s software.
If you are working without a CNC, the plans include the hardware details, for example, the drilling diameter and depth, and coordinates.
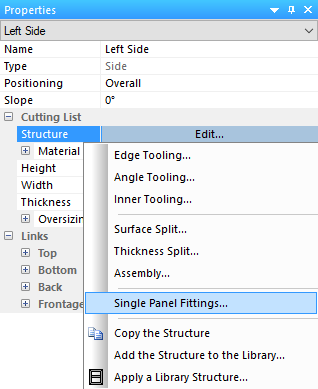
Single panel fittings
Another type of hardware is available in PolyBoard.
Unlike hinges, drawer sliders and panel assembly hardware that are associated with a link between two parts, single panel fittings define the machining for handles and other hardware that can be placed at any location on a panel.
To add a single panel fitting:
Select a part > Properties menu > Cutting list > Structure > Edit > Single panel fittings
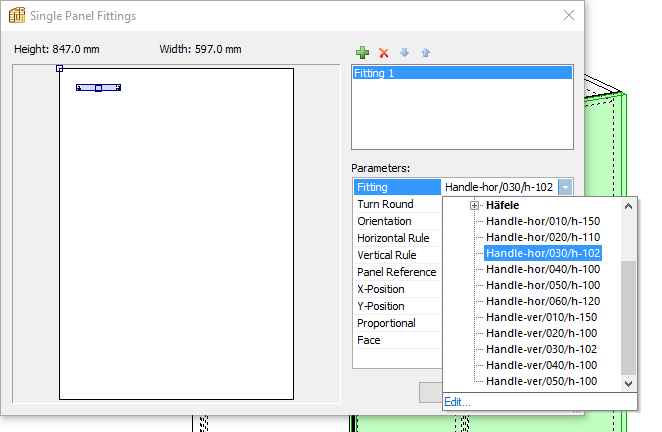
Click on the green + icon > Parameters > Fitting > select a handle for example, then adjust the position to your preferences.
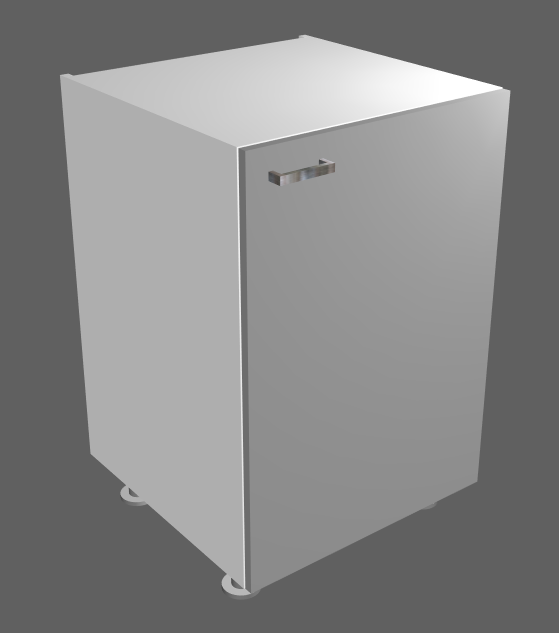
3D models of your hardware
A 3D image of your hardware can be linked with the machining details so it will appear in the 3D view when applied. These 3D images are stored in the 3D accessories library.
This is particularly useful for single panel fittings like handles which add value to your 3D render.
Here we’ve linked a 3D model to the handle applied above:
You can add a 3D image for standard hardware like drawer sliders and hinges, although it isn’t as important for the 3D presentation.
More details:
Extended: handles, specialist fittings and other 3D accessories