Multi cabinet projects
PolyBoard Essentials: Previous | Next
- Project mode video introduction
- Project mode menus
- Create your layout
- How to add cabinets to a project
- Edit cabinets in a project
- Save or save as?
- 3D render and lighting effects
- Measuring
- Worktops, plinths, fillers, cover panels
- Move and rotate cabinets
- Change materials, hardware and lots more
Up until now, we’ve been editing a single cabinet within Cabinet mode.
Project mode allows you to set up a room layout and add multiple cabinets to it.
Why is Project mode useful?
- Ability to create 3D presentations for your customers
- To assess the aesthetics of your design
- To measure and very quickly edit your cabinets for a perfect fit
- To generate combined manufacturing output for your complete project
Project mode video introduction
Just like the Cabinet mode introduction video, please watch this video to see Project mode in action.
We cover the key features and design steps below.
More details:
Project mode menus
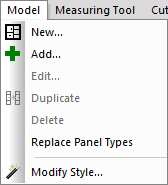
Two new menus are available in Project mode:
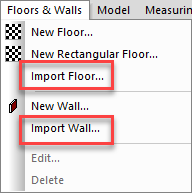
Floors & walls
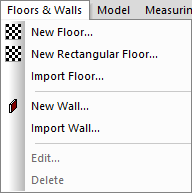
Model
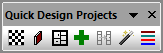
Many commands are also available with a right-click of the mouse, and via the Quick Design Projects toolbar.
As with Cabinet mode, commands will become activated when it is appropriate to use them.
★ Tip ★
If you close your menus (perhaps by accident), to reactivate them go to:
View > Toolbars and docking windows > Initialise windows layout
Create your layout
Open a new project
Go to File menu > New project
Or click on the New project icon:
Add floor
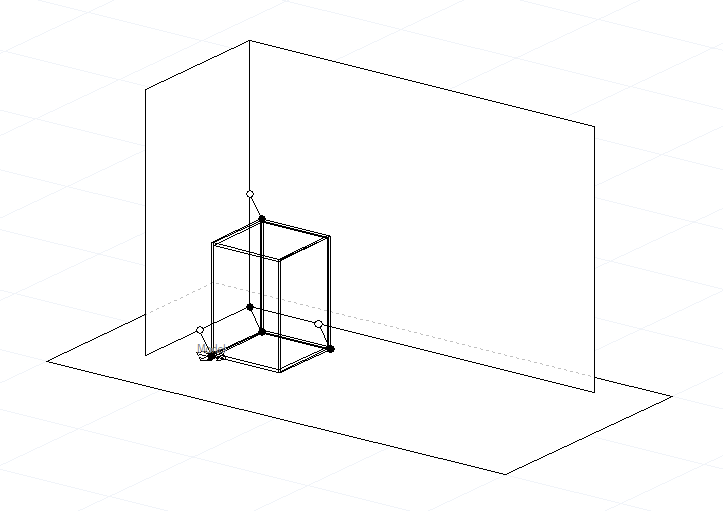
A blank project window will open.
Start by creating a floor, in this case by clicking on the New rectangular floor icon in the Quick Design Projects toolbar.
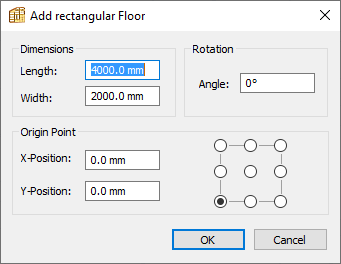
Select the dimensions and hit OK.
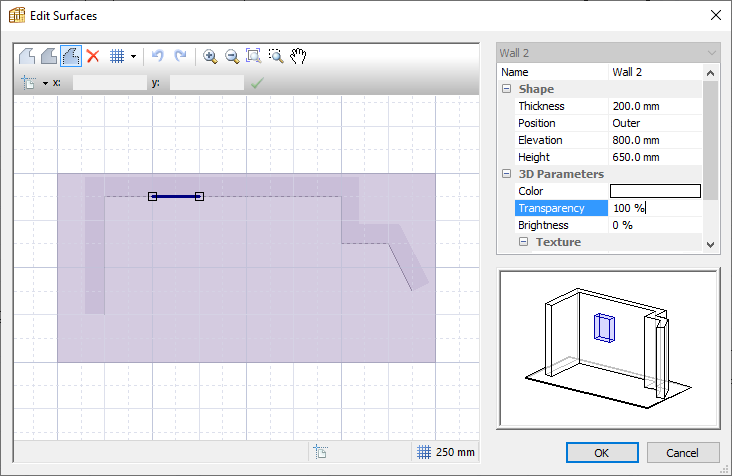
In the Edit surfaces window that now appears we can further adjust the floor plan:
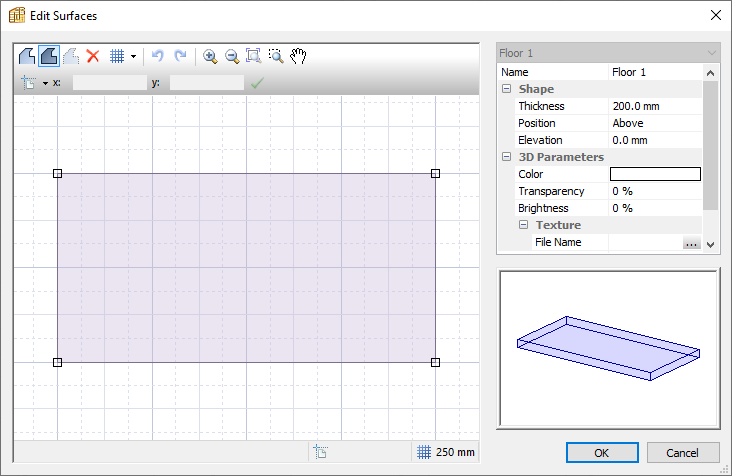
Options include:
- Revising the dimensions
- The floor thickness, 200 mm is a good option
- Floor colour
- Add a texture (reference an image file to represent a floor material)
- Transparency, make sure this is 0% to show the colour or texture
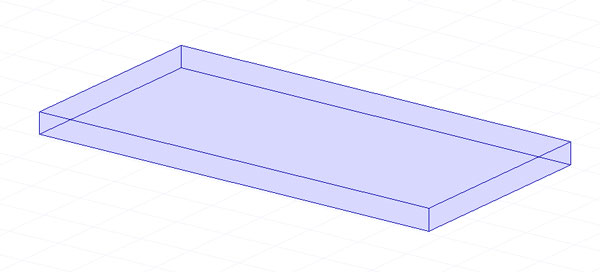
Double click on the floor to access the Edit surfaces window again if you need to make changes.
The menus also offer a New floor option which goes directly into the Edit surfaces window.
You can create more complex floor plans and add exact dimensions by clicking and adding points and by using the coordinate system (shown in the video at the beginning of this page).
Add walls
Click on the New wall command to access the Edit surfaces window again.
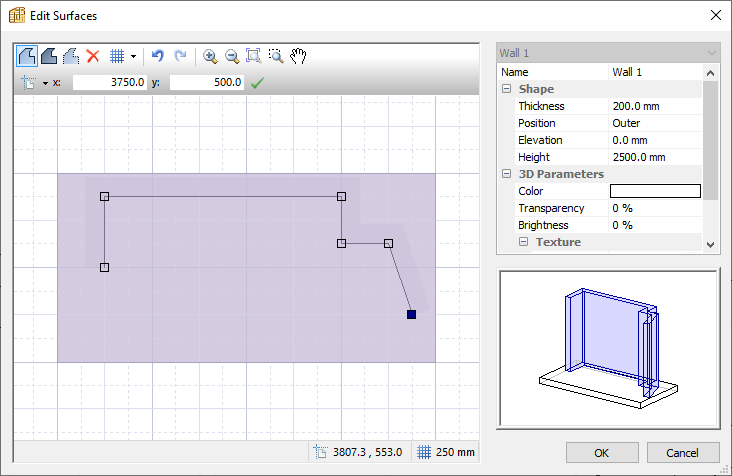
Plot out your wall or walls, set the thickness, height (2500 mm is a good place to start) and if you want a colour or texture.
As with the floor above you can also import a 2D DXF file of the wall layout:
Add doors/windows
These are added using the wall command again.
For windows, add a section of wall and an appropriate elevation.
For a simple cut out of the wall, make sure your window or door is 100% transparent. Or you can add an image file of a window or door from the Textures library.
Adding images
To add a window or door image, or a texture for your walls and floor, select one of those elements then go to:
Properties menu > 3D Parameters > Texture > File name > 3 dot (…) icon and browse through the Textures library and select your file.
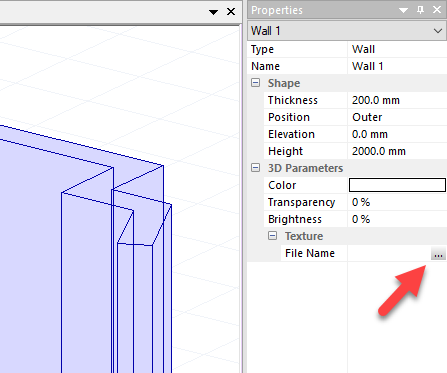
You can use the images already stocked in the library or add your own.
The image file can be tiled which works in some instances, but this won’t work for a window or door, instead choose:
Texture > Application > Application mode > Stretch
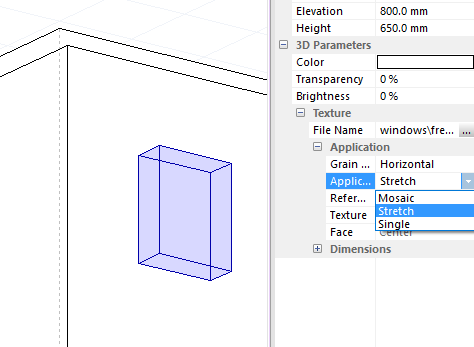
And make sure your transparency is 0%.
This feature can be used to add lots of other elements to your design, for example:
- A picture on the wall created just like a window with a linked image file
- A carpet on the floor, add another floor the size of your carpet and choose your image (to move the carpet into place, Ctrl and click on each side until the whole carpet is selected, and drag it into place)
You can also add images to parts of a cabinet in Cabinet mode, to create a TV, books or a sink for example.
In this case, you add the image to the material in the Panel materials library, as in this example:

How to add cabinets to a project
There are two ways to add a cabinet to your project:
- Add a cabinet or cabinets you already have
- Start a new cabinet
To add a pre-existing cabinet or cabinets go to:
Model menu > Add or access the same command from the Quick Design Projects toolbar and browse to your cabinet file/s.
To start a new design go to:
Model menu > New or access the same command from the Quick Design Projects toolbar
Here you will see the first Cabinet mode ‘New Cabinet’ window pops up, select your cabinet type and select OK.
In both cases your cabinet/s will appear in the Model list window bottom left of your screen:
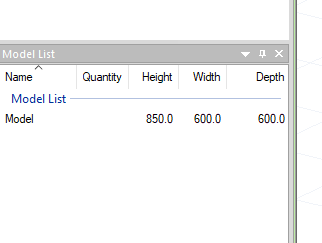
From this window you can drag your cabinets into the project window and snap them into place on the floor, against a wall or next to another cabinet.
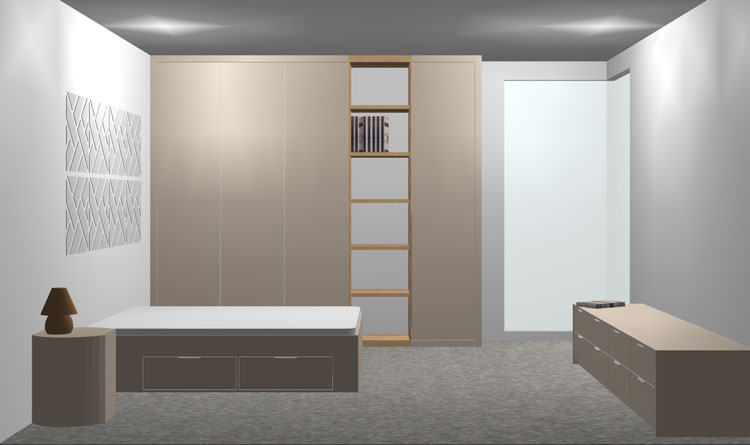
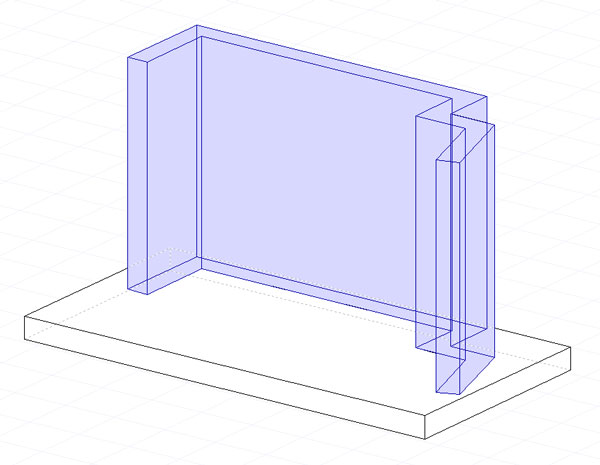
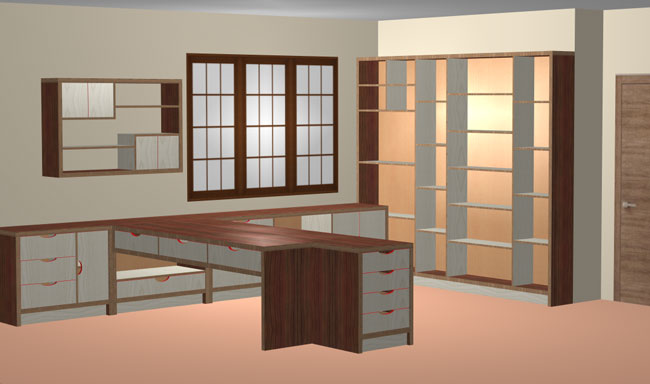
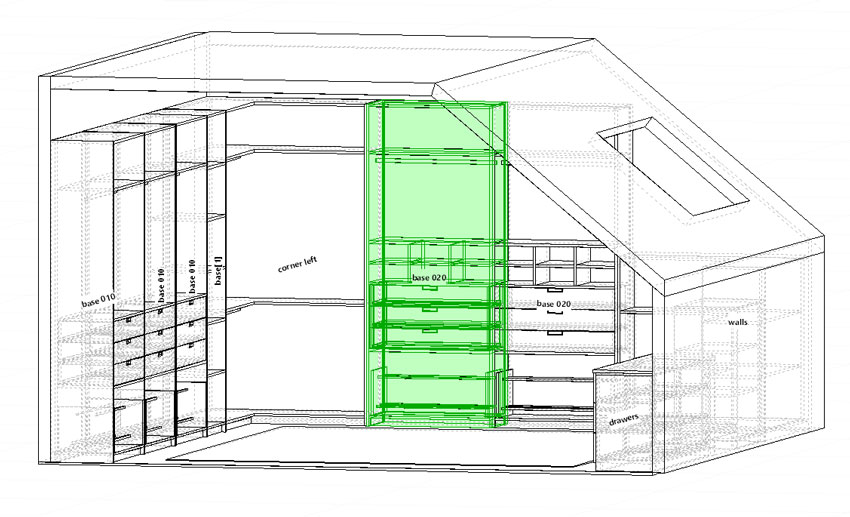
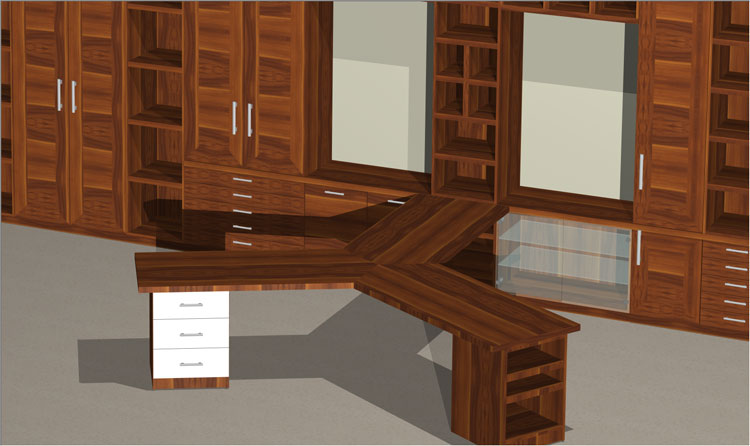
Below is a complete project (our walk-in wardrobe model) with all cabinets in place:
Edit cabinets in a project
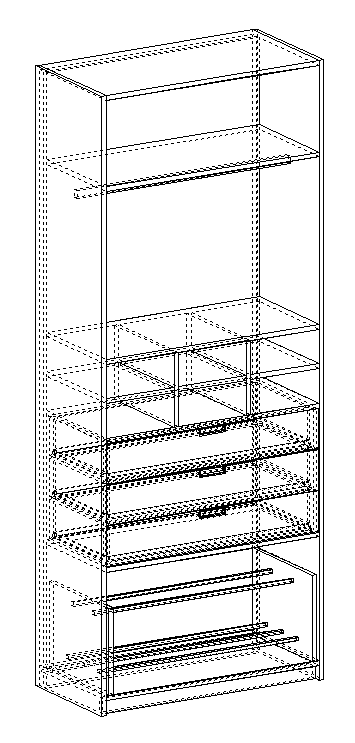
To edit a cabinet, double click on it, it will then open in Cabinet mode for editing.
Here’s the cabinet highlighted in the model above open in Cabinet mode:
When you’ve made your changes, close the Cabinet mode editing window, save your changes at the prompt and they will be reflected in Project mode too.
★ Tip ★
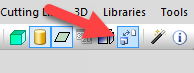
When both Cabinet and Project mode are open, click this icon to quickly switch between the two:
Save or save as?
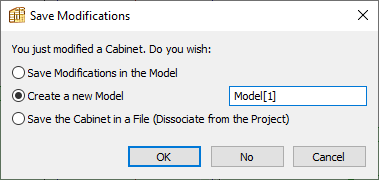
If you’ve dragged in the same cabinet design multiple times, and edit it, all instances of the cabinet will be updated.
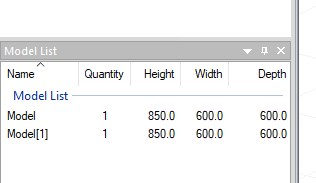
If you want to retain the initial cabinet model, and create a new one with your design changes, select Create a new model and give it a new file name.
This new cabinet will appear in the project window and as a new cabinet in the Model list:
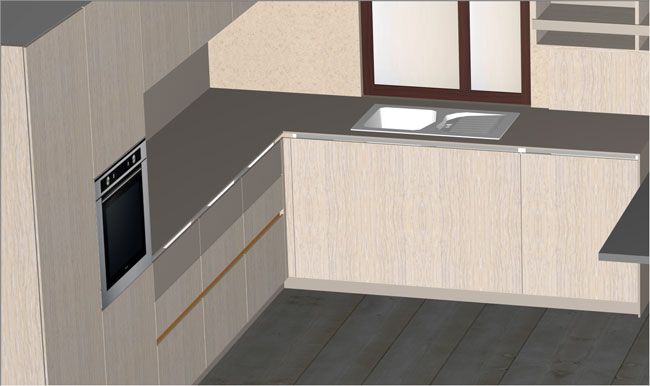
3D render and lighting effects
Just as you would in Cabinet mode, you can view your project at any time in 3D.
You have a similar set of options as discussed earlier in Cabinet mode.
Shadows and lighting effects, although available in Cabinet mode, come into their own in Project mode.
Shadows can be switched on and off directly from the toolbar shown below or via the 3D menu > Rendering menu:

The nature of the shadows and also the lighting can be changed by selecting the lightbulb icon in the toolbar and then in the Properties menu adjusting:
- General lighting
- Directional lighting
- Point (spot) lighting

The key variables are the colour of the light (we recommend you stick to greys) and the direction of light. It’s best to just play around with effects and see what you like, or retain the defaults.
Select the green + icon to add more directional endpoint lighting.
Please note:
Machining details are not shown in the Project mode 3D view, only in Cabinet Mode 3D.
Measuring
One of the key benefits of Project mode is to ensure your cabinetry fits your overall project and looks great in situ.
If you need to make an adjustment, it’s very easy to open up any cabinet and resize the carcass so it fits perfectly.
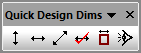
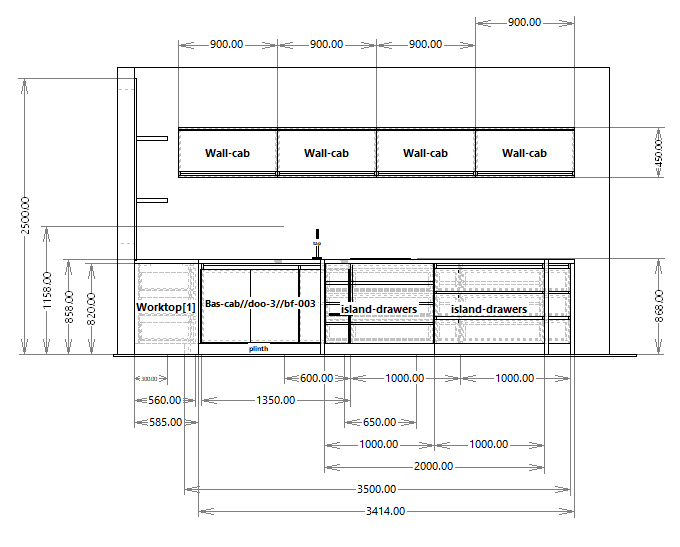
You can use the measuring tool to measure gaps between any points in your design.
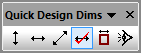
Horizontal, vertical and diagonal measuring tools can be accessed from the Measuring tool menu, or via the Quick Design Dims toolbar:
For example:
- Let’s say you would like a sink unit to be positioned directly below a kitchen window; check the horizontal gap between the window and the edge of the unit, if it’s slightly out double click on the unit and resize it to fit exactly
- Or you’ve placed a series of bedroom wardrobes but you’ve still got a gap to the wall; measure this gap with the horizontal measuring tool, double click on the unit, and resize to fit (minus space for a filler if required, more on that below)
As long as you’ve laid out your room dimensions accurately, you can be 100% confident your cabinets will fit when it comes to assembly.
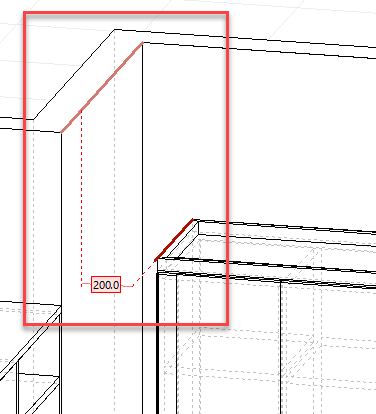
You can also attach measurements to your design, which will be included in the plans. Right-click on the red dimension box and select Customized dimensions:
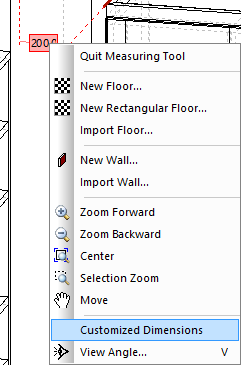
The image below shows the dimension in green, permanently attached to the design.
For this feature to be active make sure you have it selected in the toolbar first:
It can also be switched on/off to show/hide any dimensions that have been set up.
This ability to add measurements allows you to output detailed and informative drawings to aid with production:
★ Tip ★
To exit the measuring tool, select the measuring tool icon again, or right click and select Quit measuring tool:
More details:
Output: the measuring tool and dimensioned plans
Worktops, plinths, fillers, cover panels
Project mode allows you to very quickly add worktops and plinths across multiple cabinets.
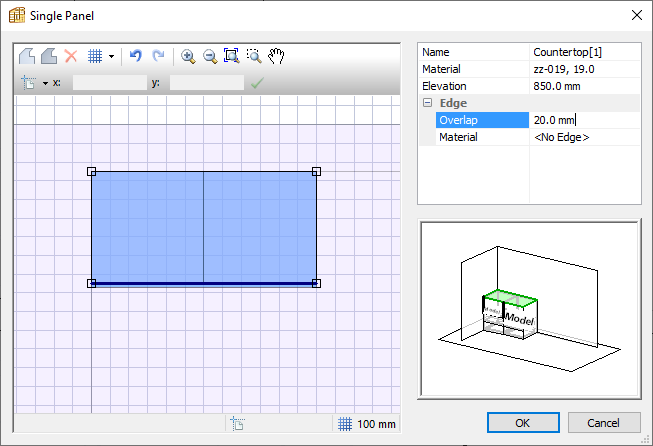
To add a worktop:
- Select a cabinet or multiple cabinets (hold Ctrl when selecting)
- Right-click and select Create a countertop (worktop)
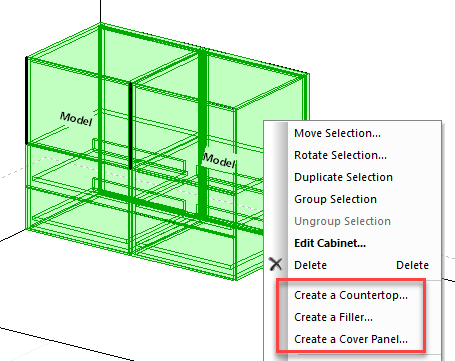
You can also add fillers, plinths and cover panels (typically used to hide a part of your carcass construction with another more aesthetically pleasing material):
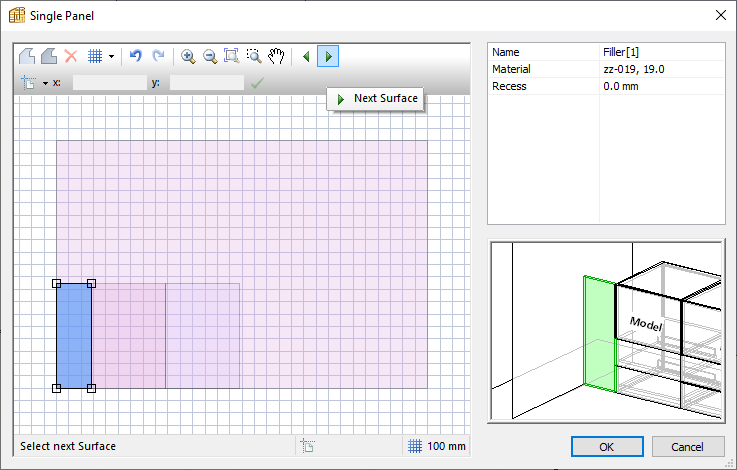
- For a filler select a cabinet and a wall, right-click and select Create a filler
- To add a plinth select all cabinets you want the plinth to sit below, also select the floor and then right click to apply a filler again (note: the cabinets must be elevated)
- For a cover panel select the individual unit, right-click and select Create a cover panel
★ Tip ★
Some of these elements can be added in multiple locations, select the green arrow button to move through your options:
As usual, all these design elements are included in the manufacturing files.
Move and rotate cabinets
Cabinets snap in place next to each other, and to walls and other design features.
However, you will sometimes want to control positioning yourself. With a cabinet or multiple cabinets selected, right-click to view these options:
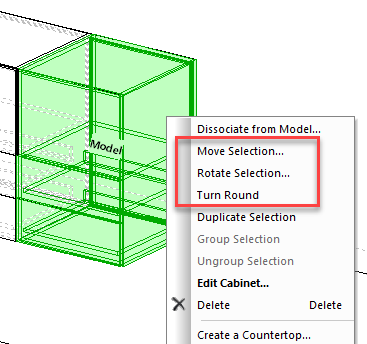
- Move selection
- Rotate selection
- Turn round (single cabinet selection only)
This video gives you some more details on how these commands work.
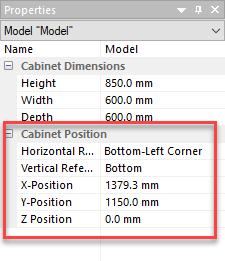
Alternatively, with a cabinet or cabinets selected, you will see coordinates in the Properties menu > Cabinet positioning which can be adjusted there to move your units.
Change materials, hardware and lots more
At any point in the design process, you can make changes to your construction preferences.
You could open up each cabinet and make changes to your material, or decide on different drawer construction and lots more besides.
However, it’s much faster and more accurate to build these preferences into Manufacturing methods and sub-methods.
That way you can make these changes across all the units in your project at the same time.
We are going to introduce these concepts next.