How to add balustrades (stairwell railings)
In StairDesigner you can add handrails and spindles on both the left and the right side of the stair, but can we create a balustrade on the upper floor level to ensure a secure landing and stair environment?
Yes we can, this is how it’s done…
This video shows how to set up a balustrade and also finish the floor joist with a covering plate and a ceiling rail.
The following guide details the key points, and finally a special case where we use the final step of the stair for the landing.
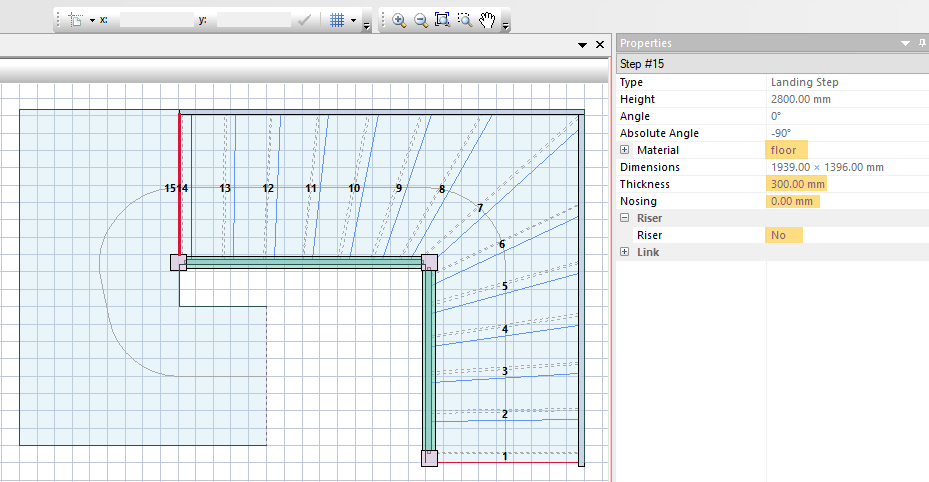
First the stair needs to be completed correctly at the upper end which in most cases is done by adding a landing step. This indicates the stair end where the last step (landing step) meets the floor joint.
In StairDesigner we have the possibility to create a representation of the landing floor level and use this to build the balustrade.
StairDesigner has different landing models to choose from but all are also editable so that almost every stairwell geometry can be achieved.
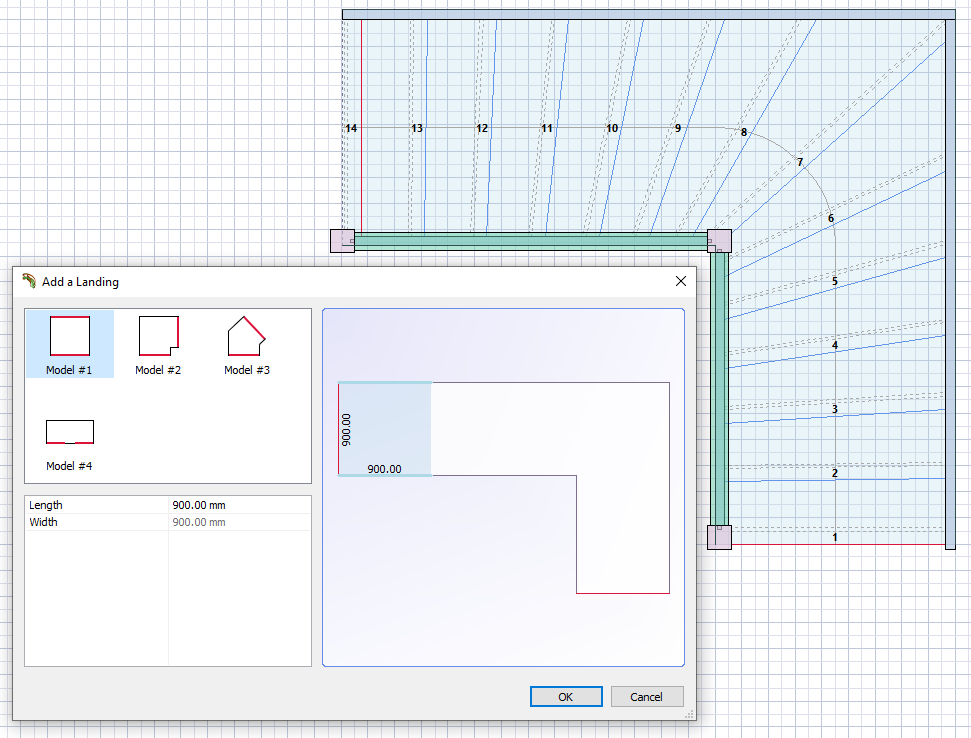
You need to add a consecutive landing to design the shape of the stairwell on the upper floor.
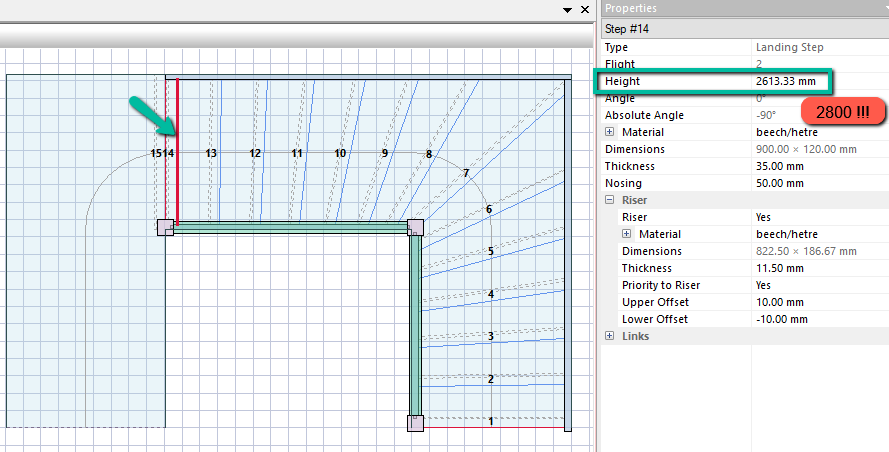
Important! When adding a consecutive landing the height of the stair will need to be reset on the first landing.
Example stair and balustrade project
Here we have a stair with 14 steps and a floor height of 2800mm with a landing step. When you add the first consecutive landing, StairDesigner will set the total height to this second landing which in turn pushes down your first landing as it gets recalculated over 15 steps.
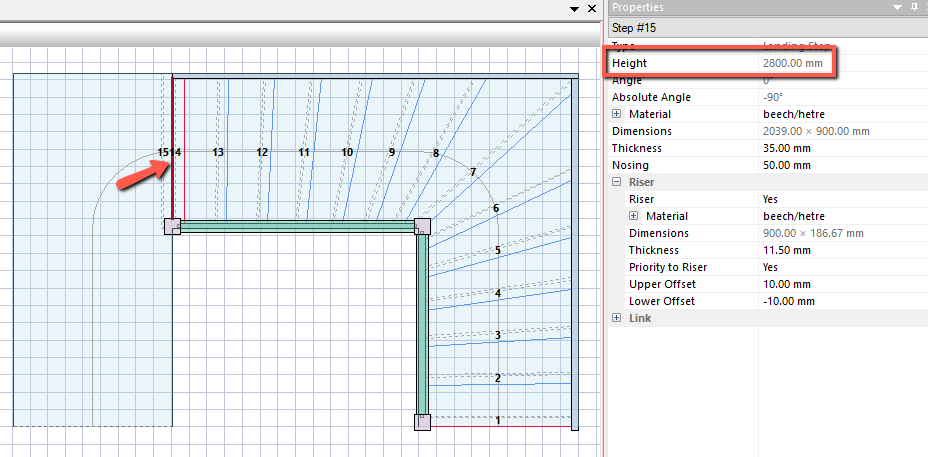
You need to select your first landing step (the last step on your stair) and change its height to 2800mm. From now on all extra added elements will be locked at 2800mm in height.
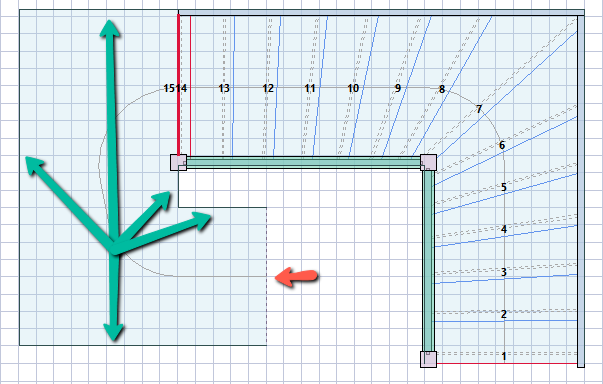
Now you can start to build the stairwell perimeter using extra landing elements.
Choose the element which fits your situation the best and add it. Remember that you can edit the shape with a double click on the line.
You can add or remove points with another double click. To exit the editing mode double click outside the element.
You can drag the points around with click and hold or move them more precisely by using the coordinate input at the top of your screen.
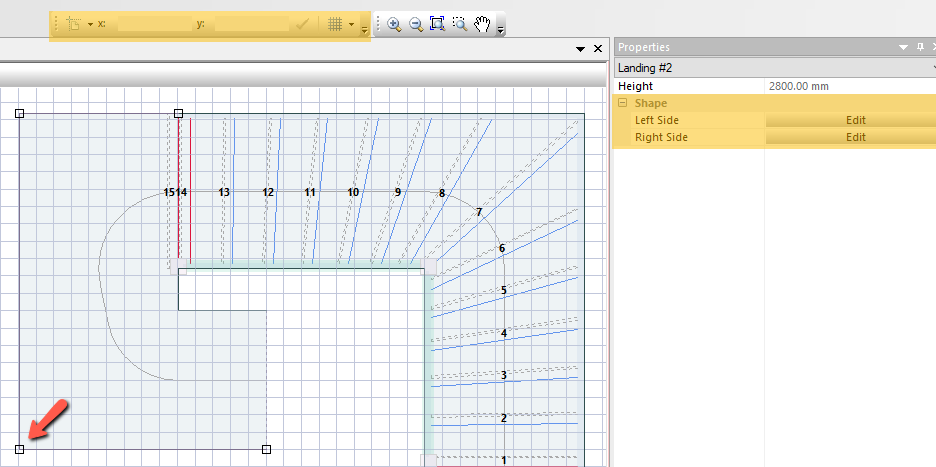
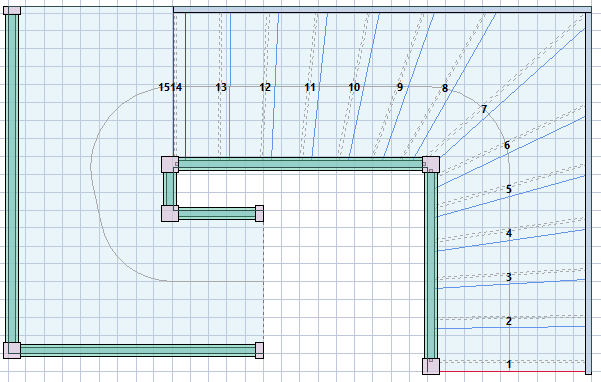
Once you have designed the shape you can size it to meet the required thickness and textures.
Do not take an existing material but create a specific material called for example “element” or “floor” to distinguish it from the actual active parts of your stair. We advise you to also set the price and weight to zero. This will minimize the impact on the cutting list as well on the cost and materials report.
Also set following parameters:
- Nosing: 0mm
- Riser: No
Important! Be aware at all times where the balustrade is required as you can only add balustrades on the sides and not on the enter and exit parts of the landings.
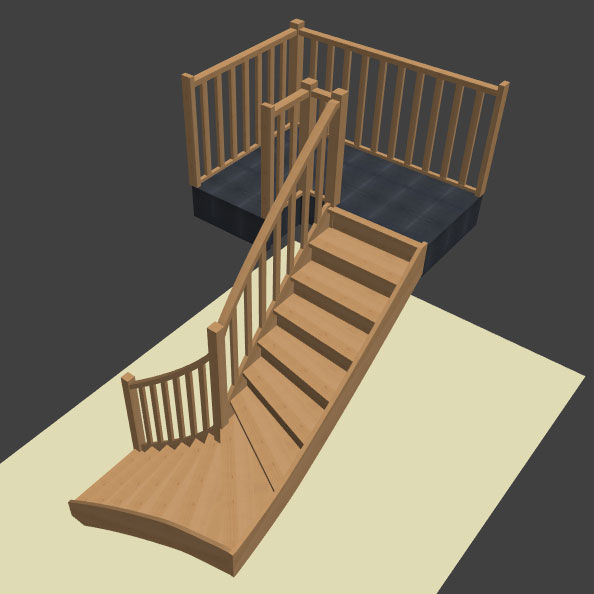
Now you can add the required elements to create a balustrade.
These are newels, handrails and stringboards to create a lower rail (needed to connect to the banisters).
The stringboards need to be set up in a certain way to mimic a lower rail on the floor.
By adding stringboards you need to edit a set of parameters first:

- Thickness which you can define according to your needs
- Width which in this case will represent the height of the rail
- Positioning above nosing will need to be the same as the width so that the rail will sit on top of the floor level
The result in 3D shows a nice rendering with the balustrades added.
Important! StairDesigner is not specifically designed to add balustrades. This is a work around and will likely need additional set up depending on the project in order to obtain the correct design and output.
Please check and correct elements in your production files if needed.
If you would like to discuss further, please ask on the forum.
Special case
This video shows how you would add balustrades using your last step as the actual floor of the landing, and covers these key points:
- How to add a horizontal balustrade to a stairwell
- Adjusting the handrail height to fit building regulations
- Adjusting stringer positions along a landing