Headroom control feature
StairDesigner includes a headroom control feature that allows you to confirm the safe passage up to the next floor level.
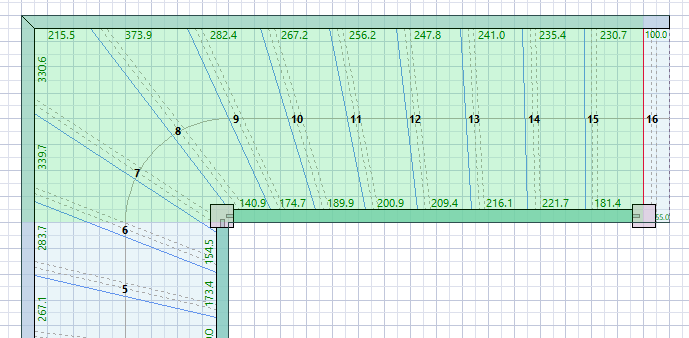
Specifically it measures the distance between the step directly below the stairwell opening and the height of the opening. If the distance is less than a customisable control value, a warning will appear in StairDesigner.
So, how does it work?
Add well hole (stairwell) parameters
In the Modify menu tab select the Well Hole option.
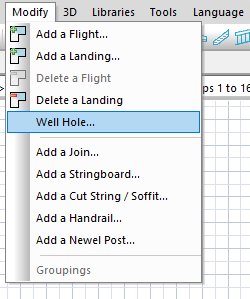
This will open another window where you can set the required dimensions of your well hole (stairwell), plus importantly the floor thickness.
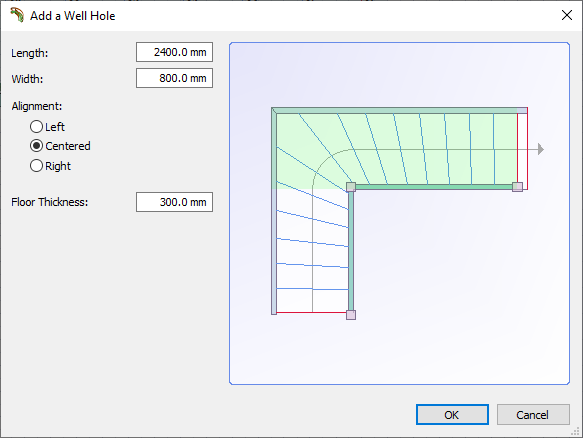
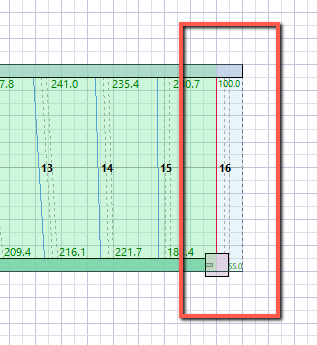
Once confirmed Stairdesigner will show in green the well hole position on top of the stair.
Control value
If the headroom distance is less than your control value, you will see a warning in the Properties menu.
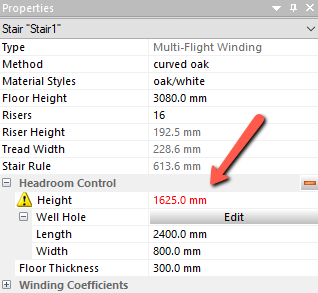
The general parameters of the well hole are also shown here.
You can set your control value in Tools > Control Values.

Building regulations in different countries will vary, but an average safe passage is around 2000mm.
If you make a change to your stair the headroom is automatically recalculated, so it’s easy to check this important design point as you work on your project.
Edit well hole
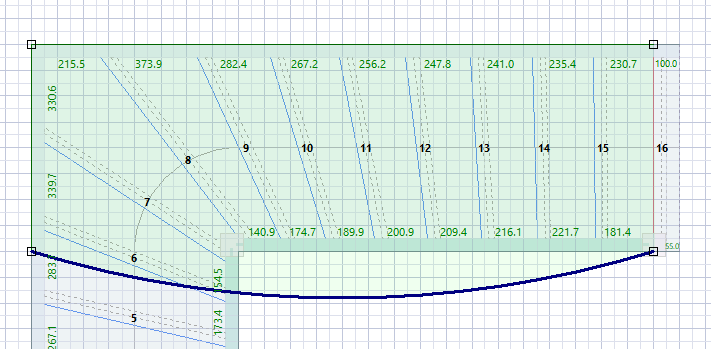
You can also select the Headroom Edit button in the Properties menu to adjust the well hole.
This allows you to reshape the well hole if it differs from a general rectangle. You can add or remove points to shape the well hole and even create a curve by clicking and dragging the line.
The orange minus sign in the Headroom section of the Properties menu is used to delete the well hole.
To create a new well hole you need to start again from the Modify menu.
Include landing step in the well hole
The well hole is set to start at the nose of the landing step and this position cannot be changed. In some cases however it is useful to include this very last step.
How can we solve this?
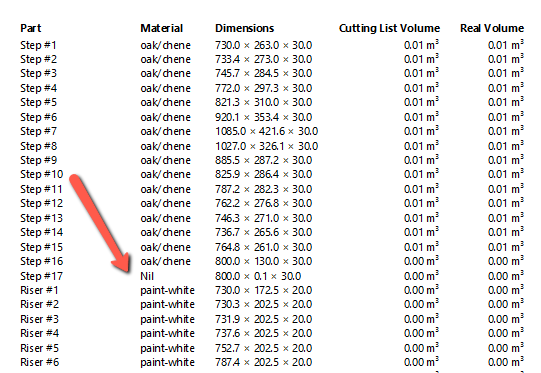
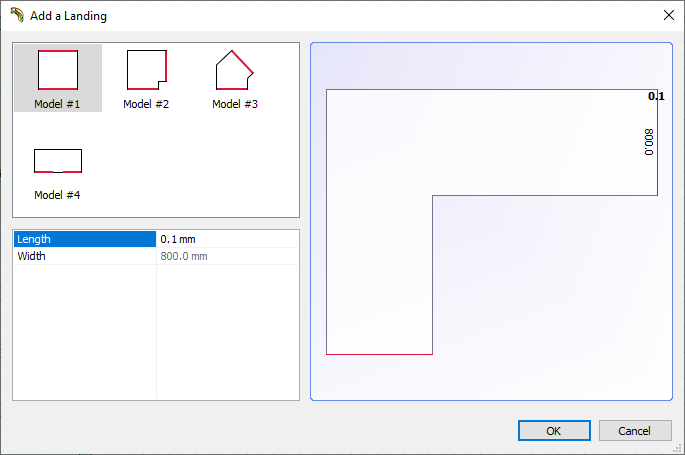
The solution is a work around, where we add a extra landing step in a way that it will set the well hole edge at the desired spot without interfering with our output like the 3D view or the cutting list.
First you add a second landing step to your stair with the smallest possible length. In this case it is 0.1mm.
The original landing step has been positioned lower now, so adjust its height to equal that of the staircase. The height of the original landing step and the new ‘false’ landing step will be the same.
Finally set the parameters for the extra landing step as follows:
- Thickness: 0mm
- Material: Nil
- Riser: No
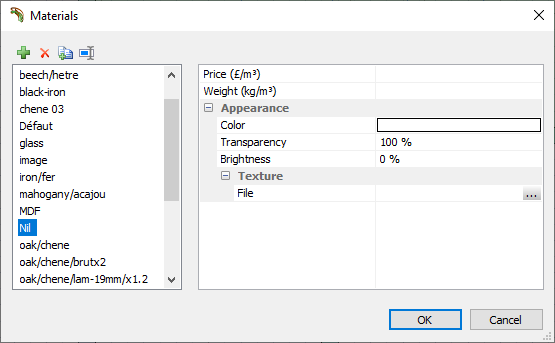
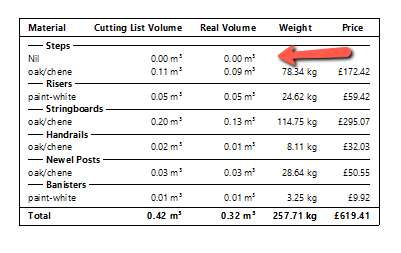
A Nil material can be created without any color or structure using a 100% transparency.
Also, ensure price and weight parameters remain blank.
The result is a correct 3D view of your stair and the cutting list will indicate the Nil material clearly so that you can discard it from production. Also, the cost and material summary for the stair will not be distorted.