Here is the last article in the series for building a curved wreathed handrail on an irregular metallic rail.
In my last article in this series I showed how to adjust the wreathed rail’s core form onto the metallic rail and how to apply the walnut veneers to prepare the rail for moulding.
You can read these previous articles here:
How to Make a Wooden Handrail on Metal Rail: part 1
How to Make a Wooden Handrail on Metal Rail: part 2
To end this series of articles on building wreathed rails on metallic rails here’s a description of the last phases of moulding and assembling the handrail.
Once the wreathed sections have been veneered up, I prepare the straight sections in solid wood that has a slightly larger section (+2mm) than the wreathed sections so that they can be flushed up once the final assembly fixed.
Once all the squared sections are prepared I go back on site to cut the joints.
I clamp the wreaths onto the metallic rail and cut the straight sections to length so that they fit snugly between the wreaths.
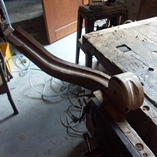
Here’s a set of photos showing the completed squared rail on the metallic rail:
Once back in the workshop I use a false tenon and “pull screw” assembly that keeps the rails aligned while the screws pull the joint tight when the joint is pushed together.
When the joints are adjusted the rail is moulded using a “French Spindle”. This tool is very handy for moulding wreathed rails, enabling me to start cutting safely by lower the cutter into wood and using a progressive cut depth that I adjust on the fly. I work the mouldings backwards taking off just a small amount of wood each time.
In this way I can eliminate tear out, splitting and machine over load. Giving a good clean finish ready for sanding.
Here are a few photos to that show how this is done:
Once the handrails are moulded they are stained and varnished in the workshop ready to installed on the metallic rail.
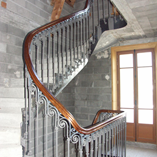
Here are a few photos of the finished handrail installed in a magnificent house that although it looks as if it was built in the 1900’s is in fact a new building entirely built by its owner. A very impressive project indeed!!:
Finally, here’s a short video that explains the assembly method:
Don’t hesitate to leave a comment to tell me what you think or if you have any questions or remarks.


you are a genius tess, it looks brilliant.
Hi Tess, thanks for sharing your tips and tricks of the trade, I really appreciate all the photos, they tell a lot.
Marc