People often ask me how I make curved parts for stairs.
These parts have such strange shapes that are far from the usual shapes worked by the average wood worker that they seem extremely difficult and complicated to make. Which is true to a certain extent but using today’s technology, computers, and modern glue with a bit of patience and reflexion the task can be easier that it seems at first sight.
How to make a curved part this is not an straight forward question to answer as it depends on many things.
For me as a professional it firstly depends on what my customer wants.
A real situation is usually made of a mix of possibilities and constraints. My first job as a professional craftsman is to make the customer aware of these and find a way to find the best compromise that fit the customer’s desires as close as possible.
One of the biggest constraints for my customers is usually cost. Most people want a specific design and quality at the lowest cost possible. This puts a lot of pressure on me as when someone sees a curved stair they often see the beauty and have the desire to have one. On the other hand the curves are time consuming and expensive to make.
In an attempt to bridge or at least narrow the gap between the desire and the possible I have tried to find new ways of building curves that simplify the process and make curved stairs more cost effective. On the way I have found that simplifying the construction of the curves has also made it possible for less experienced wood workers to build more complex shapes, so opening a whole new world of possibilities for amateur or part time stair builders.
As a result I have helped several amateurs build curved stairs that it would be nearly impossible to build by traditional methods.
A traditional stair would have to be made in solid wood in a traditional manner where as a modern stair will allow me to use less time consuming techniques and have a more cost effective solution.
I started my career using only tradition methods of construction, with the advantage that as I’m fluent in French and English I used a mix of traditional French and English stair building techniques. For instance the French are very good at building strings out of solid wood whereas the English have developed very good hand railing techniques.
My philosophy in life is to respect the past to build the future. The past is infinitely rich but the present and future are full of possibility.
Due to the demand of curved stairs that cost less and also for my intellectual amusement, that I started thinking about faster easier, more cost effective ways of building curved parts.
Today I use a mix of techniques that I adapt to the circumstances at hand.
For curved stringers I use 2 techniques according to the thickness and shape of the stringer. I make thick central cut strings with my horizontal laminated technique you can read an article on this technique here:
How to make curved stairs with a central cut string
Using horizontal laminates I don’t need to make a form to glue the laminates onto and I don’t have to cut the step rests. This can drastically reduce the time for making this type of string.
When I have to make a cut string I always try to use this technique so as not to have to cut the notches for the step rests and the angles for the risers.
Examples of curved staircases built using horizontal laminates
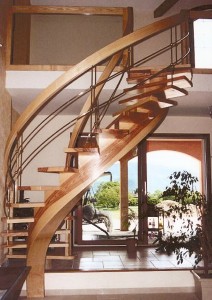
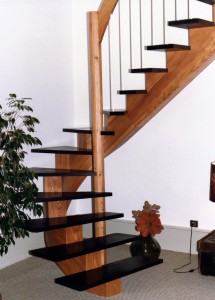
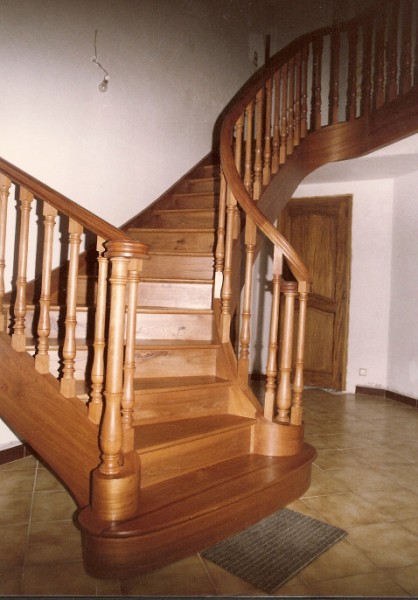
Unfortunately this method requires that the string have a minimum thickness of 60mm.
For traditional stringers less that 60mm I use normal laminated techniques using a form, onto which I glue a plywood core with a 2mm veneered skin.
You can see the principles used in this article:
Editing a curved string stair in Autocad
Here is a stair built using only veneered plywood laminates for the string and hand rail:
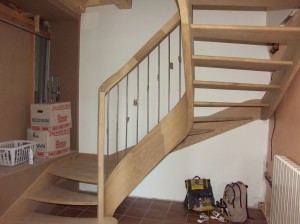
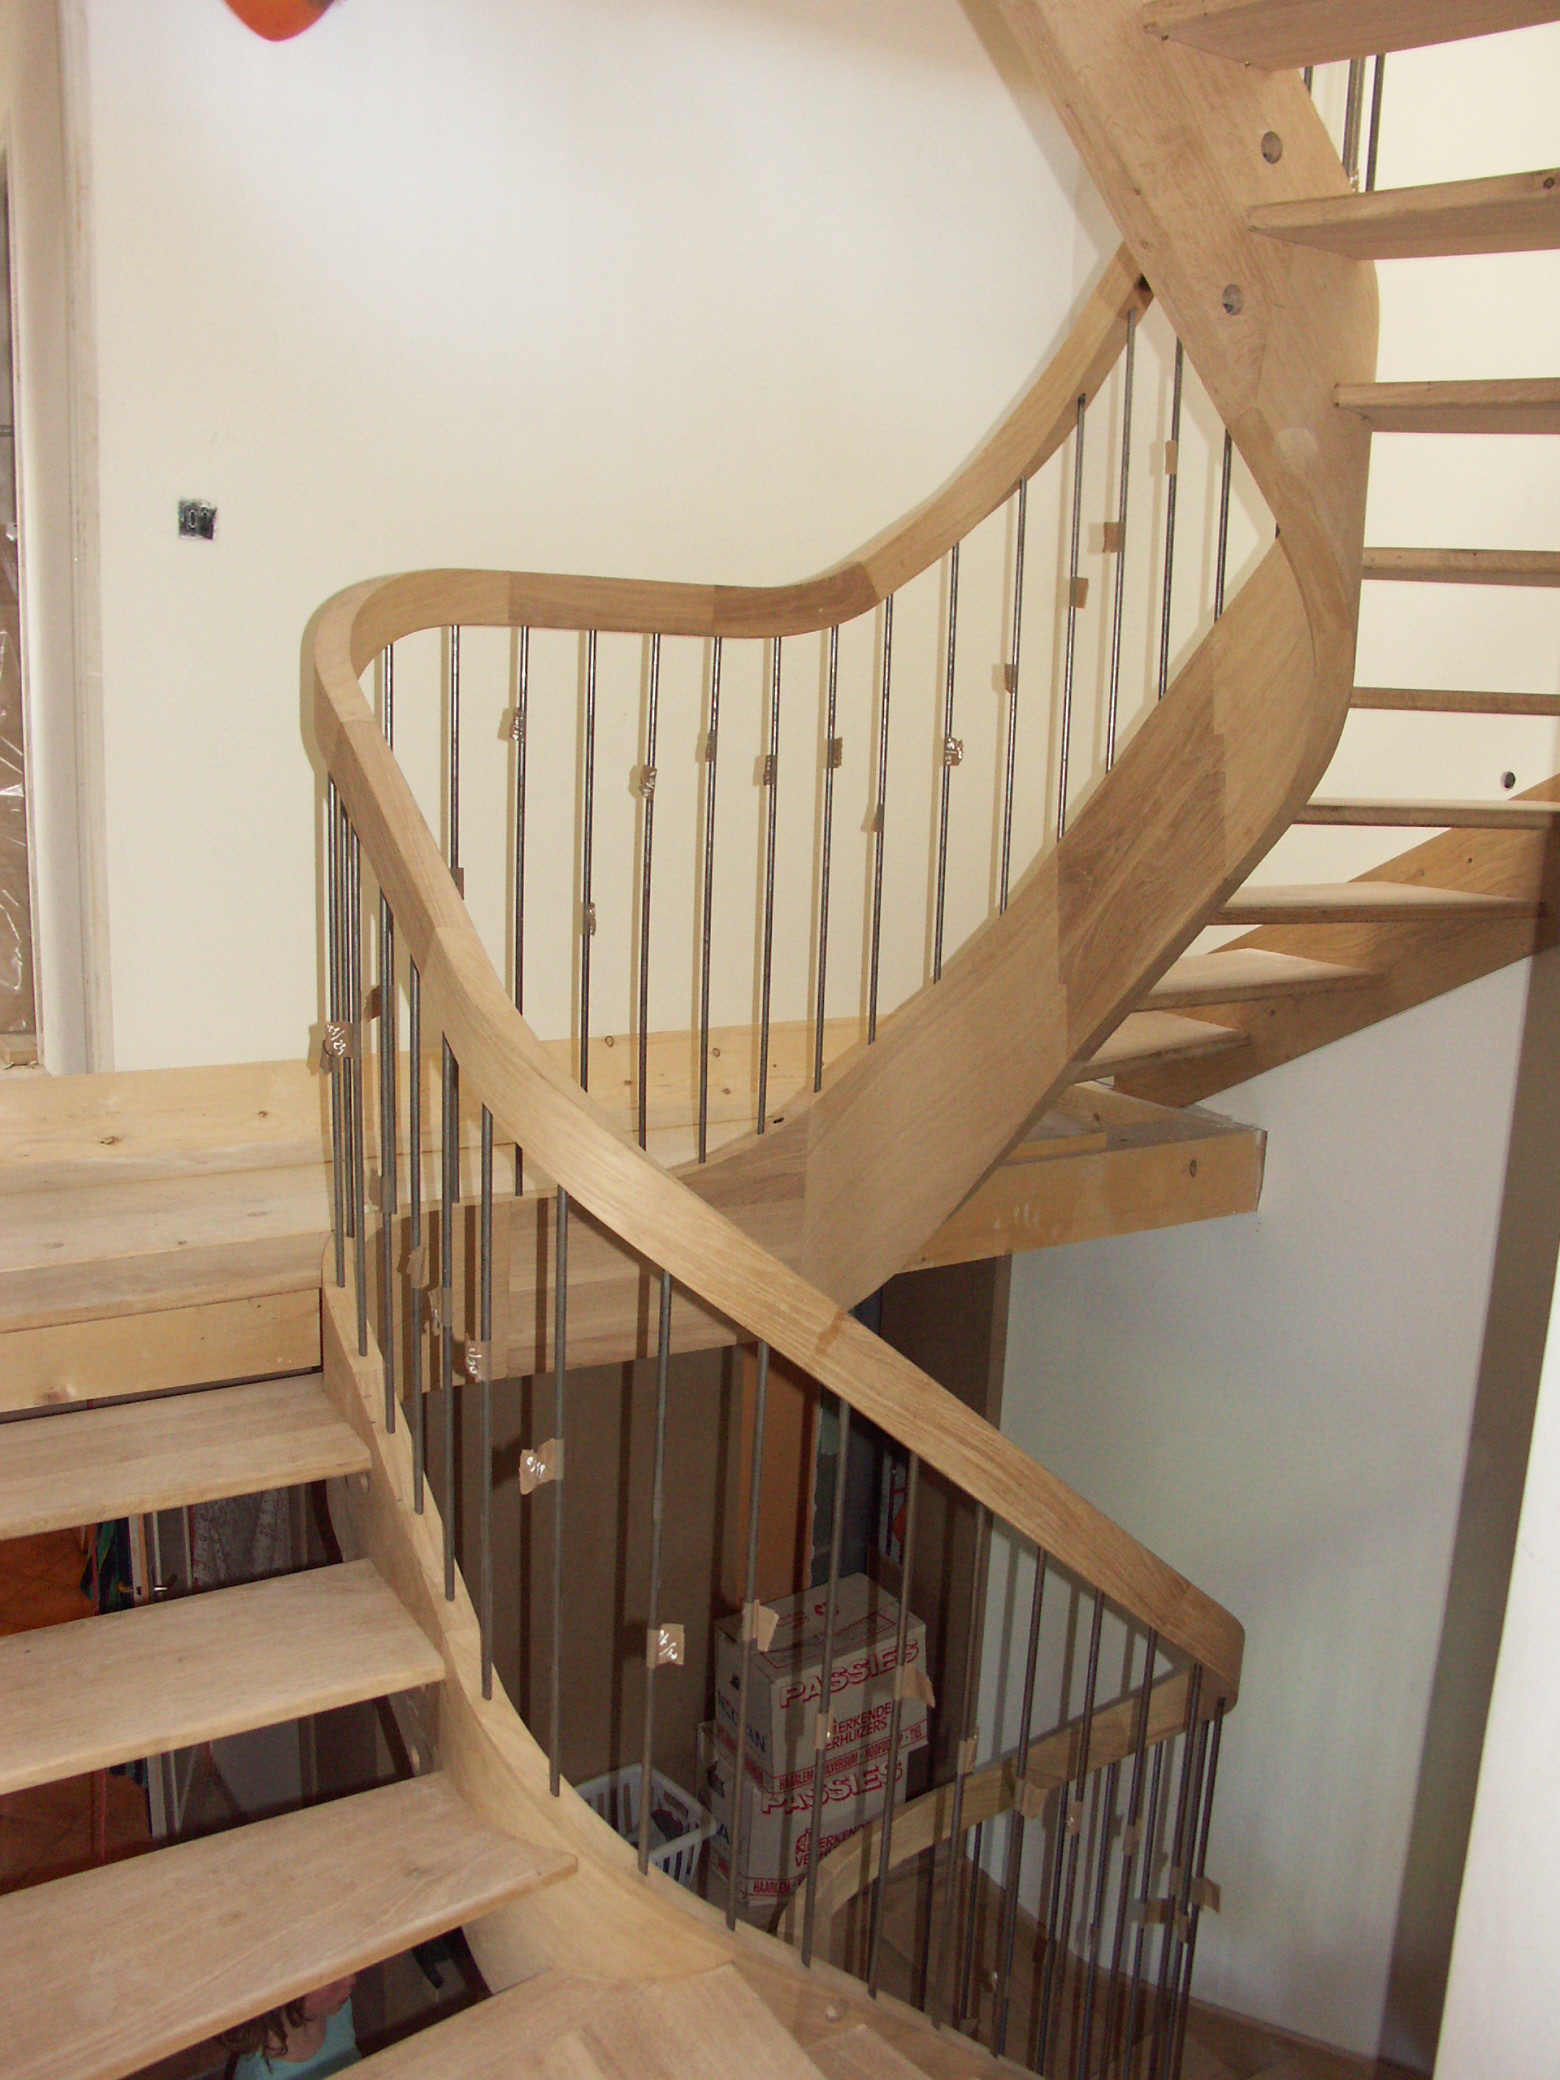
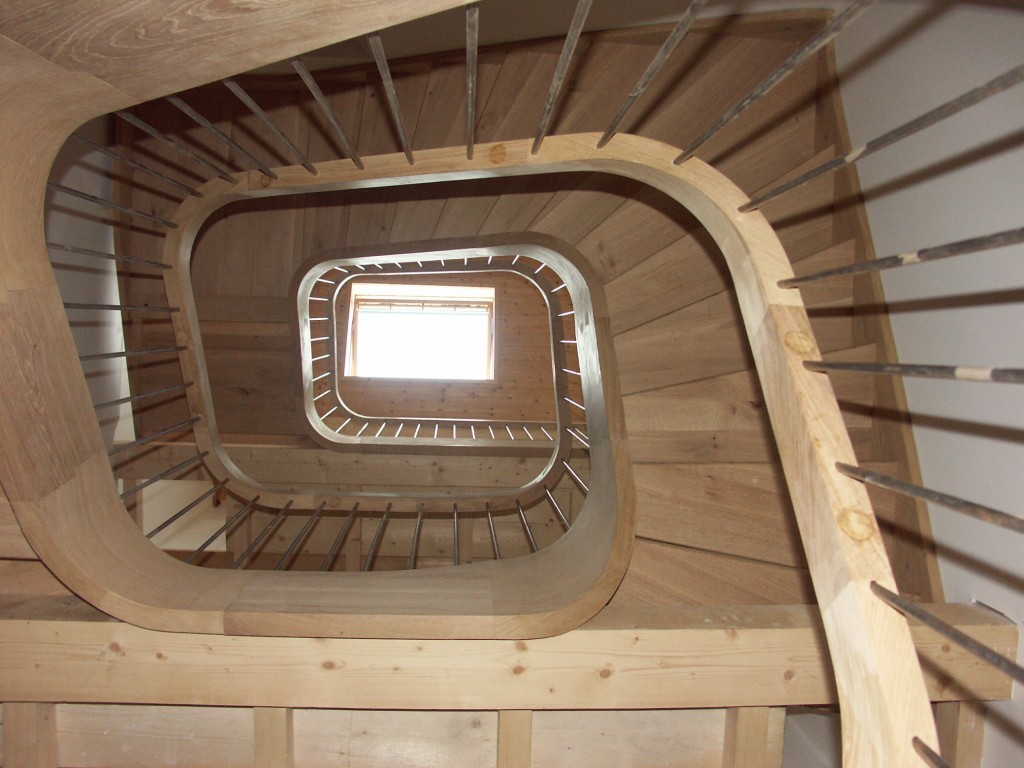
When it comes to handrails, I use several ways to build continuous geometrical hand rails.
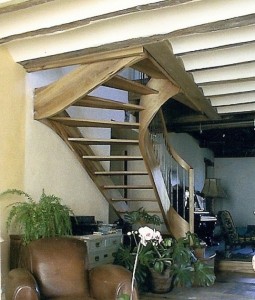
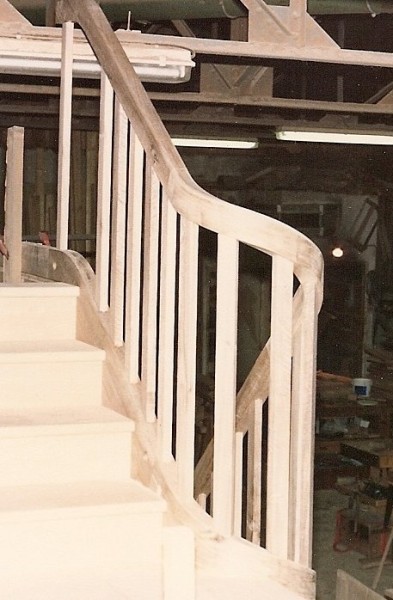
When the rail is part of a stair with a laminate string and has just a square or slightly rounded section, the easiest and fastest way to build it is simply to add the extra width to the string and cut the rail out of the top (or bottom) of the string.
Here are 2 photos of a hand rails in elm and walnut that I have cut from the top of the stringers built with horizontal laminates:
When the hand rail has a large sweeping curve it’s often possible to use the steps as support to laminate the rail but when the rail turns tightly and / or is deeply moulded, laminating is no longer possible.
In these cases I use variations of tangent hand railing techniques.
I mark out the tangents using AutoCad or Progecad’s 3D solid modelling tools.
Marking out the 3D geometry for building handrails directly in 3D with CAD is really much faster and more precise than marking out by hand or in 2D.
The simplest case is a round rail. The round rail has become popular in France for modern stairs often built onto stairs in cement or steel. Using the tangent method it’s easy to set out a wreathed rail in elliptical sections and assemble the sections with the bevel angle to get the helictical shape. The advantage being that the rail is a 2D elliptical curve and can be shaped simply on a spindle moulder or with a router. Here are some hand rails on a cement stair made using the tangent method:
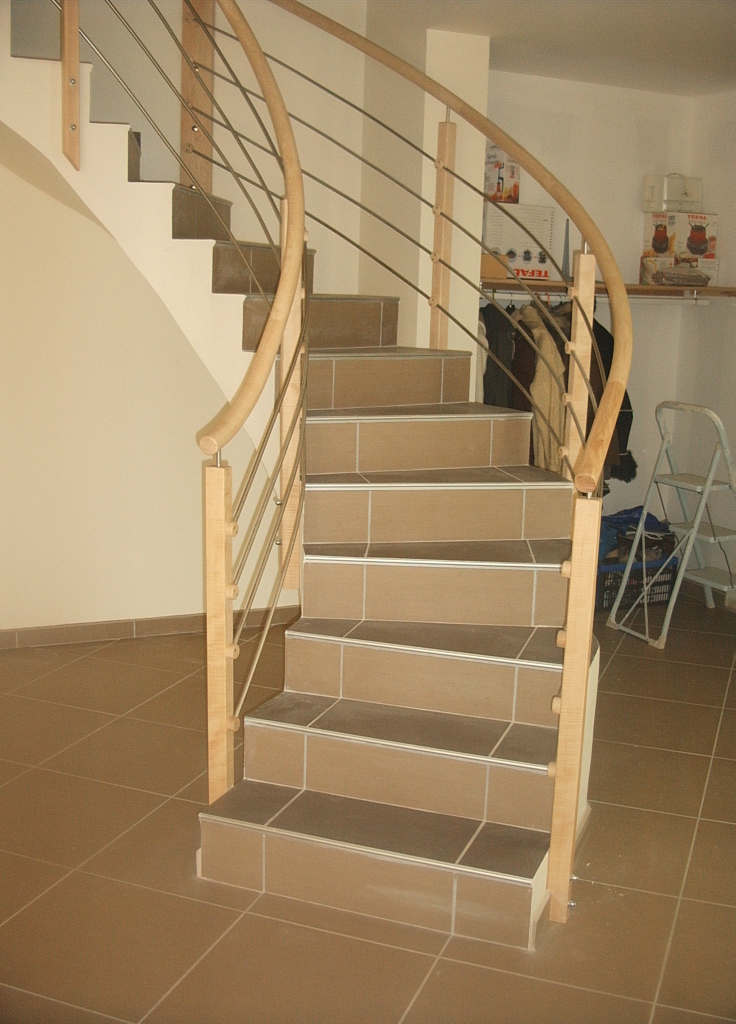
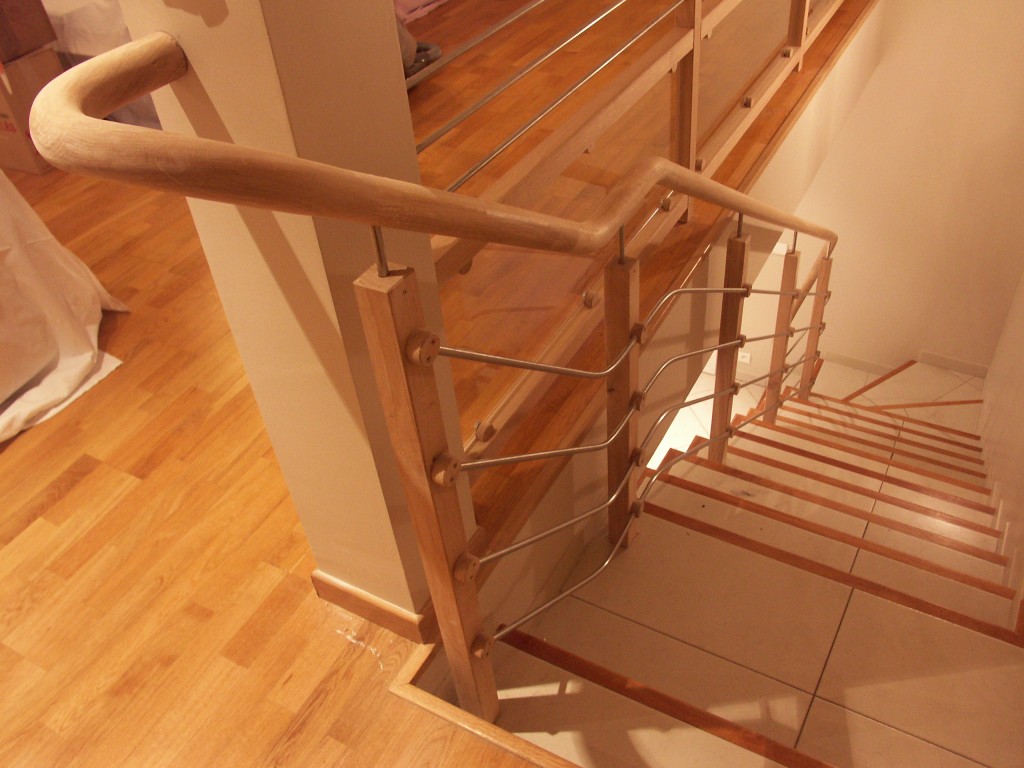
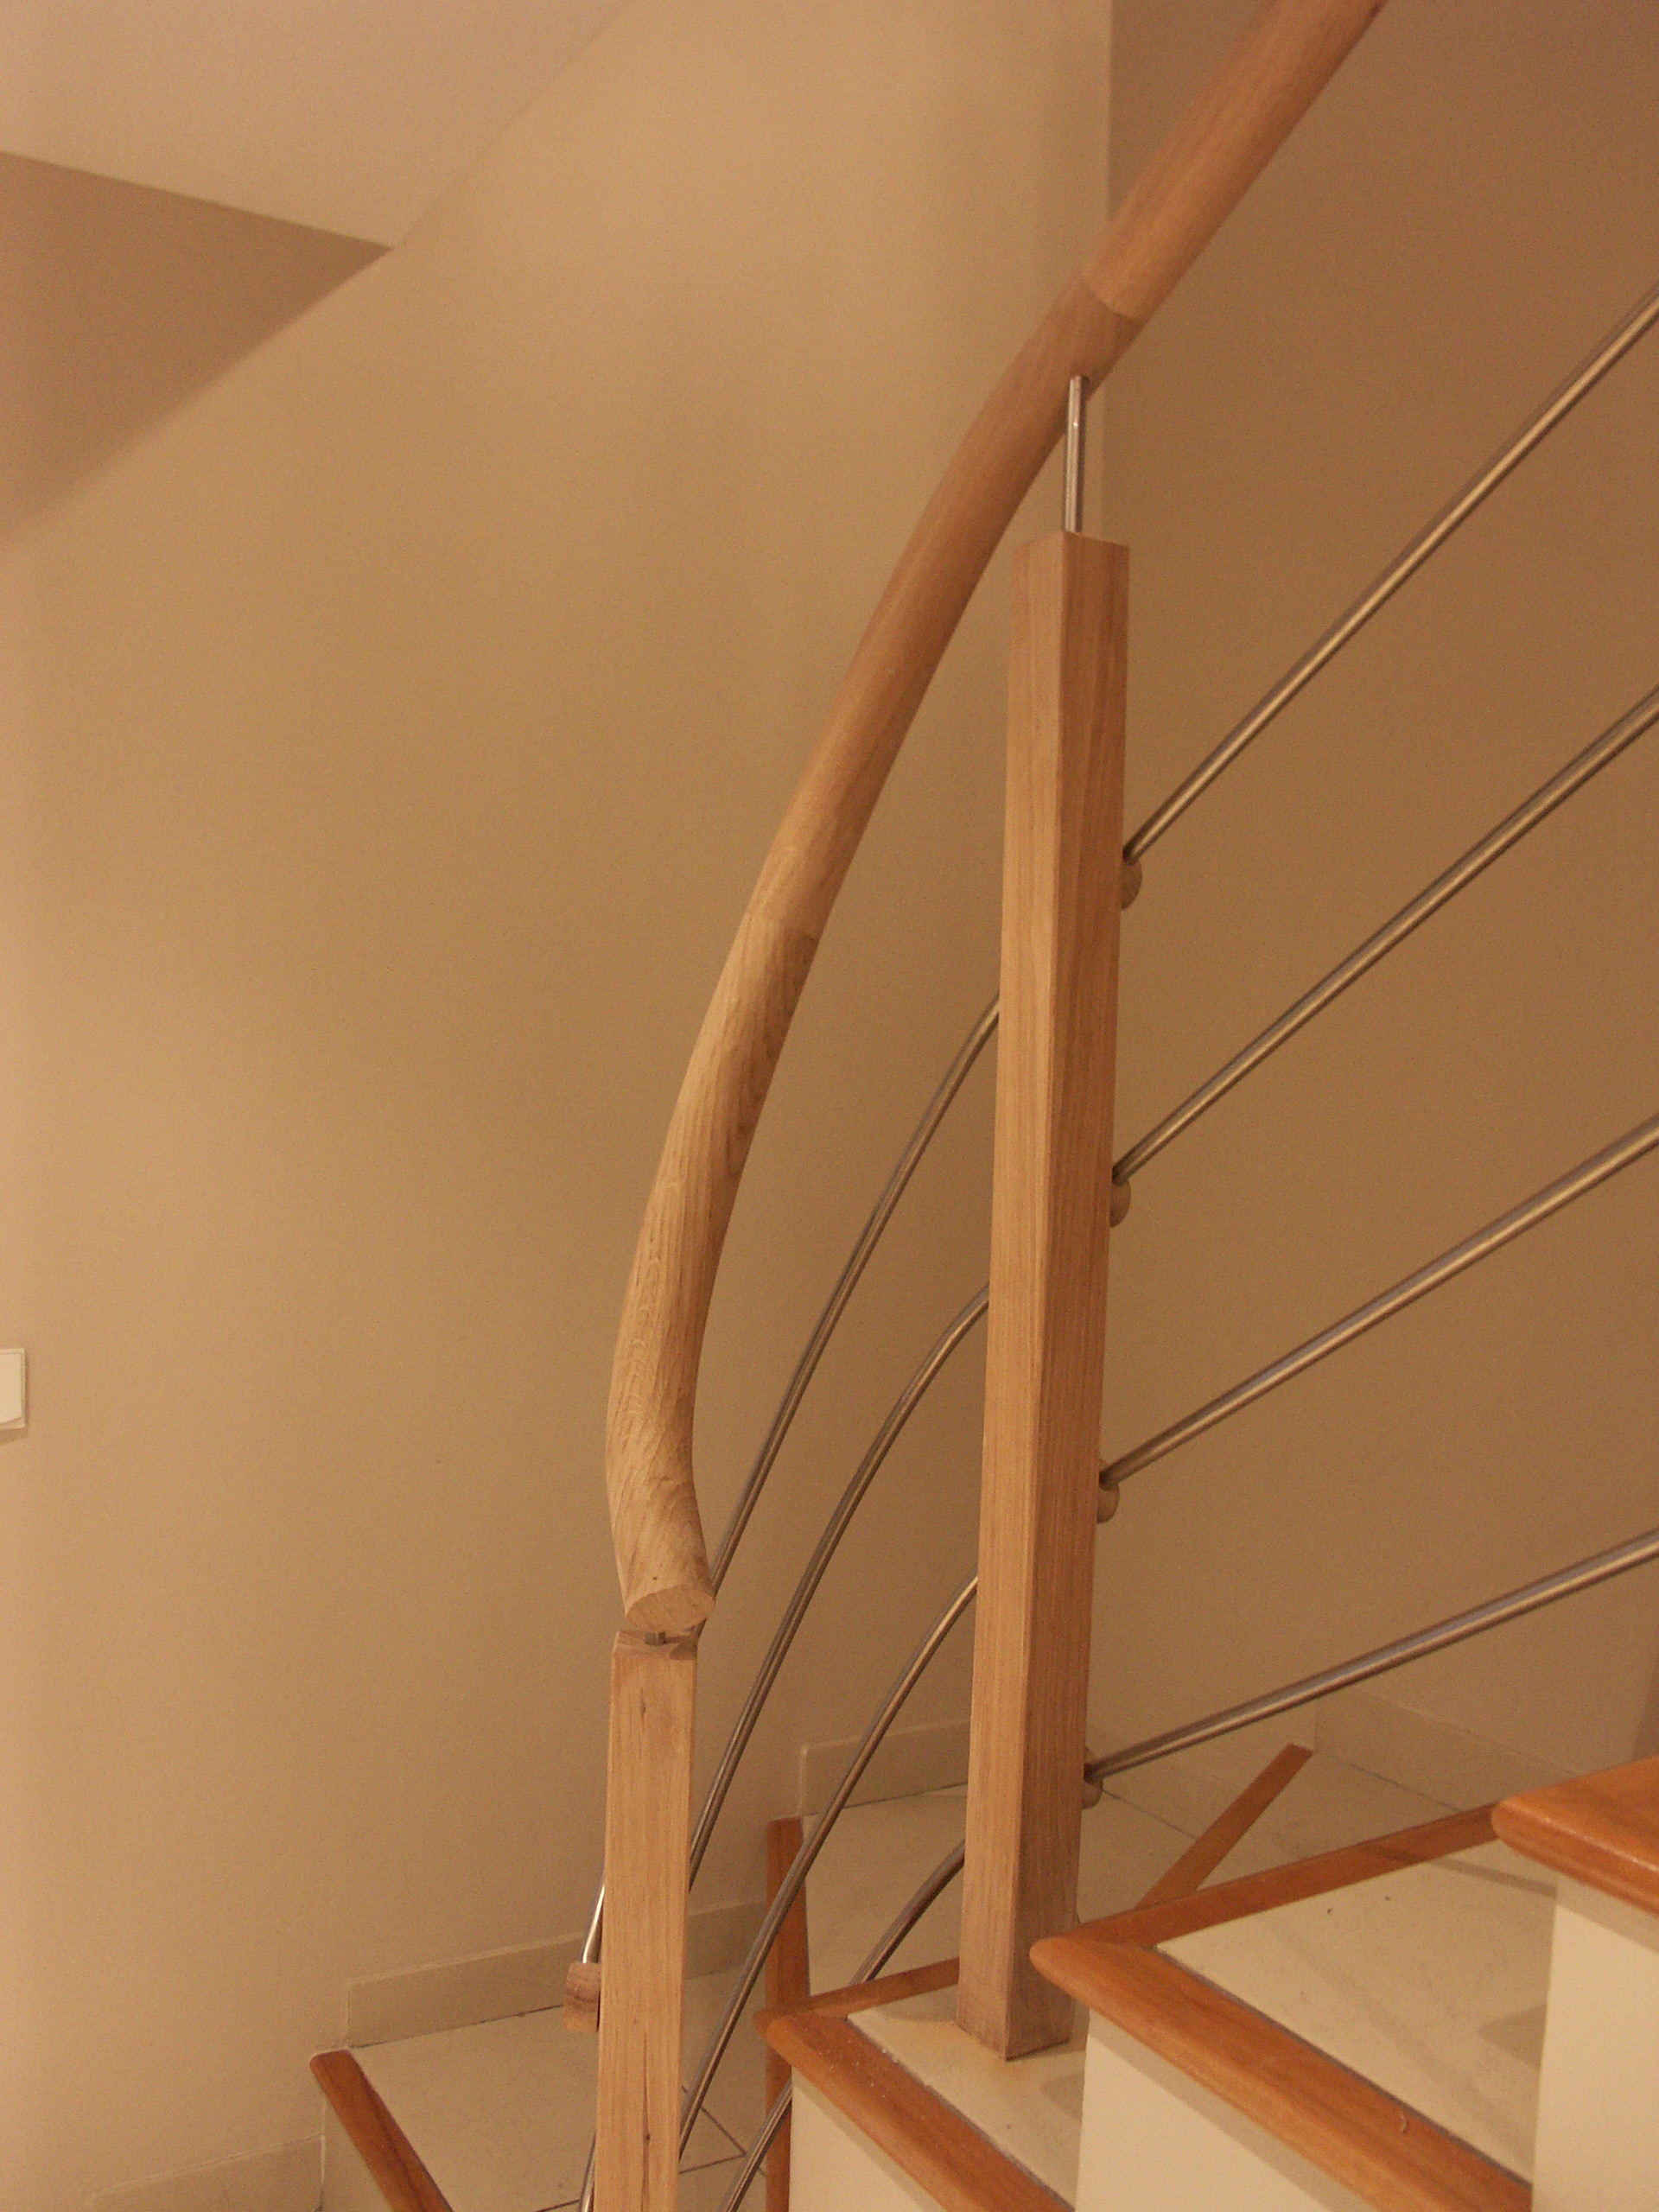
When the hand rail is square or moulded I use the tangent method for marking out elliptical curved laminates and apply the angles to twist laminates to get the helictical shape. This has the great advantage of making a twisted rail where the sides are always at right angles to the top so moulding with a router or spindle moulder is very easy.
With this method a groove for a metallic under rail can be incorporated into the laminates and doesn’t have to be machined separately.
Here are a few exemples:
A pack of laminates being glued up on a jig that gives the twist:
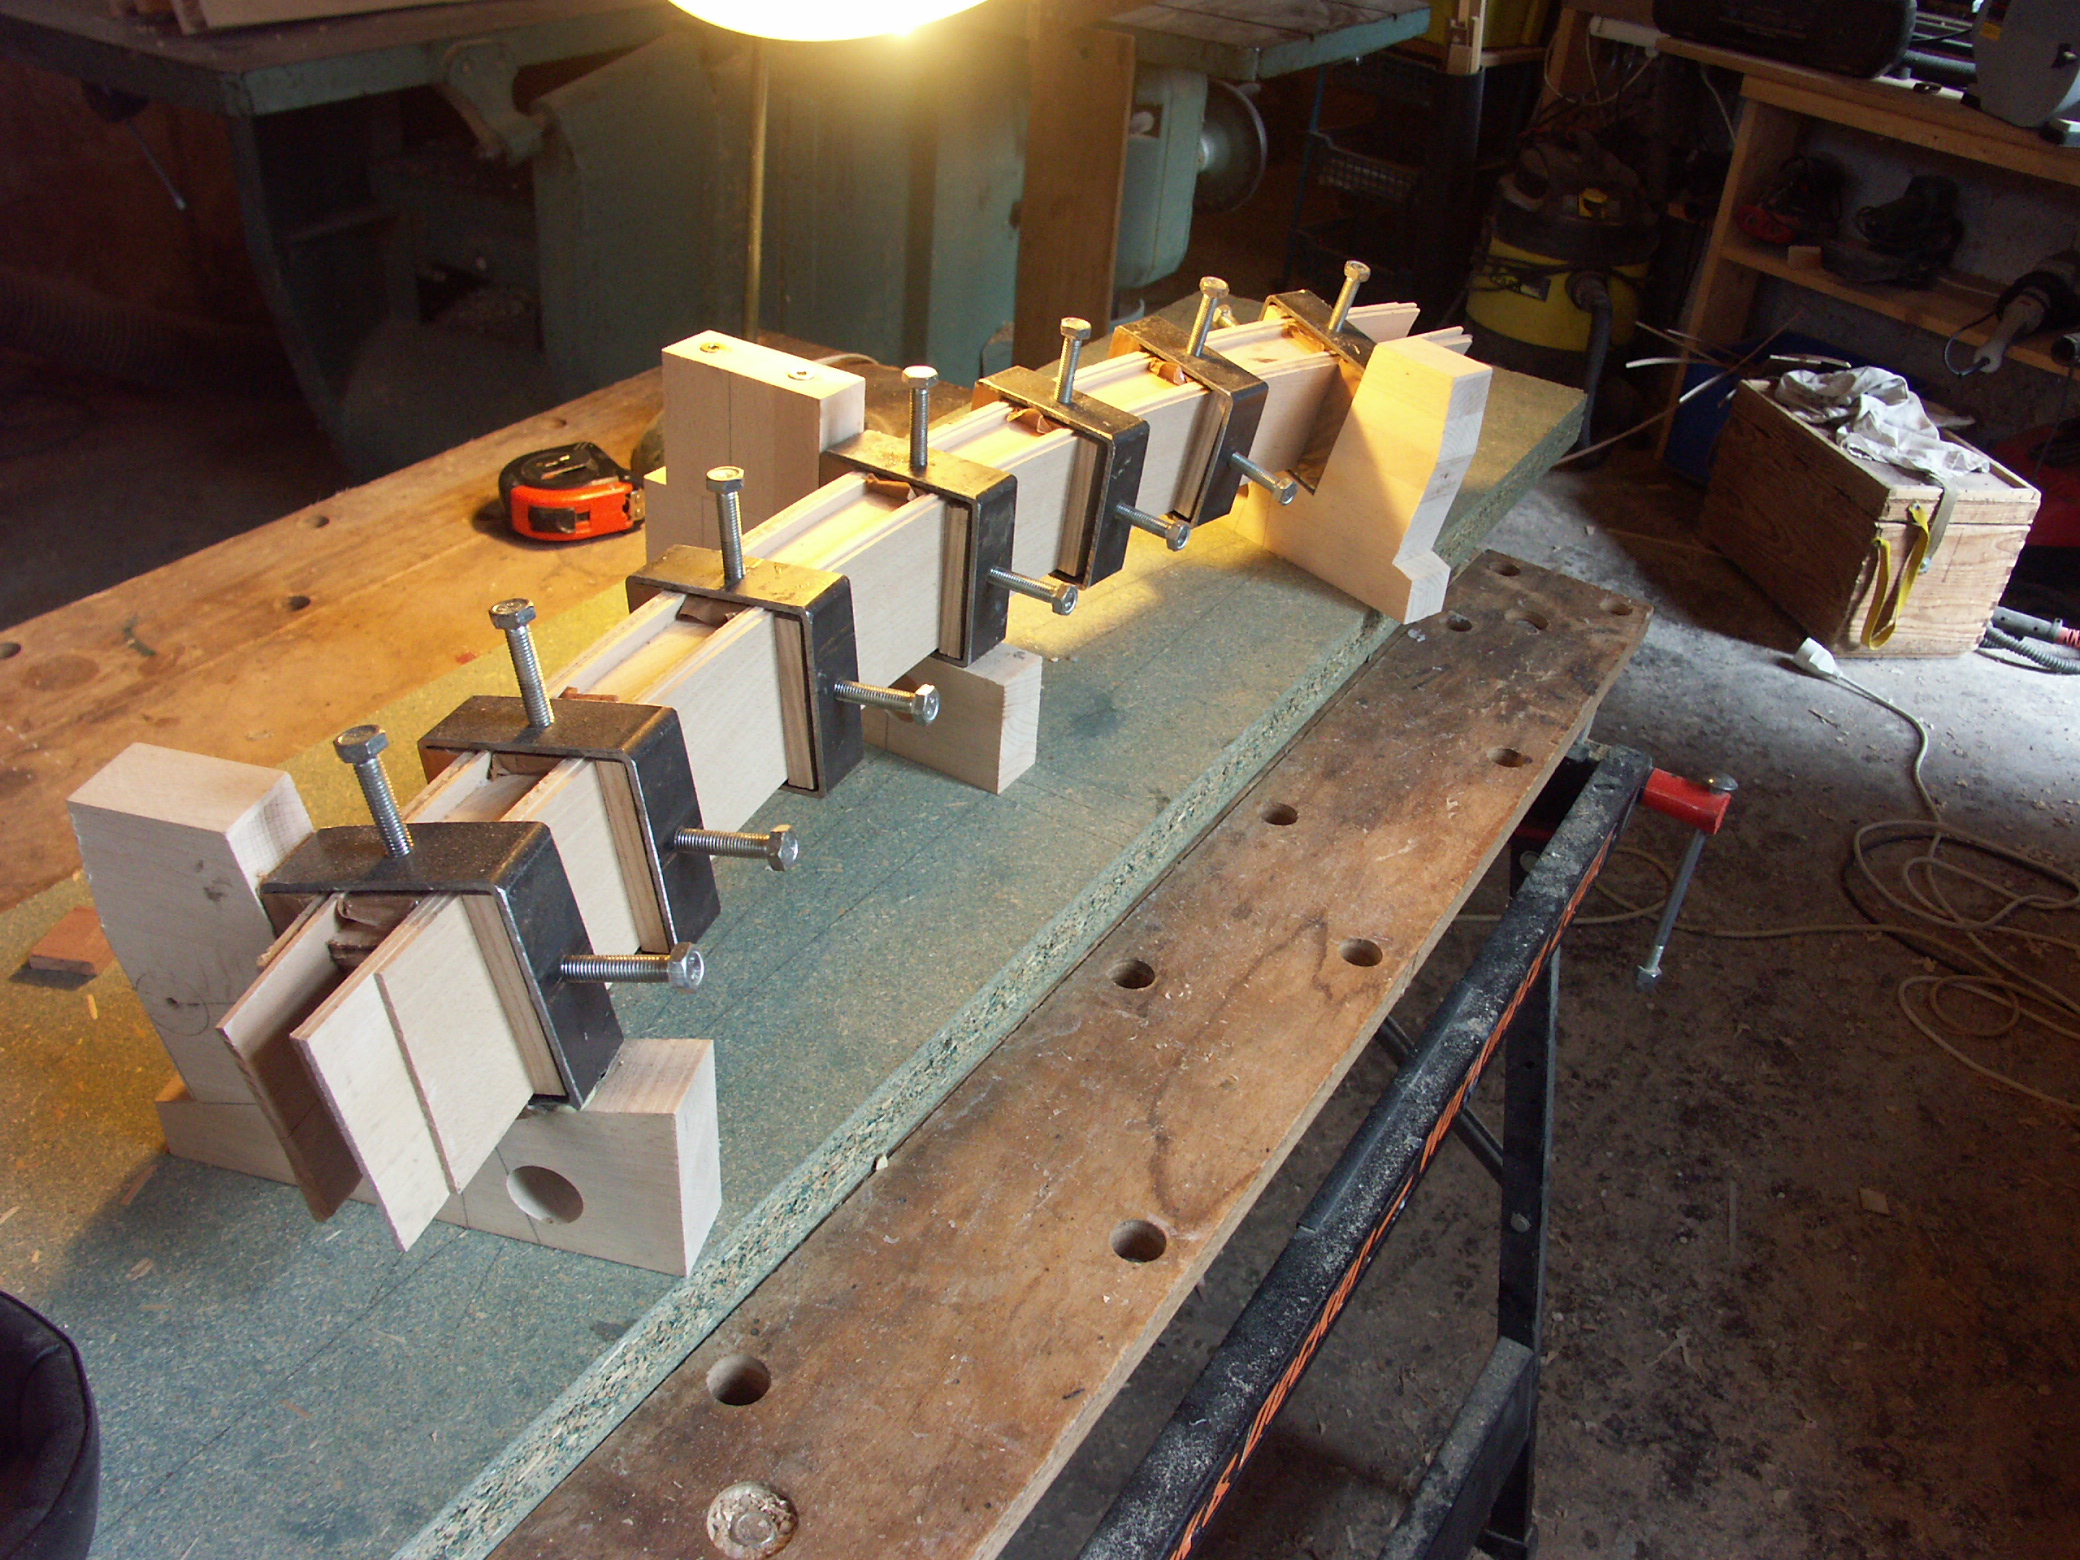
Assembly of the hand rail
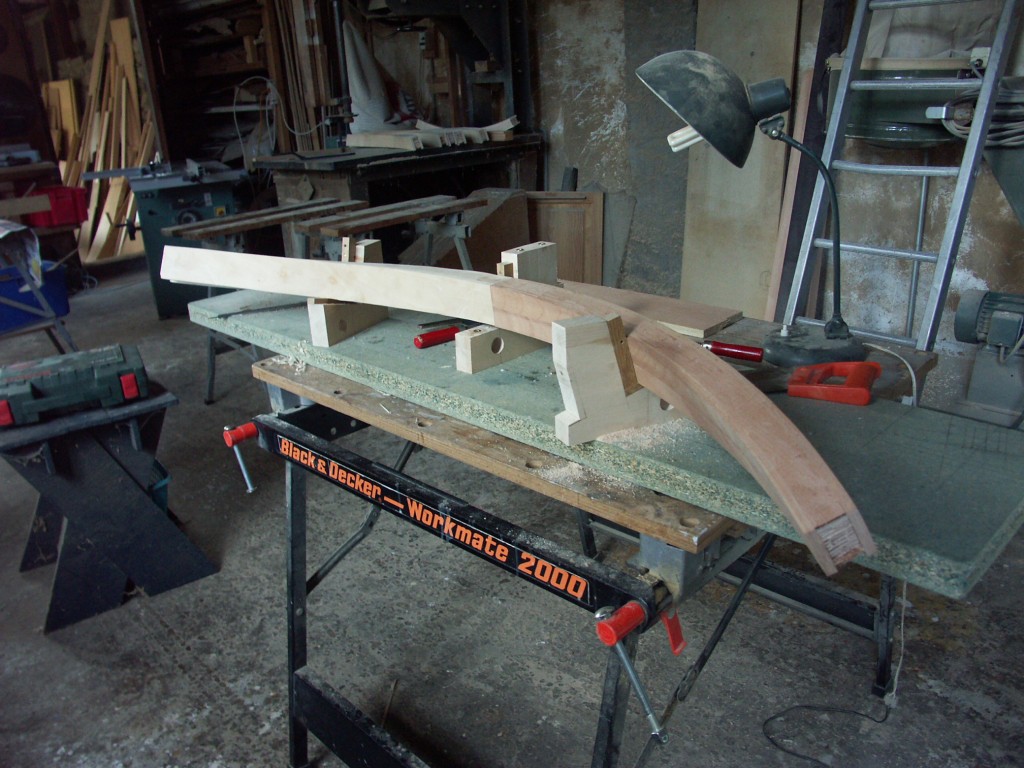
A special case of a moulded rail is when the rail has to follow a pre-existing metallic rail with no geometrical shapes.
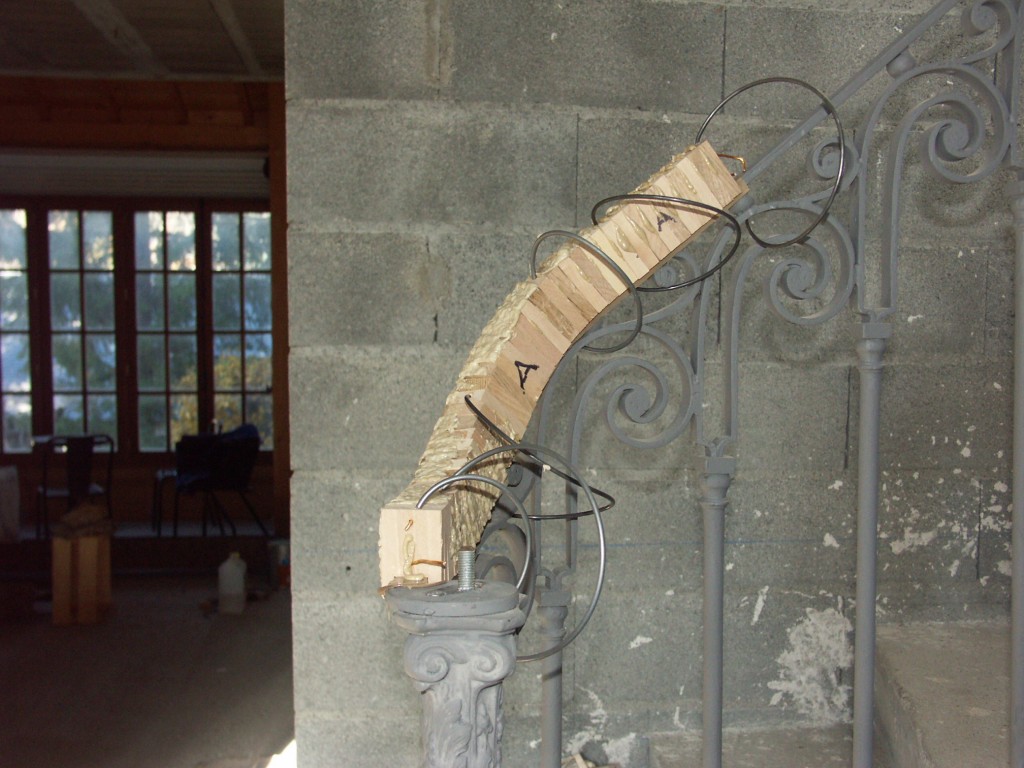
In this case I glue up small sections on the existing metallic rail and add veneers the resulting form.
Here are some photos to show the general principals:
This photo shows how I get the shape by segments glued up on the metallic rail. The segments are held in place using springs:
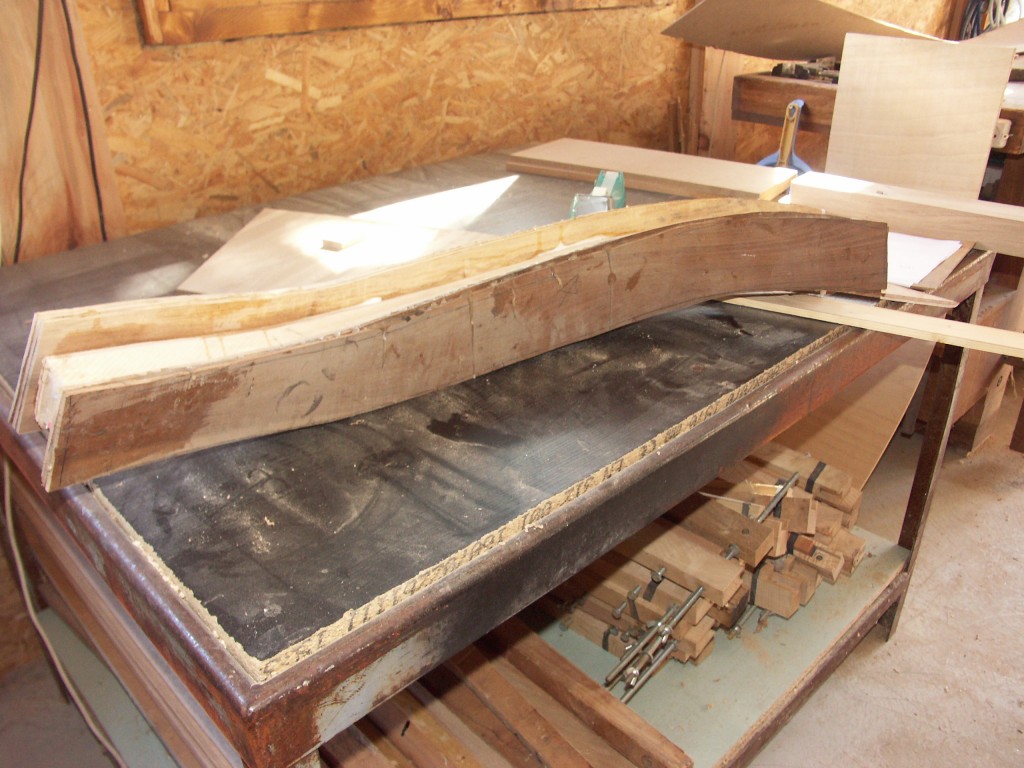
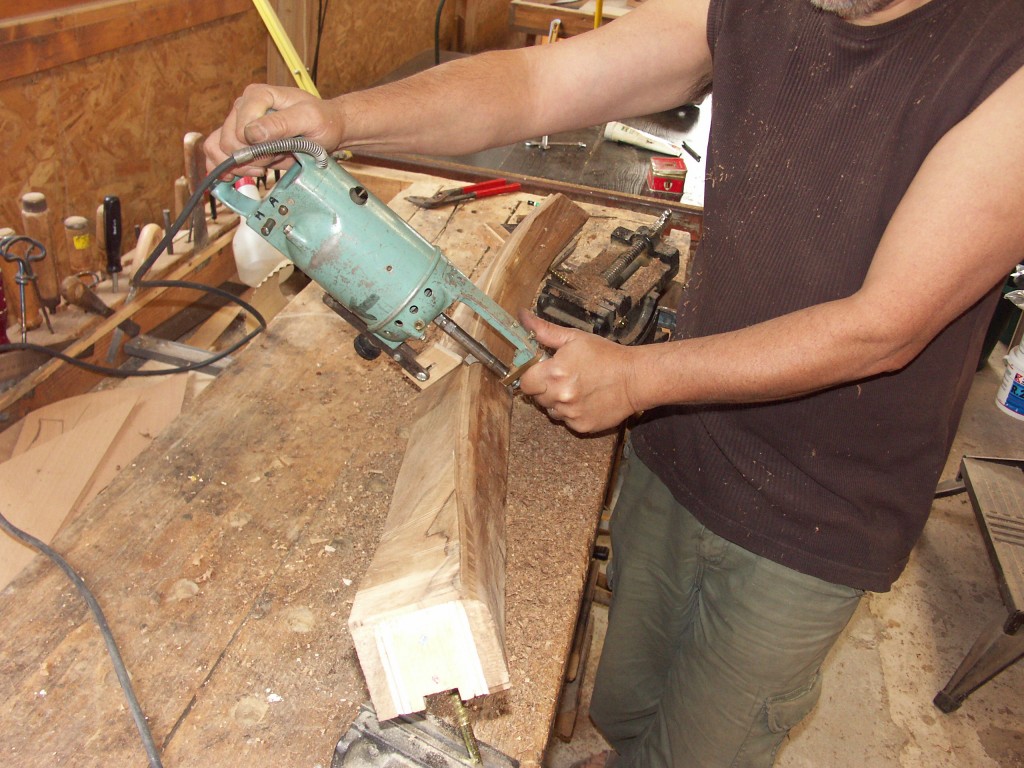
Back in the workshop the form is veneered and shaped:
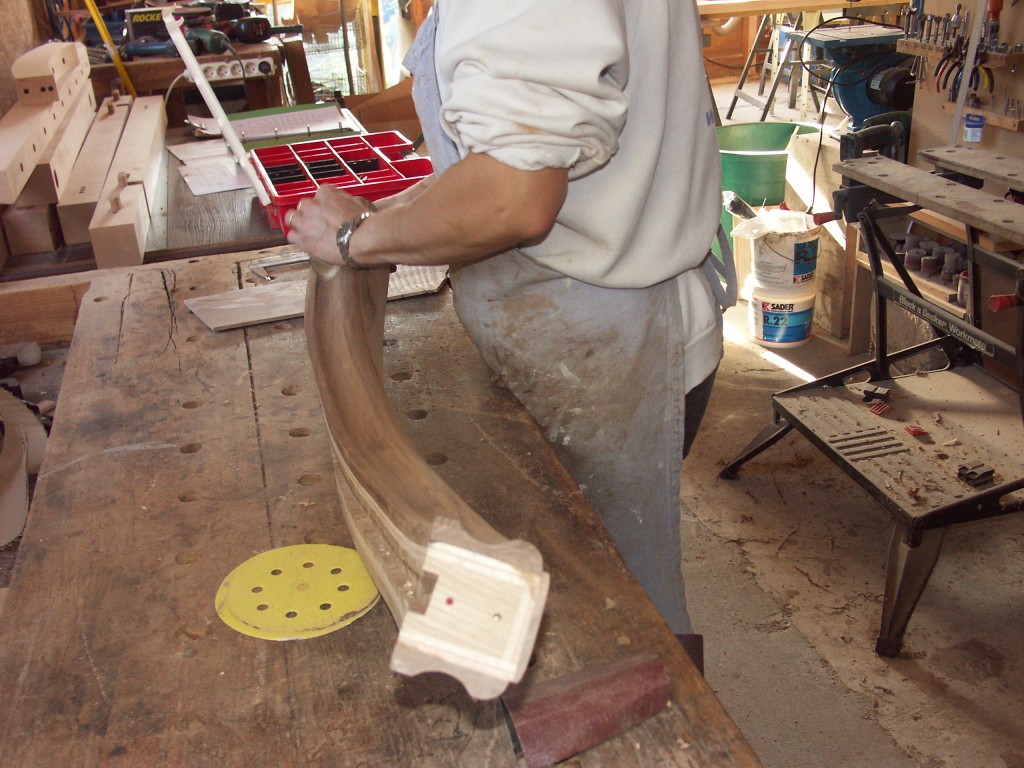
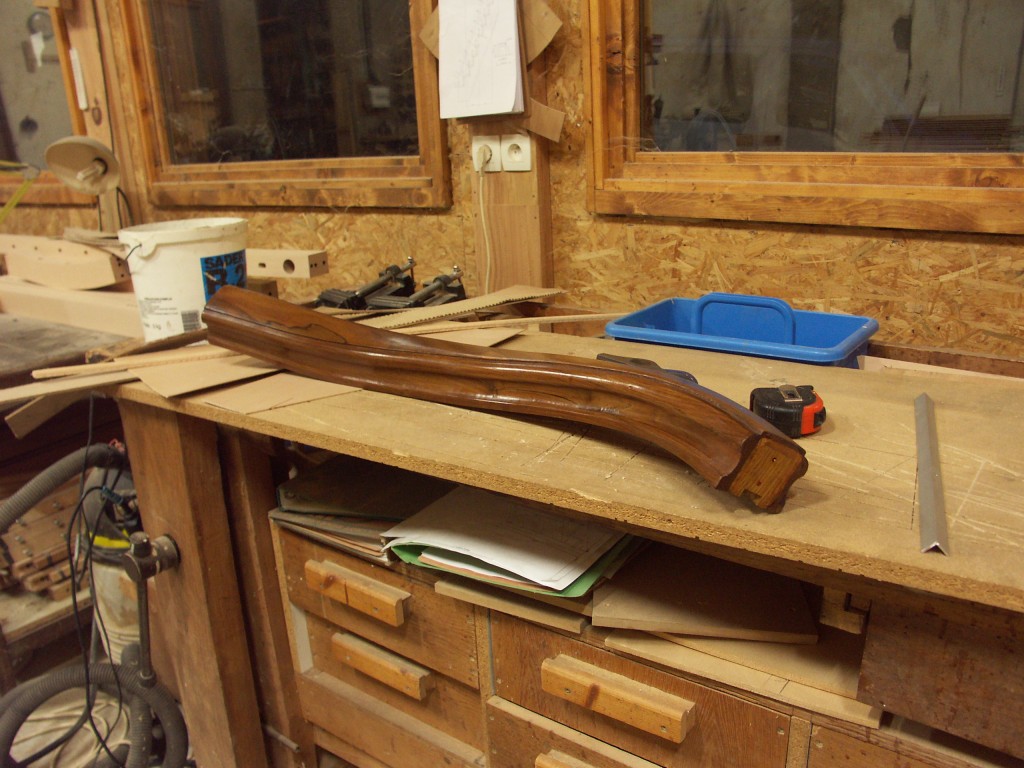
As you can see there are lots of different ways to build curves. Each technique had its advantages and set backs and I often mix different techniques on the same stair.
This is just a general overview and as with all wood working the details of how the technique is implemented is very important to determining the beauty of the final job.
Don’t forget to leave a comment to tell me what you think.
You can find out more about the stair software I use here.

[…] How to build curved stairs and handrails […]
Beautiful work. I’m a relatively novice stair builder. I’ve desired for some time to tackle a curved stair but have not had the opportunity. I’m so glad I found your site.
Great stair designs here.
HI Jim,
I often use tangent hand-railing and most of my molded rails are built traditionally. I just find that sometimes taking things a bit differently can help work go easier and faster. A lot of my personnal hand railing techniques are based on traditional tangent hand-railing. My main problem has often been that I have customers that are not rich but want curved stairs for less cost, so I invented faster ways of working to reduce cost for them.
As for the French spindle it’s still on sale here in France so it reaches French safety standards, but I agree that it’s a relatively dangerous tool.
king regards
Ness
@Jim Baldwin
Your composite formed rail looks interesting but I think you go to a whole lot of trouble to avoid traditional tangent handrail. Itlooks great however so whatever you’re doing, keep it up.
I don’t know about your ‘french spindle” router either but wood shapers equipped with french spindles were discontinued years ago due to safety issues.
Your composite formed rail looks interesting but I think you go to a whole lot of trouble to avoid traditional tangent handrail.
I don’t know about your ‘french spindle” router either but wood shapers equipped with french spindles were discontinued years ago due to safety issues.
Hi Ness,
The stair designs are astounding. These main members should be generating lot of torsion wondering how it is made. As i know timber is weaker along the grain.
Many of the designs are impressive and its great that you reveal techniques for achieving them. In your article there is a link https://wooddesigner.org/building-a-curved-stair/ but it opens a blank page (unless I’m missing something)
Thanks for sharing your creative ideas.
Hi David,
Thanks for your comment. I’ve tried clicking the link and it works for me. Mybe you should try again as I’ve had some tech problems with my site lately.
all the best
Ness
Hello Ness,
Aha! That portable spindle moulder with what we English speakers call a, “French Spindle” — that’s the tool I’ve been trying to find for years. Would you care to share who made it and where I can find one today? I’ve seen the Scheer version, but this simple little beauty looks more versatile for the experienced craftsman.
Many thanks for your generous writings,
Erik
Hi Eric,
Thanks for your comment. The French spindle is actually called a “Toupie portative Resch”.
This is really the only tool that I know of that is good at shaping wreathed hand rails without too much risk of moulding your fingers too. They are expensive new and you sometimes see them cheaper on ebay.
Still have to count your fingers before and after.
all the best
Ness
I Ness,Your articles are very interesting and useful!!
Many thanks
Hi Ness
I previously downloaded SD on an old cumputer that is no longer in use. I would like to down load the demo into my new computor but won’t let me because I am already registered. My email is artisan stair @ gmail . com
Thanks Alick Munro
Hi Alick,
I’ve tried to send you another install file by email but it keeps coming back to me.
Have you another address I can send to?
§Regards
Ness