We’d like to show you a fast and accurate method to make a curved wooden handrail, illustrated in this particular project: a moulded wreathed handrail in laminated walnut, which includes:
- Quarter turn wreathed wooden handrail elements
- Half turn wreathed element
- Multiple straight handrail sections
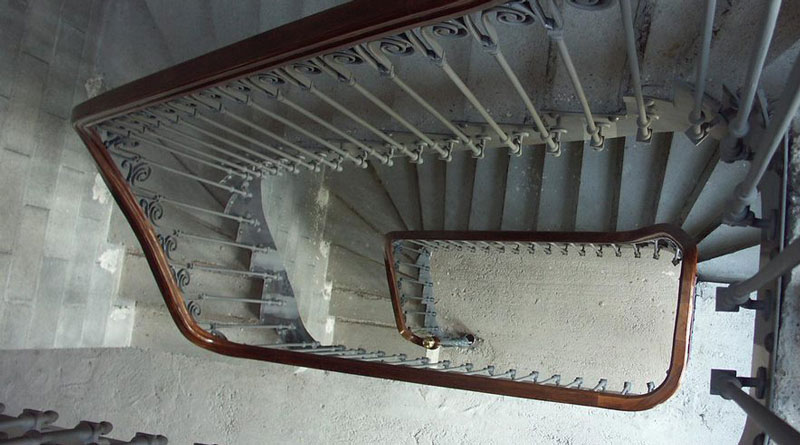
This timber handrail was made using a technique we’ve called laminated sections.
As well as walnut, this method would work just as well with typical stair materials like oak or pine.
Please watch this introductory video to find out how to make a curved handrail with this method.
Advantages of the laminated sections technique
We developed this approach specifically for making handrails that have to fit an existing metallic wreathed rail, but it can also be used very effectively to make any curved handrail.
The advantage of this technique is that you do not need to mark out the rail.
Neither are there any complicated geometrical calculations or marking out required. You don’t need to use the tangent system, which is pretty complicated to get into; no form or mould is required either, as would be the case if you were using traditional laminates to make a handrail like this.
In fact, making a staircase handrail with this method can be done by any woodworker without any specialist handrail knowledge.
Another nice benefit is that the section of the handrail is always perpendicular to the slope of the handrail so spindle moulding is easy too.
What height should a handrail be?
The IRC Stair Railing Code recommends that a handrail should be 34-38 inches above the pitch line/nosing line. According to UK regulations, the figure is 900-1000 mm.
In this project, the house was in fact a new build, with the metal stair elements already in place for us.
How to fit a stair handrail
Again, we’re focusing here on a wreathed handrail.
We have been able to develop this system thanks to modern day polyurethane glue that will expand and set hard.
The technique consists of making sections that are small solid wood rectangles, and stringing them together with aluminium wire to form a flexible wooden snake. This flexible snake allows us to create the form freehand.
Ideally, if you’ve got access to a nesting CNC machine, you can very quickly cut 100s of the rectangular pieces you need.
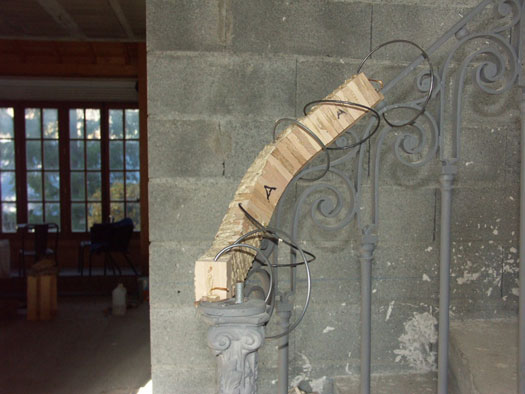
In the case of a wooden banister that must sit on a metallic rail, we would actually fix this snake to the metallic rail as shown above. If we’re manufacturing a freestanding handrail, we can just create the shape freehand.
Springs have been attached to hold the blocks in place. Once the shape is as we want it, we inject polyurethane glue in between the sections to fix the shape. Before applying the glue, add tape to the metal rail for protection.
Here’s another image of the blocks in place around the wreathed sections of the handrail.
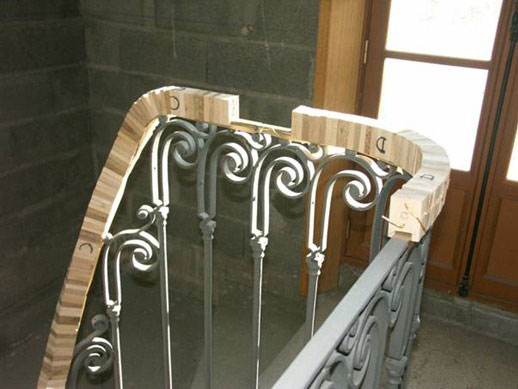
Once set, the shape is removed from the rail and it’s back to the workshop. It’s still delicate so handle carefully.
One option at this stage is to create a 3D scan of the shape and cut on a CNC machine, but we’re going to use a manual method.
To ensure the shape is robust enough for handling and for adding the laminates, the underside is first reinforced with a fibre/plaster mix. To achieve this, create a mould out of plastic, fixed to the blocks with double sided tape and springs.
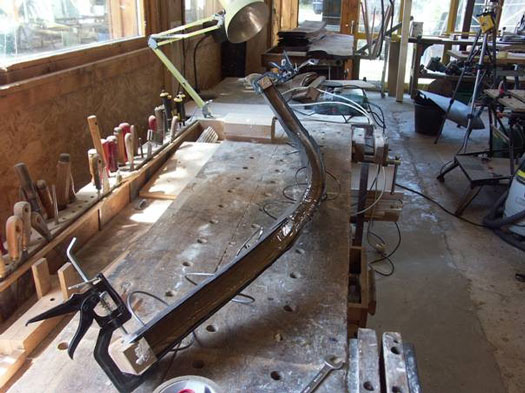
With the mould removed, you can see the shapes reinforced with that mix.
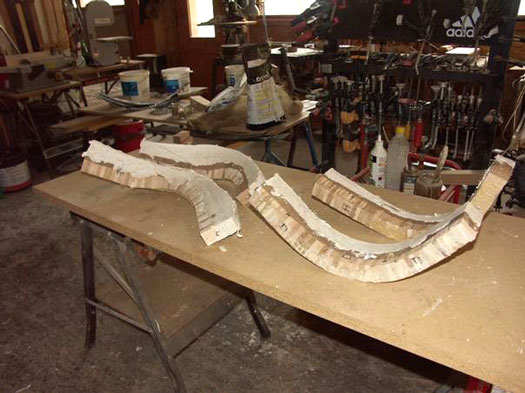
The form can now be cleaned up with a disk sander.
And after that, we can glue on the veneer / laminates to make up the form of our wooden handrail.
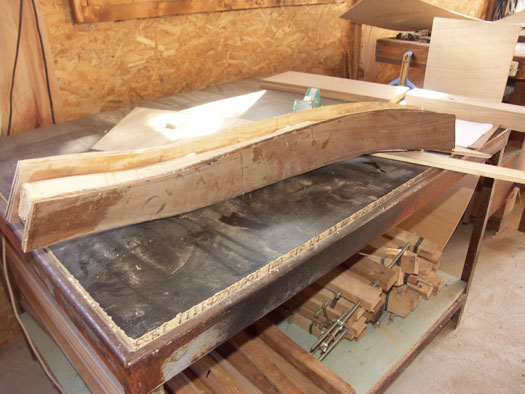
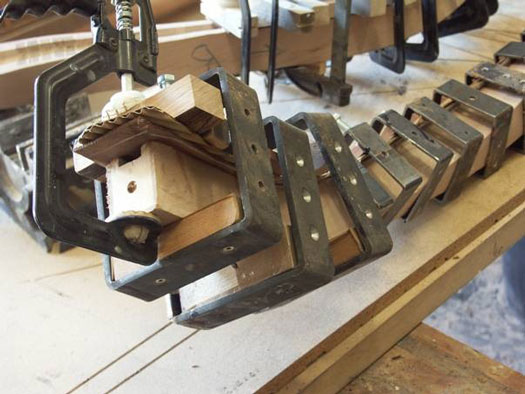
Multiple veneer layers are built up, each 2mm, until we have enough thickness to accommodate a moulding of 10mm depth.
It can be difficult to estimate the shape of the required free form laminates. To get roughly the right shape, it’s a good idea to fix cardboard on each face and cut to size and to use those as cutting templates.
The clamps for this process have been cut from a single square metal tube; each section is drilled to receive a 8mm bolt that presses all the laminates together while maintaining alignment.
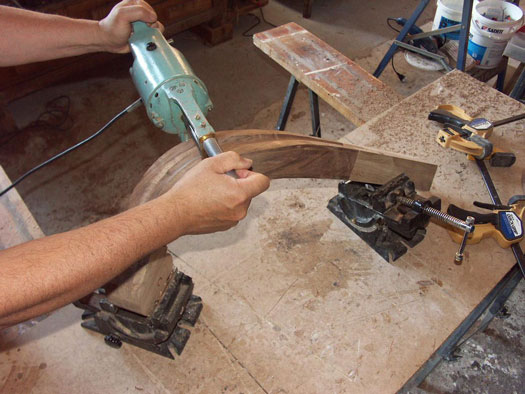
Once laminated, the handrail is moulded using a portable spindle moulder. This tool is great for wreathed rails: you can gradually lower the cutter into the wood over multiple passes. The risk of tear out and splitting is very low.
This DIY handrail technique is really efficient for making complex shapes; it’s very fast and easy.
The straight sections are made in solid wood; each section is 2mm larger than the wreathed elements and are flushed up at the final assembly stage.
How to install a handrail
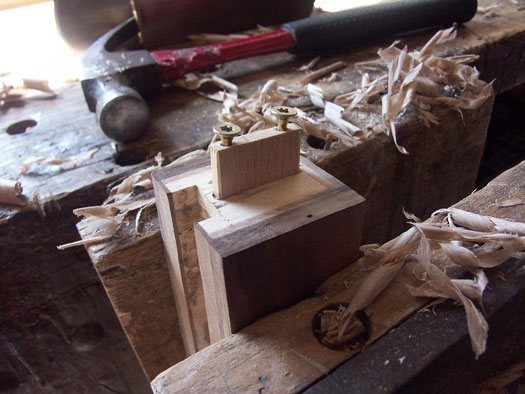
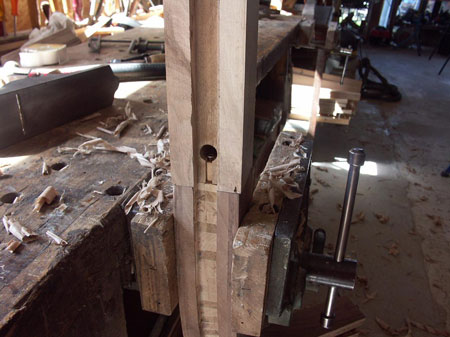
Each section is joined as shown in the images below. As the parts are pushed together, the screws automatically tighten.
How to attach the handrail end to a wall
Handrails can be attached to the wall in various ways depending on the situation.
Some typical methods include:
- Fixed via a base plate screwed into the wall
- End with half post screwed into the wall
- Chemical anchoring with threaded rod in the absence of any other means of fixing
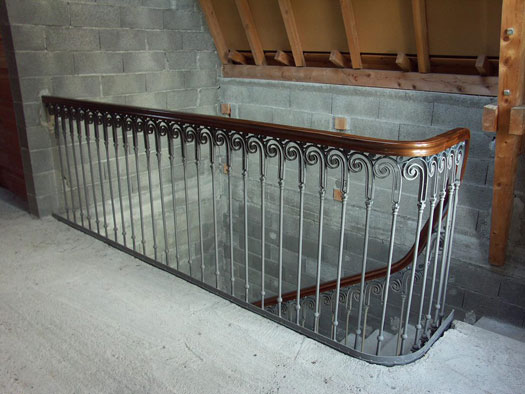
In this example, the metal structure is already fixed to the wall. The handrail fits on top of the structure and is fixed with screws to the underside. To reduce the number of screws required, this can also be done in combination with direct gluing.
Finished curved wooden handrail project
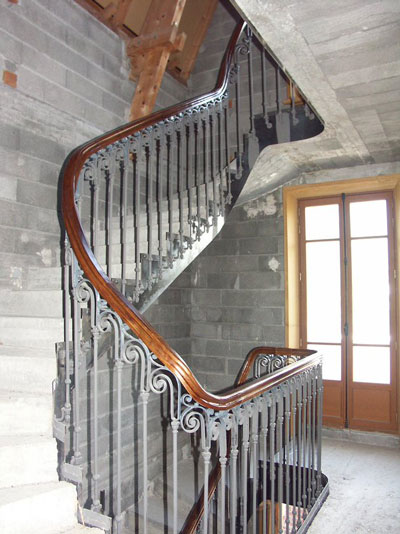
And finally, here are two images showing the completed handrail. For this project, we’ve applied an antique finish.
Looking for an easier way to build your stairs?
Please post a comment below or go to our forum for any stair building queries you have.
If you’re a professional stair builder, check out our own professional StairDesigner software, and let us know if you would like an online demonstration with a member of our technical team.
We’ve also got a service available for one-off stair projects. Use the free version of StairDesigner to design your project and we’ll send you the manufacturing documents to build it.
This is our StairFile service, available along with expert advice, and included with a Premium Support subscription (which you can cancel whenever your project is finished).
Thanks very much for reading!

Hi ,
Very interesting read and informative.
We are looking to extend our victorian house which has its period staircase and wanted the ne staircase rails into the loft flow from the original- can you help?
Hi Krishe, Thanks so much for your message. I can see that you’ve emailed us through our customer support email so I will reply to you there. Have a nice day!
Dear Ness,
What a great idea for a Wreathed Handrail, it’s looks great.
I’m new to your site, and find it very interesting and informative. I need to know more !. To this end, would like to see your stand at Expobois this month. Do you still have spare tickets ?. If so, I need two please.
Many thanks.
Howard A. Lister
Pennine Interiors
Von-Quadt-Str. 139
51069
Koln Germany.
or, howard.lister@hotmail.com
Hi Howard,
Thanks for your comment.
We are sending your invitations via: email.
Please let me know when you receive them.
Hope to see you next week .
Best regards,
Ness
Very interesting technique Ness, do you have a video on the wreath being moulded and the moulder? If not, could you make a video? Would be interested in seeing the fixturing and feeding techniques. Thanks, Bob Horenn
Hi Bob,
I use a French spindle but this is a bit tricky and takes to long so we are actually setting up a jig to push most parts through a traditional spindle moulder.
It works well but needs touching up by hand which slows down production.
I think that for some fast turning parts it will still need to done using this machine but we are hoping that a simple 3 point jig on a normal spindle moulder will give a faster solution.
Sorry I haven’t got the video you need.
Cheers,
Ness
Hallo, can you tall me where I can buy semi finished products for manufacturing curved handlerail stairs, which is meantioned in this article?
Thanks a million!!!
Júlia
Hi Julia,
Can you tell me where you are based?
All the best,
Ness