Polyboard is a cabinet design software but its powerful and versatile functionality makes it extremely useful for a vast array of other tasks.
Although mainly designed to build cabinets and furniture from sheet material Polyboard also includes the possibility to work with bars or lengths of material.
Any given panel can be set up in a number of ways with cut outs, shaped edges, made of different thicknesses and/or made of a frame with panels.
In this short lesson and video I’d like to show you quickly how to use Polyboard’s Panels assembly functions to set up some simple room separations made of framed paneling.
An overview of the project
The idea in this project is to set up some modular separating units made of standard 1200mm wide elements for separating spaces within a larger area.
The basic units must be adaptable to a variety of situations.
They will be made of 95x45mm beech frame assembled with mortise and tenon joints with panels in 5mm beech ply and an upper panel in 8mm glass.
The idea is to build a library of basic elements that can be assembled easily into different projects.
Setting up Bars Materials
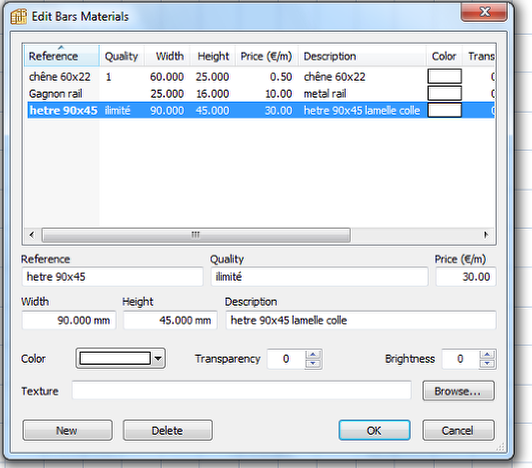
To build the frames from 95x45mm beech, so the first thing to do is to set up the materials library for the frames.
Use the Libraries>Bar Materials dialog box to setup the right section.
Setting up Panel Materials
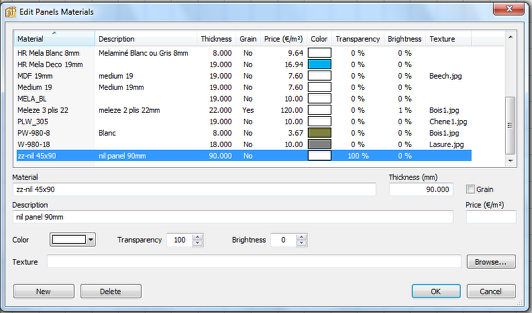
For the panels we will be needing some 19mm beech paneling and some 8mm glass so these will have to be set up in the Panel Materials library.
To be able to add separations with doors we will also need some virtual material.
A virtual material is an invisible material where the transparency has been set at 100%.
I use virtual materials to set parts to their right position in space.
In this case we will be using a 90mm thick panel to simulate a virtual cabinet casing so that our doors will appear in the right place.
You see in detail how I use this material later in the video tutorial.
These materials show with their specific names in the cutting lists and can simply be ignored.
To separate them from the other materials in the library I always name them zz-nil.
“Nil” because they are used like “nil” panels and zz to make them show up grouped at the end of the materials list.
Starting a new project
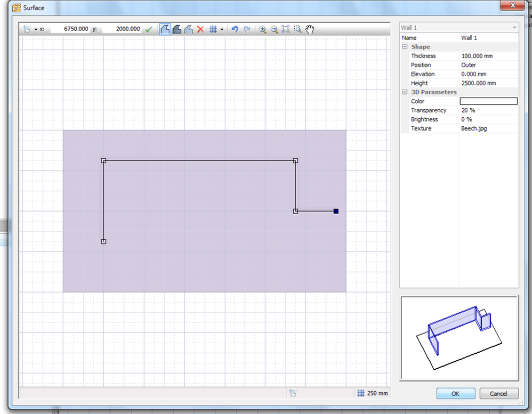
Start a new project and set up the existing walls where the separations will have to fit.
In real life you will enter the exact sizes taken onsite, but for this exercise you can just place a rectangular floor with walls using the grid snap.
Adding cabinets to the project
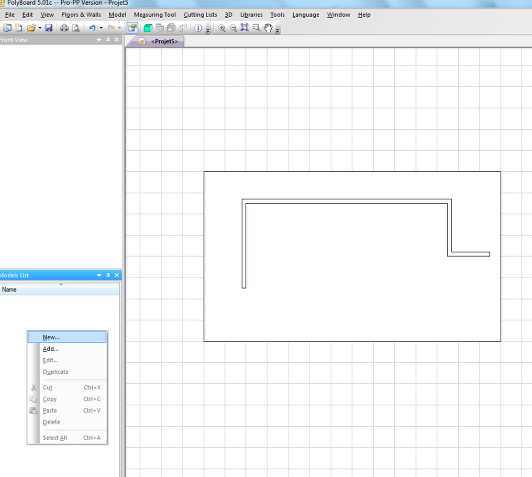
Put the mouse in the “Models List ” area and click right.
Choose “New” model in the mouse menu.
When the cabinet appears in the list double click it’s name to activate the cabinet editing mode.
Setting up the construction method
We are going to use Polyboard to build a simple wooden frame with panels.
To do this we will only be using the back of the cabinet that we will set up as a framed panel.
To prepare the back as a single panel make sur that it there are no over lapping panels.
The easiest way to do this is to modify the Manufacturing Sub-Method.
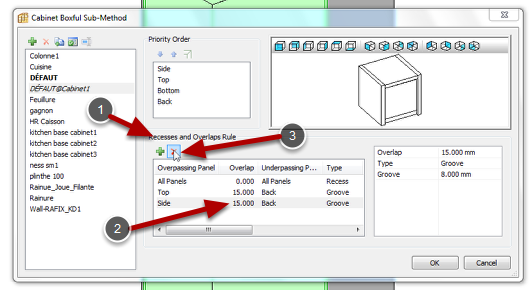
Click the Libraries>Sub Methods>Boxfull menu to open the Cabinet Boxfull sub-Method dialog box.
In my example we can see that in the Recesses and overlaps Rules section (1) the default style has the top and side over lapping the back by 15mm with a 8mm groove.
We have to erase this rule so that the back is flush with the back of the cabinet and just butted up against the other panels.
Select rule by clicking on the line (2) and click the Erase button (3).
Setting cabinet sizes
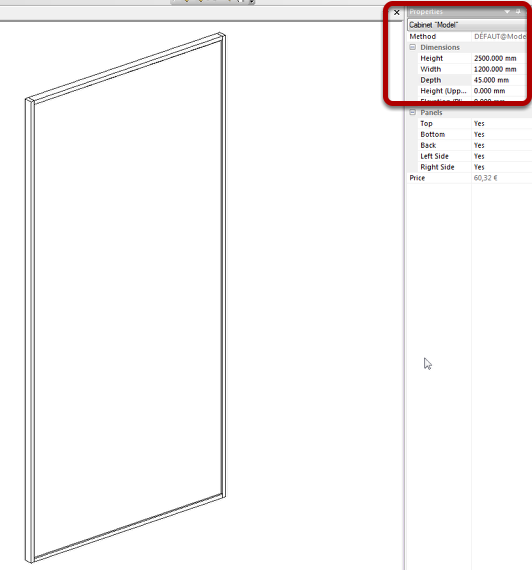
Use the Propertises window to give the cabinet the size of the finished panel 2500mmx1200mm.
For the cabinet depth set the total cabinet depth the same as the thichness of the separating panels, in our case 45mm.
Keeping only the cabinet back
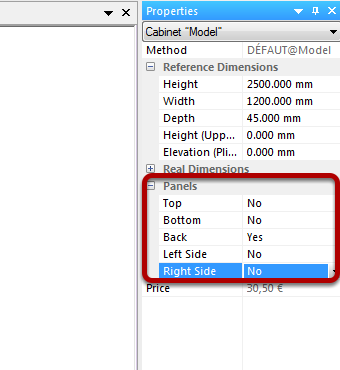
For our wall separations we only want to keep the back panel so use the “Panels” section to elimiate the Top, Bottom and Sides, just keeping the Back.
Creating assembly details for the panel
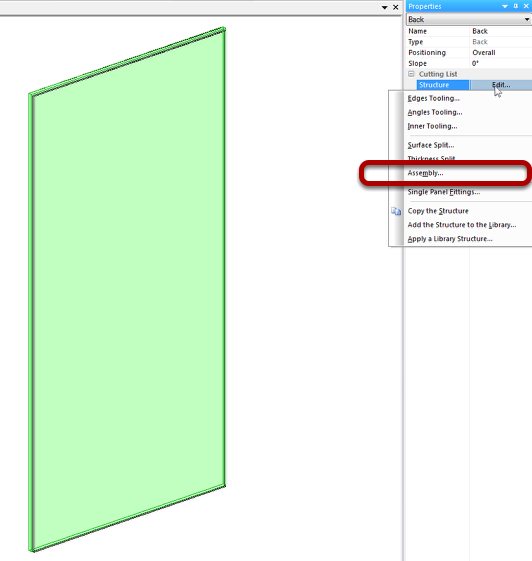
We are going to create a back with a framed and panel structure.
Select the back, open the “Structure >Edit” menu and select Assembly.
Assembly Methods
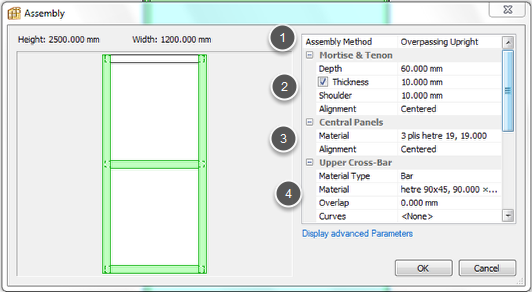
We want to create a frame with mortised styles and tenoned rails.
In the Assembly Method (1) roll down menu choose “Overpasssing Uprights”.
As we will be using mortise and tenon joints set the Mortise and Tenon depth (2) to 60mm, tick the Thickness option and set it to 10mm and add a 10mm shoulder.
In the same way set the following parameters:
Central Panels material to “19mm Beech”,
Set the Cross Bar Material Types to “Bar”, Material to “90×45 Beech”
Setting the height of the middle rail.
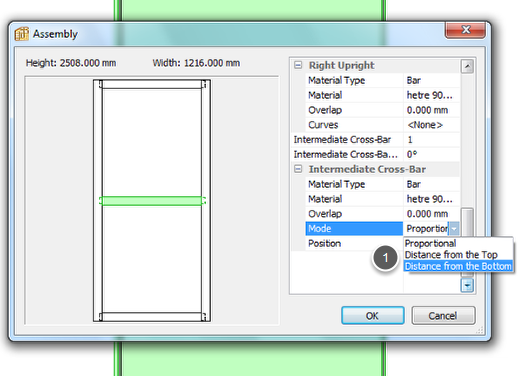
To place the middle rail at a precise height, in the Intermediate Cross Bar section, in the mode drop down menu, choose “Distance from Bottom” and type in 800 as the distance.
Click “OK” to validate all the parameters.
Framed panel with mortaise and tenons
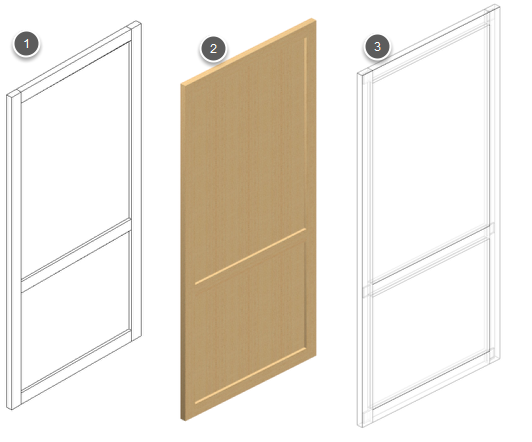
Your cabinet back should look like (1) in the edit window.
In 3d textured mode (2) we can see the frame with 2 full panels.
The transparent view (3) shows the mortise and tenon joints.
Adding a plinth

Don’t forget that in Polyboard the panel is realy a cabinet and it can be modified using the cabinet editing commands.
So to add a plinth just click outside the model, add an lower elevation and add the plinth as if you were working on a cabinet.
Adding the model to the project
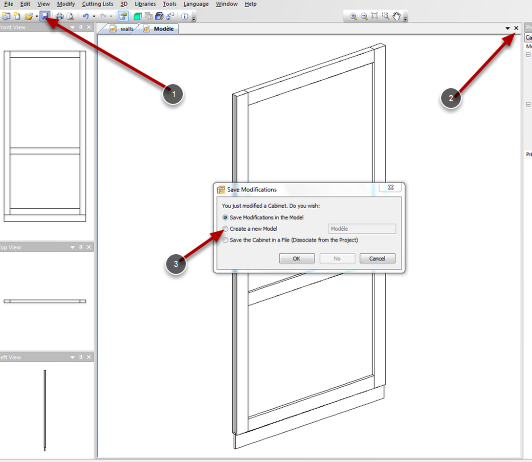
To add this new model to the project click the “Save” button (1) or the exit “X” (2).
In the dialog box tick “Create a new model” (3) and give a name.
Inserting the panel into the project
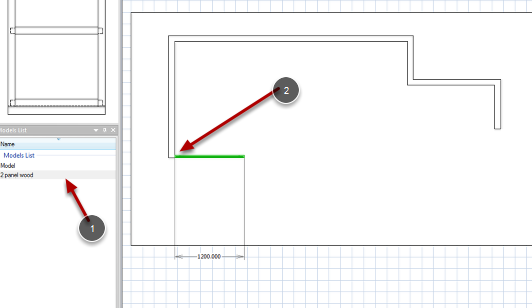
To insert the panel into the project, click the new panel in the list (1) and drag it into the project window and snap it to the wall (2).
3D view of project
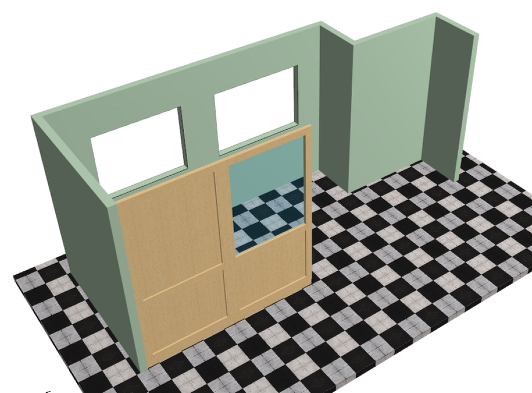
To use the new full panel to make a glass panelled wall just make a new model and change the upper panel material to glass.
In the project mode you can easily assemble le different panels that snap neatly together to make your project.
Note that each panel remains parametric so it’s easy to change its dimensions.
Video on making panelled wall separations
This video shows how to set up these panels, add doors and adjust them to the walls.
Please leave a comment if you have any questions.
For more information see this overview of Polyboard.
Hi Ness
This looks like a great addition. Was wondering if it is possible to adapt this in Polyboard to make
raised panelled doors for wardrobes/kitchens etc instead of having to go into sketchup.
Cheers
terry
Hi Terry,
Well that’s one of the limits of the actual Polyboard versions in that you can’t make directly raise panels, mouldings and decorative features.
Polyboard is mainly manufacturing orientated so the manufacturing documents are really perfect, but when it comes to detailed 3D we are a little limited.
This said it is possible to make a raised panel by cutting out the center of a panel and adding a thicker material to the hole cut out.
This creates a panel in 2 parts so is not exact for manufacturing but will give a better 3D image of a raised panel.
I’m hoping to sort this out in future versions but for the moment you have to use this trick or complementary software to get the 3D images.
all the best
Ness
Thanks for Reply Ness.
Terry
Hi again,
To explain how to set up raised panels I just made a short video that you can see here:
Making raised panels in Polyboard