We’re excited to announce the official release of the Polyboard 7 full version, now available for download and sale.
This major update to Polyboard version 7 is packed full of new features, and comes with a new set of Quick Design libraries to keep you working as fast and efficiently as possible.
We have Polyboard 7 download advice at the end of this article.
But first, let’s take a look inside…
Enhanced Creativity
New lateral zones
In Polyboard version 7 plinths and upper strips are now added via a new External Zones section in the Properties menu. Completely new is the ability to create lateral zones around the cabinet, based on the sides and the back. In the case of a top overlap, a lateral zone will be automatically created.
Lateral zones can be used to add panels to the side of a cabinet. These can include double backs that can be used as fillers, shelves, or any other type of panel.
Lateral zones support improved face frame management
It now becomes possible to create the frame within the external zones, leaving the inner volumes to function in the normal way for adding shelves etc.
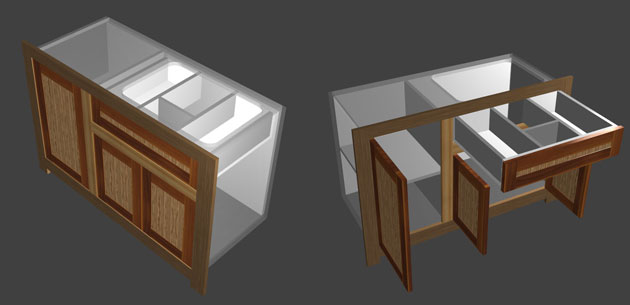
Drawer internal divisions
Standard divisions and inner casings can now be applied to the inner zones of drawers. This makes it possible to create automatically inner drawer separators, a visually appealing feature for client demonstrations and included in the manufacturing output. Perfect for modern storage systems, built in wardrobes and kitchen and bathroom sink units, etc.
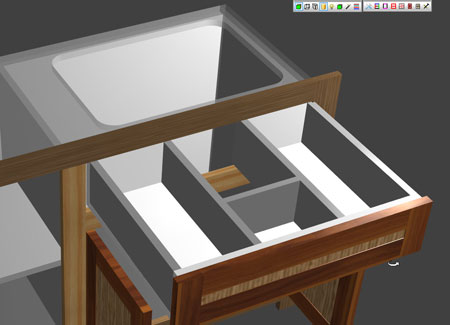
It also allows the modification of the overall drawer shape for fitting around pipes in kitchen sink and bathroom units.
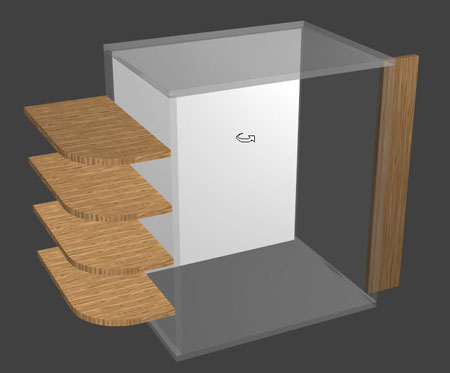
Fillers between cabinets and floor
The fillers function has been extended to the space between the cabinets and the floor.
This new function can be used to create plinths under several cabinets so it’s no longer necessary to build a running plinth as a separate model.
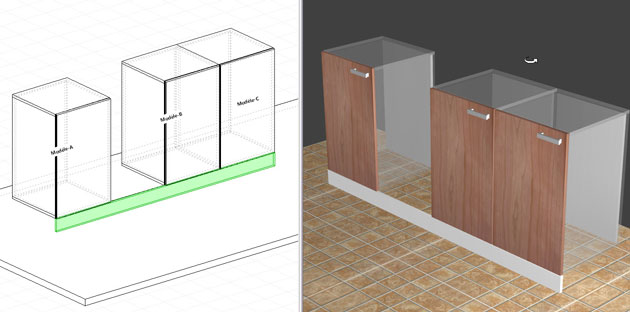
Cover panels to extend along multiple cabinets
Two panel types are specific to Project Mode: Countertops and Fillers. A new addition is cover panels, which are vertical panels covering the side, front or back of one or more units.
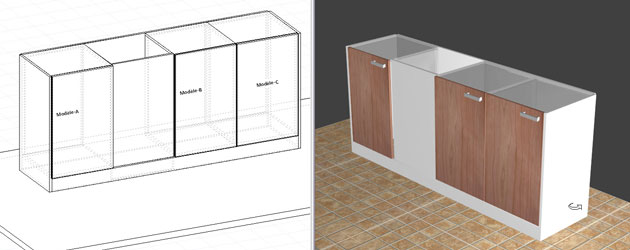
This makes it possible to add an extra panel to a cabinet side or to the side of 2 cabinets one on top of the other without having to build it as a separate cabinet.
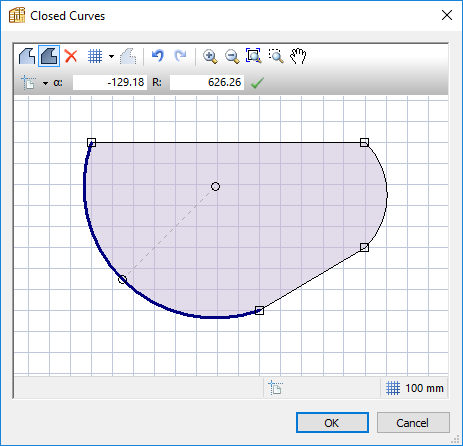
Curve editing CAD module
Most curves in the open and closed curve libraries can now be created and edited directly in the drawing editor. Prior to Polyboard version 7, this process had to be done in external CAD software.
Fine tune division positioning
The reference position of an internal division may be set either as Zone (as in Polyboard 6), or as one of the zone sides, and the reference axis is illustrated by one or two red arrows.
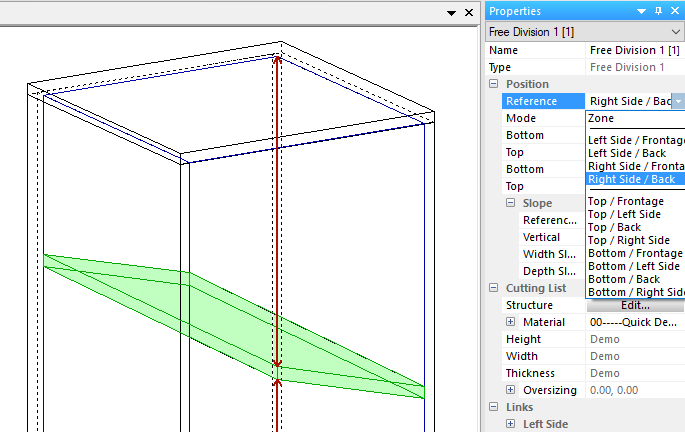
This makes it easier to precisely position inclined panels (free divisions).
Even Faster
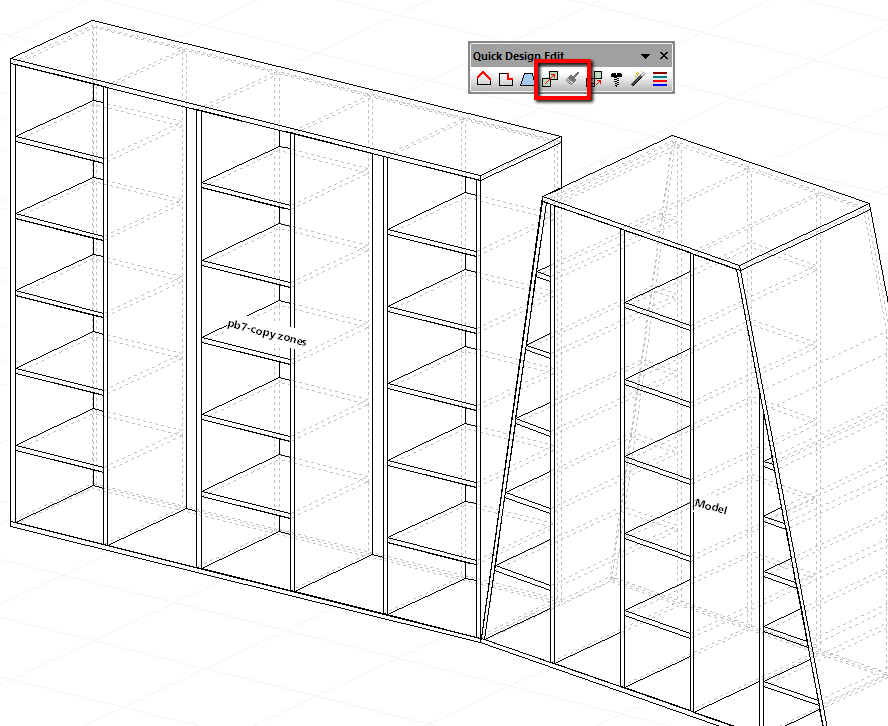
New Quick Design toolbars
The Quick Design toolbars have been redesigned to incorporate Polyboard 7’s most frequently used new features for easy access.

Modify Style command
A new command illustrated by the magic wand icon which allows you to select any of these elements: accessories, panels, edges and bars.
Once selected Polyboard displays the list of all the elements of this type used in your project so that you can instantly modify any of them.
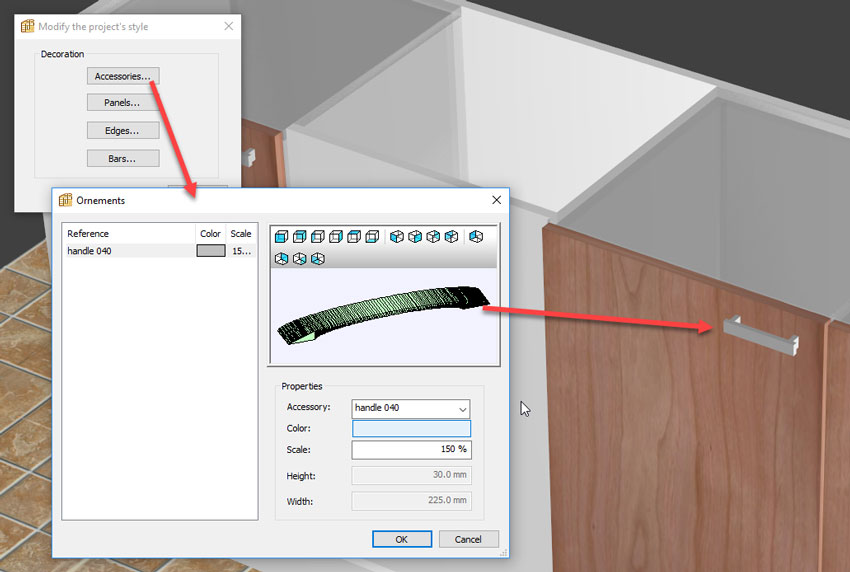
For instance, modifying the colour or the size of an accessory, or replacing it with another one from your library.
Copy and paste internal structures
Copy and paste the elements from within an internal zone such as the shelving layout, making new and larger projects much faster to create.
You can copy/paste within a single cabinet from one zone into another, very useful when you have repeating layouts. You can also copy from one cabinet into another cabinet, and the internal layout will be automatically adapted to the new cabinet.
Enhanced 3D visuals
The 3D view has been optimised for smoother and faster display when using multiple 3D accessories: handles, hinges etc.
Better Manufacturing
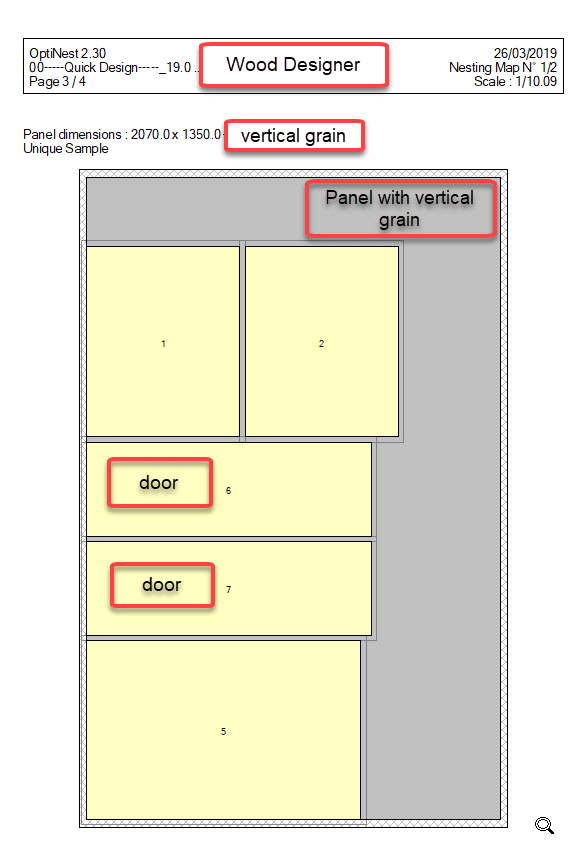
Perfect grain management
When several adjacent parts are selected, it’s possible to add a Keep the grain continuity parameter.
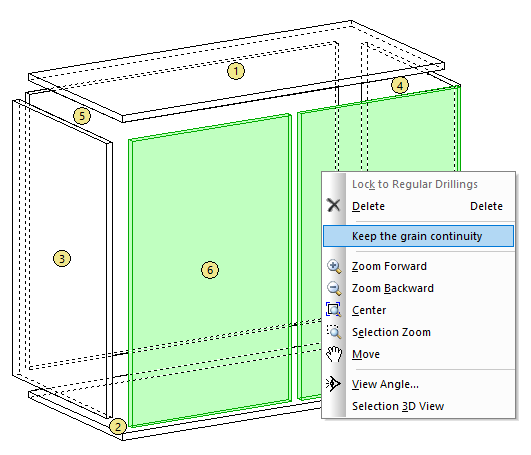
If the material of the parts is defined with grain, this command will create links describing the horizontal and vertical relative positions of all parts. This description will be exported in a file next to the cutting list file and enable OptiNest to automatically place the selected parts side by side.
Please note, if you already have OptiNest you will need a paid upgrade to benefit from this feature. All new OptiNest orders will now be sold with this feature as standard providing you are designing with Polyboard.
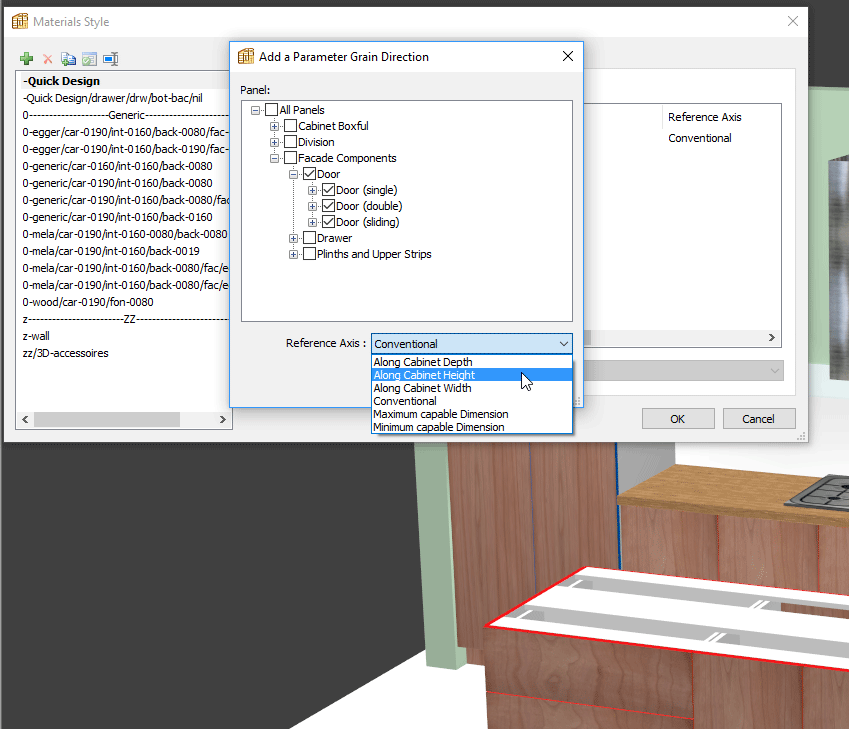
Grain reference axis by panel type
Now you don’t have to go into each panel separately to apply a specific grain direction, you simply set this parameter (grain reference axis) per panel type.
True arcs
Curved panels output was often converted into a series of straight segments. Arcs are now maintained in more cases, both in the plans and in the CNC output, useful for some specific machining cases.
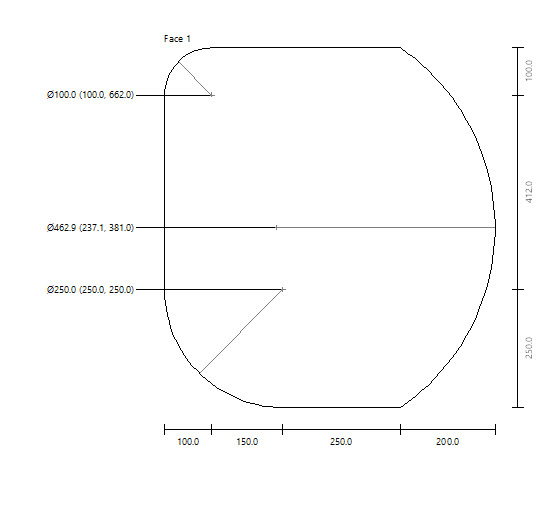
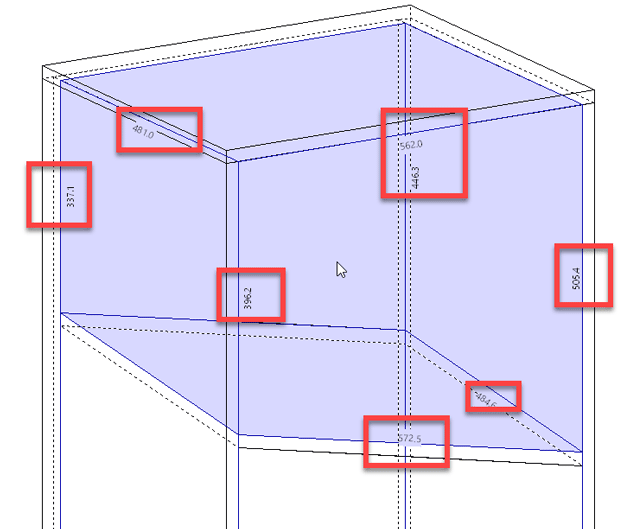
Additional dimension display for complex models
When the vertical edges of a zone have different dimensions (for instance in the case of a sloped cabinet top), all dimensions are now displayed. Previously not all vertical dimensions were displayed.
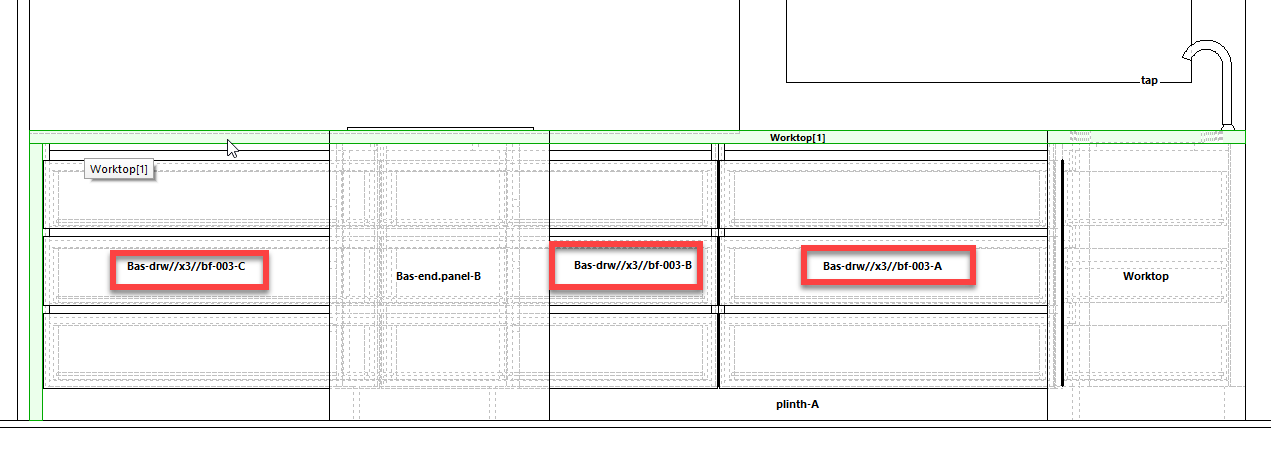
Unique identifiers for identical models
It’s often the case that you’ll have multiple instances of identical models in Project and Catalogue Modes. Inside the Cutting list Options you can now ungroup models, which applies a unique reference (letter – A, B, C…) to the model name and aids recognition during the manufacturing process.
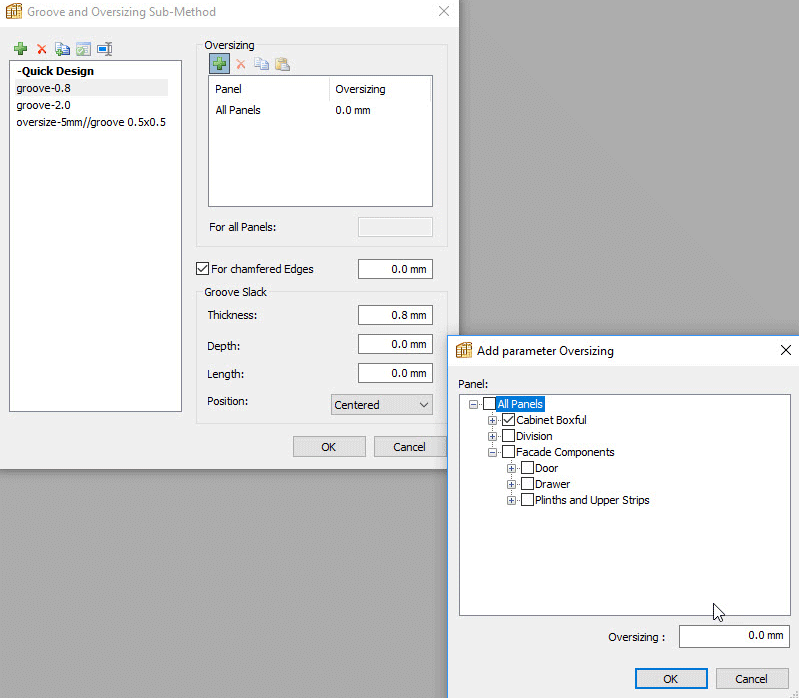
Extension of the Oversizing sub-method
A specific oversizing value may be defined for each panel type, whether chamfered or not. Oversizing is used when you cut the panels on a saw. The saw can make the edges splinter, so you cut the panels a bit larger (oversize them). The CNC then removes this excess material.
Now we can give different oversizing for different panel types, if for example you only want your doors oversized.
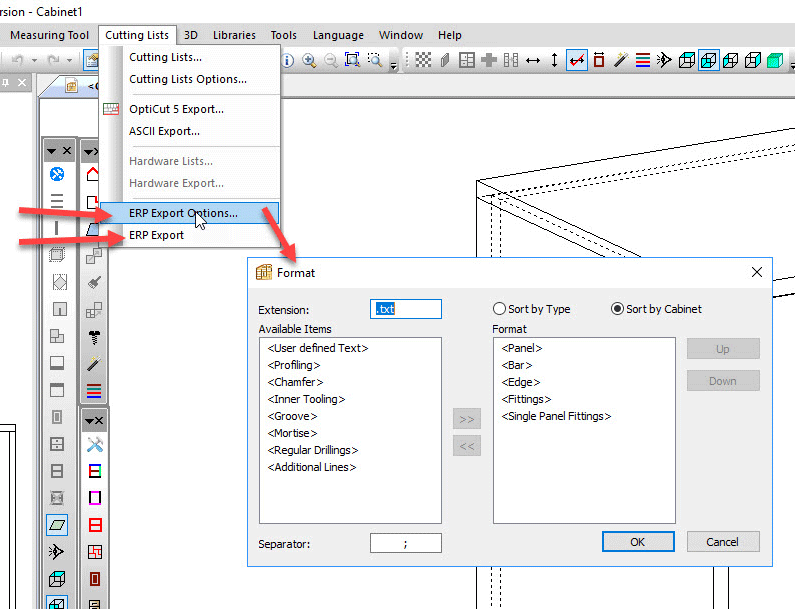
Configurable ERP export
A new ERP function exports a global file including one section per each bill of material item (panels, bars and fittings) and each machining item (profiling, drilling, grooving, etc.).
For each of the above items, the Options button opens a fully configurable format window to enable deeper integration with your ERP.
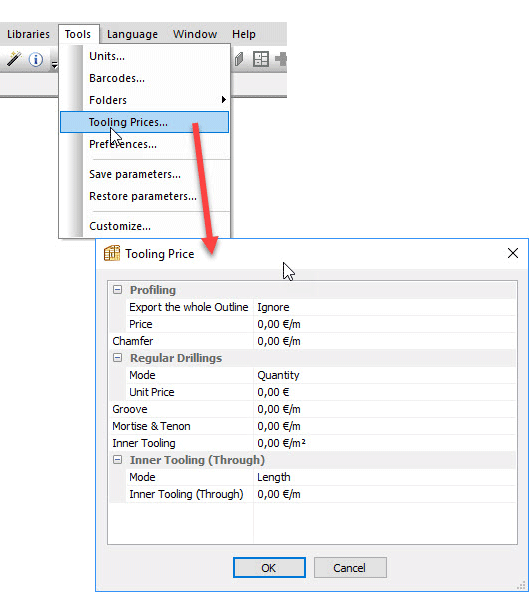
Additional machining data
A new Tooling Price feature adds extra tooling operations into the global cost report, both in terms of cost and quantity.
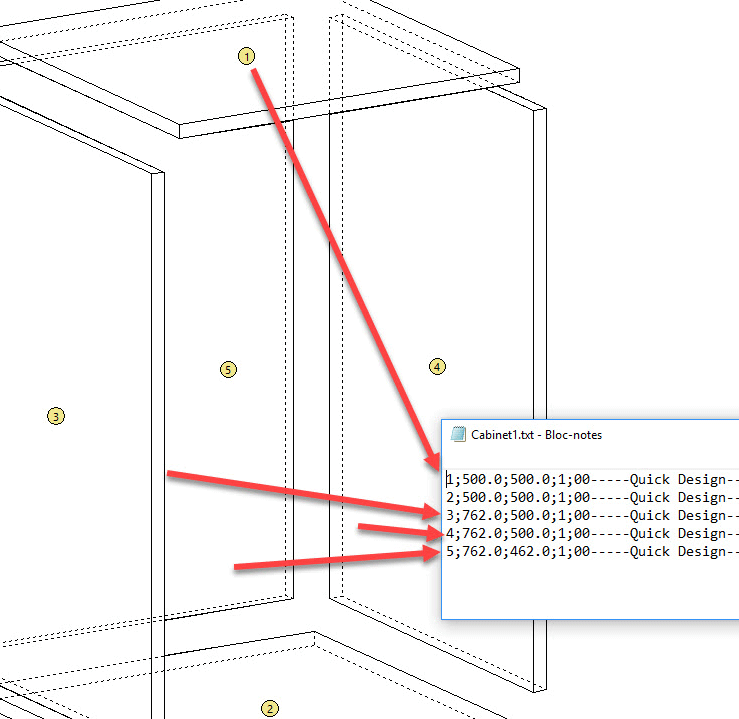
Cutting list/exploded view part number available for output
This number reference is now output in the cutting list data, both in ASCII format and for OptiCut.
Configurable OptiCut additional references export order
The order of output of these references can now be adjusted.
Post processor enhancements
The entire post processor structure is being redeveloped. Following this a number of new features will be released, more details to follow.
New Assembly Details
Halving joints
All internal panels including Free divisions (these are shelves and uprights positioned at any angle) can be applied across multiple zones inside a unit and with a halving joint assembly.
Halving joints have been a much requested feature that allow the cross assembly of 2 panels without hardware.
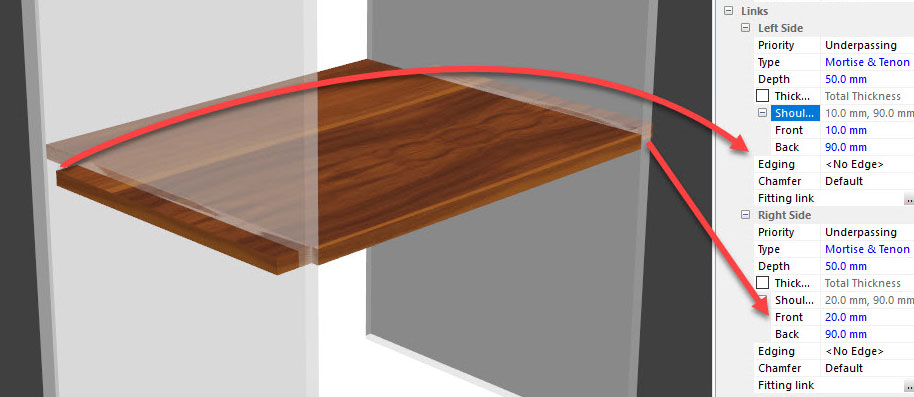
Asymmetrical tenons for added flexibility
The front and back shoulders, which share a common value in the sub-methods, may be set with different values in the properties window, leading to asymmetrical tenons.
Improved Management: Libraries, Methods, Preferences
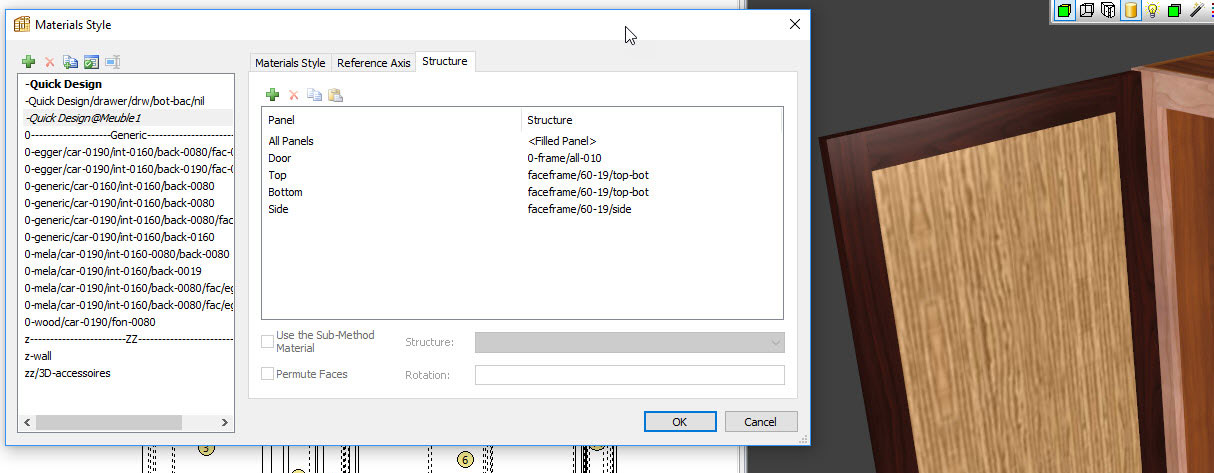
Structures associated with panel types
You can now add a structure to a type of panel. So for example doors can automatically come in framed as they are applied to your project. You no longer need to add these structure elements in a separate step. This enables you to automatically create a face frame cabinet just by selecting the correct panel types.
Turn off price display
Inside the improved Polyboard 7 View menu you can now turn off the display of the project/cabinet price which is normally shown in the lower status bar and in the properties menu. Helpful if you are presenting or editing a project on screen with your client.
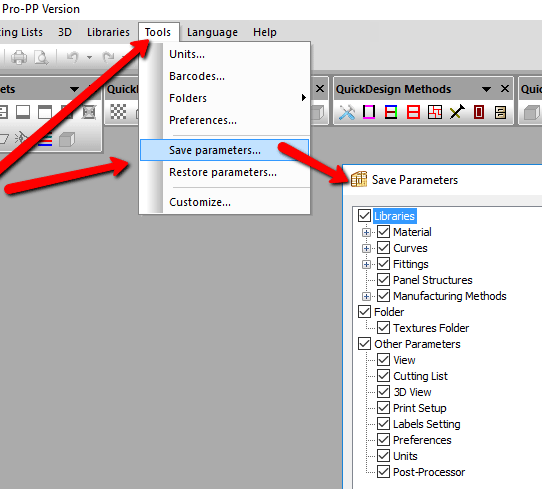
Save and restore settings
The new Save Parameters command exports a composite file including all the required data (excluding icons and toolbars) for a complete restoration. These settings include your libraries and manufacturing methods, your textures, post processor settings, print and label settings and more.
And the rest
- Larger libraries of manufacturing sub-methods now load faster.
- Menu tree memory feature so your property window, preferences and post processors are displayed as you left them next time you open Polyboard.
- Copy/paste multiple lines of a sub-method into another to speed up creation and editing.
- Improved copy/paste of structures including pasting with editable rotation and face parameters.
- Default sub-method name now editable.
- Fittings Links sub-method and nil panels: new option to remove fittings for panels linked to the nil panel.
- If you’ve got a lot of part names, a new search filter window lets you easily find what you need.
- Manual sorting of part names, so you can place a new part type in the correct place in your menus, rather than as previously where the names were listed in order of date of creation.
- More part types can now be renamed e.g. drawer internals, plinths, upper strips.
Ready to get started with Polyboard 7?
Order directly from our online store here
Or contact us today for more details and to request a demo
To access the Polyboard 7 download please can you register for free on our website.
Make sure you download the new Quick Design libraries as well to benefit from the full power of the software. There’s a video on the download page with instructions if you need them.
Hello, I have a problem applying the created parameter of method into another file, it only appears most of sub methods but not the whole one that I have for my existing parameter. I have tried to restore my parameter but it still miss 1 or 2 of the sub method and my method’s name
Hi Bun,
You may find further details on this subject in this article: https://wooddesigner.org/help-centre/polyboard-manufacturing-methods/
Don’t hesitate to reach out to our technical team on the forum if you still have any questions
The problem that im having right now is that i can’t apply all the my method to the new file that im creating, it appears most of the sub components and misses some of the sub component that i include into the main method.
Hi Bun!
You have two levels of methods and sub-methods, when you work on a cabinet, methods are dissociated from the original methods,
example cabinet@methods_name, In this case, editing is only applied to this cabinet when you edit methods or submethods, take the methods/submethods without @ in front, then apply it to the current cabinet to save your methods/sub-methods and update your database for your next project.
For detailed technical assistance, please make sure to use our forum: https://wooddesigner.org/forum/
hola buenos días, consulta el programa esta en español?
Hi Ramon, yes Polyboard is available in Spanish. I’ve just emailed you to discuss further. Thanks, Stefan
Can it post processor out put to SCM .PGMX file? the old version can do only .PGM file, please correct me if I am wrong.
Thanks
Hi Bancha, yes Polyboard’s SCM post processor includes the XConvertor for .pgmx files. All the best
The new version has nothing else. can you give me a try
Can the new version of polyboard be converted to Gcode?
Hi, as before you have a range of post processors inside Polyboard which output to the CAM software that comes with your CNC machine. This CAM software in turn outputs the GCode.
Please click here for more details on how to integrate Polyboard with your CNC. Thanks