One of the key elements of any stair build is the staircase installation element. It must be thought out and considered in detail early on in the planning stage.
Staircases are of course large, cumbersome and heavy. Even so, they can be relatively simple to put together in your workshop, with the space you need, and all your tools at hand. Things get a lot more difficult if you have to assembly on site, especially where space is a premium.
Nonetheless, you can sometimes find the space to assemble the stair laid out on the floor. Once complete, it can be hoisted or lowered into place. Not so easy is the question of how to install a staircase if you are obliged to put it together actually in the stairwell, as is often the case with renovation work.
The video above shows a stair that required just this, installation directly into the stairwell. These are some of the problems we faced:
- Insufficient space to allow assembly outside the stairwell
- An extremely tight fit between two walls
- The walls were clad in plaster board so it was hard to fix the stair to a strong support
- The stairwell itself as irregular which made it hard to obtain accurate dimensions
These are some of the solutions we found to manage the situation:
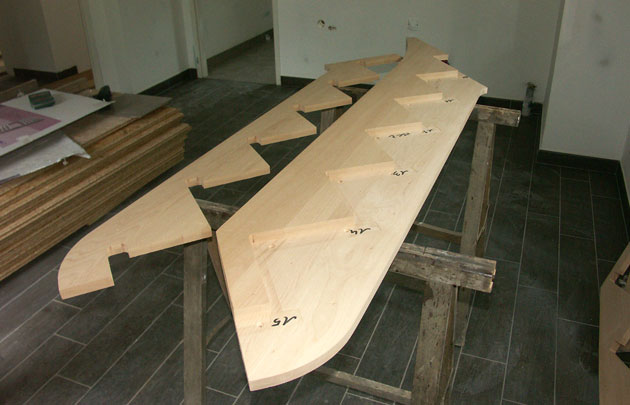
- Use of three part strings allowed installation directly into the stairwell
- Ensuring minimum play between the strings and walls and using flexible filler to ensure a great fit
- Use of a polyurethane based glue to fix the strings to the plaster boards…this is an expanding hard glue that was ideal for spreading the weight of the staircase right the way along the string/wall interface
This image shows the set up of the three part string:

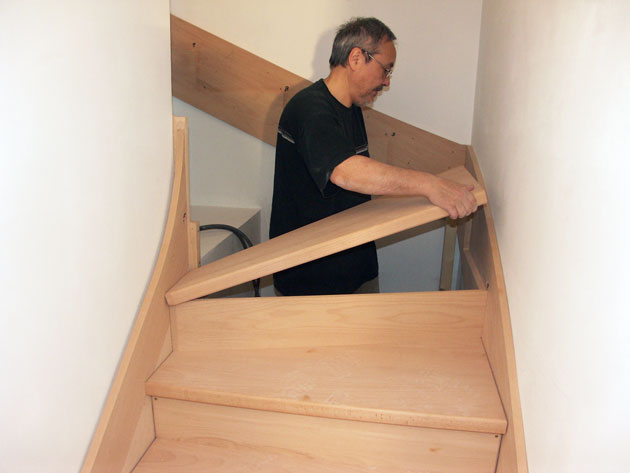
This image is an example of me putting in place a step on the lower portion of the cut string:

The video above provides a summary of the techniques we used. We’ve got further videos in the series here that describe the stair installation in more detail.
These stairs we designed using our stair design software StairDesigner.
Thanks very much!
