This article is Part 2 of our guide Stairs: Taking Sizes.
It focuses on the importance of the on site measurements, and how to do that accurately and easily.
Here’s a link to Part 1: How to Measure Stairs
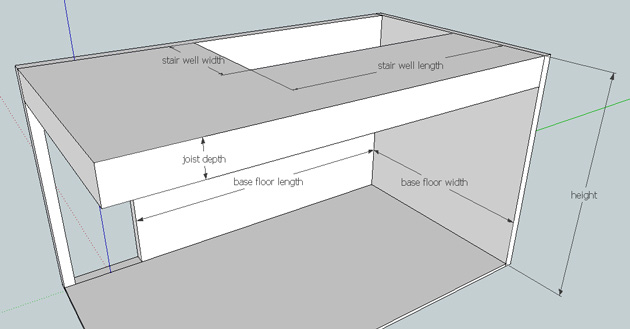
Basic measurements
Here is a very basic checklist of on site dimensions:
- Stairwell length and width
- Floor joist depth
- Floor to floor height
- Maximum base floor length and width
If you’re making a stair in a recently built stairwell, taking the sizes may well be very simple. But even for a simple project I suggest strongly that you verify these basic points:
- Are the walls plumb?
- Are the floors level?
- Are the angles of the walls at 90°?
If any of these points are not perfect you will have to measure their deflection and mark it on your sketches.
In renovation work taking on site sizes can become very complicated and it’s more than likely that none of these points are true.
The following are some tips for the more common difficulties that can arise…
Floors are not level
Be careful if the floors are not level as this will change the total height of the stair.
It’s common to measure the total height by pulling a tape measure from the lower floor level to the upper floor but if either floor is not level the total height will have to be adjusted.
The example below shows a slope on the upper floor. If the height is measured from the left the real height of the stair will require subtracting the level deflection from the measured height.
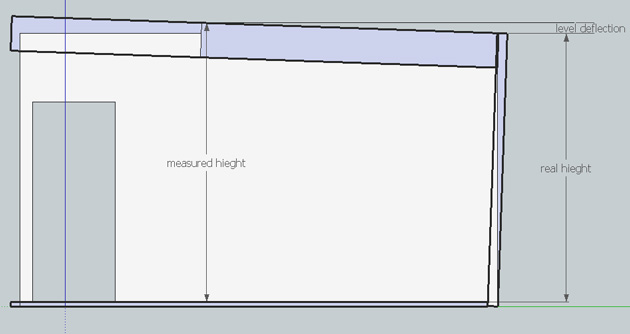
Of course it can often be the lower floor that’s not level and as often as not it’s both and you’ll have to note all the level deflections to calculate the real height.
Walls are not plumb
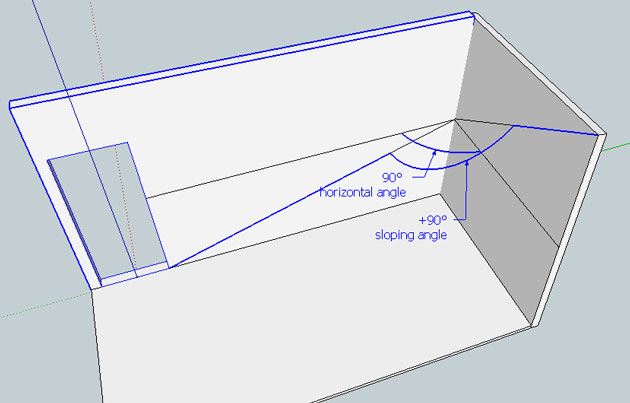
If walls are not plumb you must be aware that the stair size will vary accordingly.
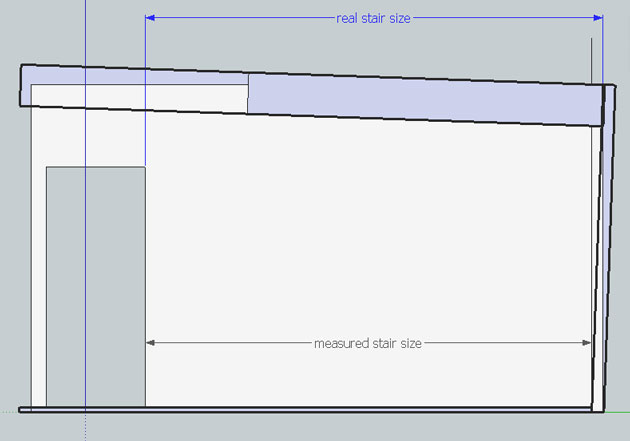
Note as well that if the walls are not plumb though the angles of the walls may be at 90° measured on the level, when measured at the slope of the stair this angle will vary.
For small differences in the wall vertically, angle variations may be insignificant and easily absorbed in the 10mm play, but for larger differences it can be useful to measure wall angles approximately on the slope of the stair and include this in the stair design.
Complex stairwells
In renovation work stairwells can get really complicated.
Difficulties often arise due to irregular walls, floors not level and often obstacles that make precise measurements difficult to take. When a stair rises up through several different floors heights, getting accurate measurements that enable the exact overlaying of different floor configurations can be a real nightmare.
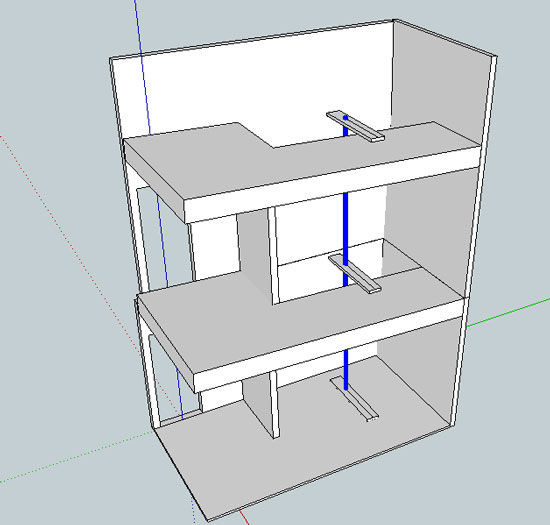
One way to simplify measuring a complex stairwell with irregular walls and different overlaying sections is to use the central pole method.
This method can be used using a standard tape measure but is far more effective using a laser meter.
The idea is to create a central reference point and reference plane in the stairwell. To do this I fix a central pole perfectly plumb approximately in the middle of the well.
The pole is held with boards screwed or clamped onto each floor. Note that I have also drawn the centre line on each board.
For the pole you can use a 30mm dowel, tube or any round object.
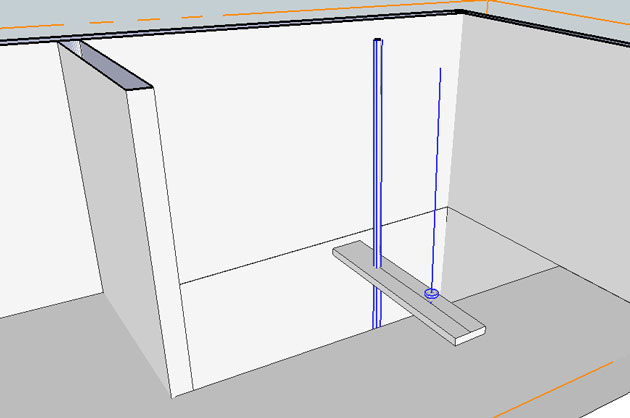
If you are measuring with a laser the easiest option is use a thick rope that you can hang from the upper board with a weight at the bottom to keep it tight. The boards with their centre lines must form a perfectly vertical plane so make sure that the boards holding the pole are perfectly plumb with each other.
This is easily done by hanging a plumb line or laser plumb referencing the centre line on the support boards.
Once set up it’s possible to triangulate the shape of each level and get a precise measurement of the angles and the relative overlays of each floor.
Here’s the measuring sequence for each floor.
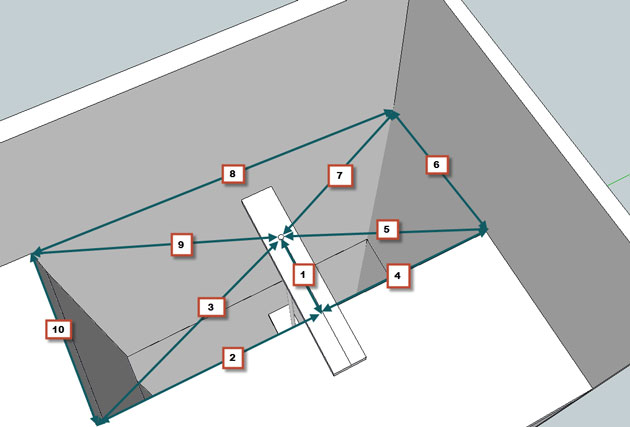
With this method all points are measured from the same vertical plane and it’s easy to align all the different sections.
Although this method gives precise measurements, I always suggest that you measure also the angles with an adjustable square and the walls and floors with a spirit level as a double check.
Note that these measurements give the shape and relative positions of horizontal sections of the stairwell but not the vertical sections that give the eventual slopes of the floors.
Conclusion
I can never stress enough the necessity for precise measurements of the original stairwell.
I have built many stairs for renovation work and for many taking the sizes has been the most challenging part of the project.
Renovation projects can get very complicated and it’s often necessary
to invent a specific tactic for the situation at hand.
One must always keep in mind that a bit of thought and preparation to put together an organised method will always save a lot of time and avoid errors in design and installation.
Please make sure you check out the rest of our stair building resources or ask on the forum for advice.
If you are an amateur stair builder, please consider using the free version of our staircase designer software along with a Premium Support subscription. This includes our stair cut list and parts processing service StairFile. It’s a great way to use pro software without buying it.
If you are a professional woodworker, and would like to take a closer look at StairDesigner please contact us to request an online demonstration.
Happy woodworking.
[…] The 2nd and final part of this eBook can be found here, covering the basic measurements required and how to manage tricky situations like irregular walls and floors. […]