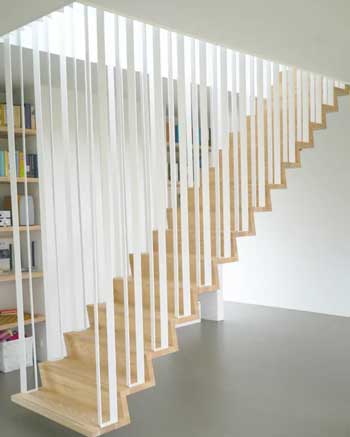
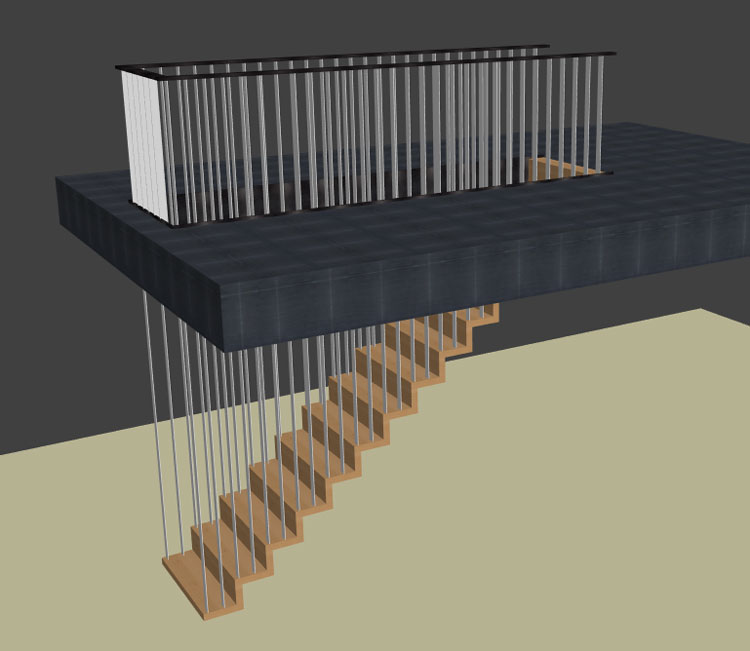
StairDesigner offers great design flexibility. This project example is a suspended stair.
It’s created with metal bannisters supporting the stair flight and securing it to the well hole. These same bannisters act as the balustrade for safety.
Let’s see how it’s done in StairDesigner
First, we need to define the stair flight (length, width and total height). We start the stair in multi-flight mode.
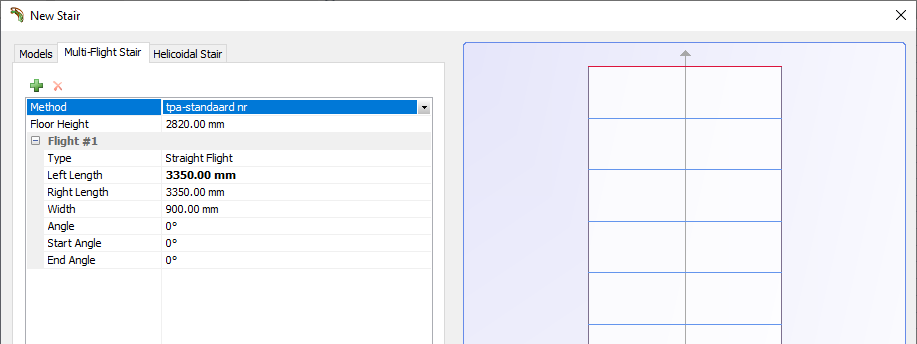
This is the best method as we do not need any stringboards or other elements at this stage.
We need to define the material parameters (step and riser thickness, and nosing).
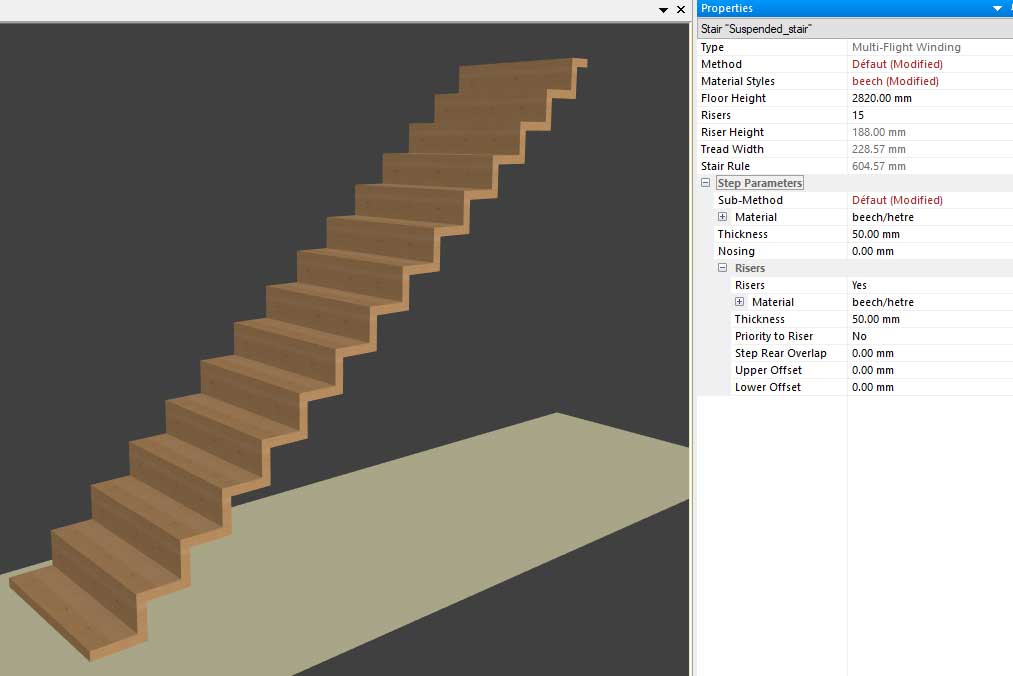
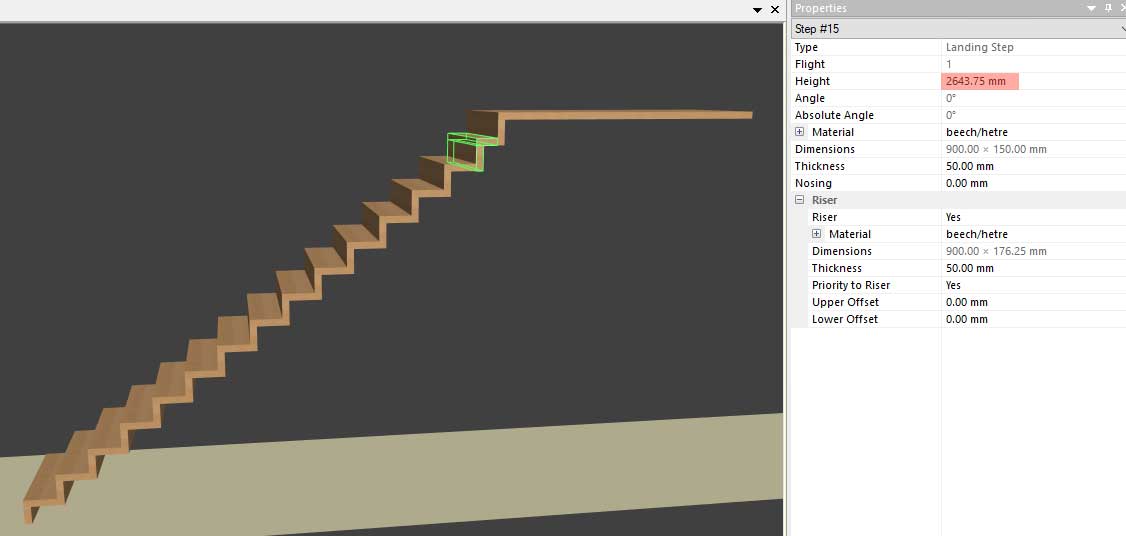
On the first step, we have removed the riser as this model needs to represent a suspended stair. We therefore don’t want to allow any contact with the floor. We have also added a landing step of 150mm inside the stairwell.
Well hole creation
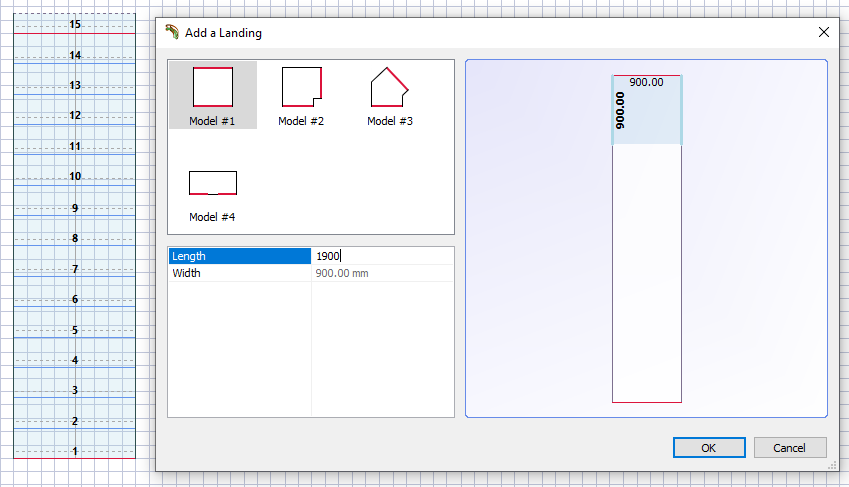
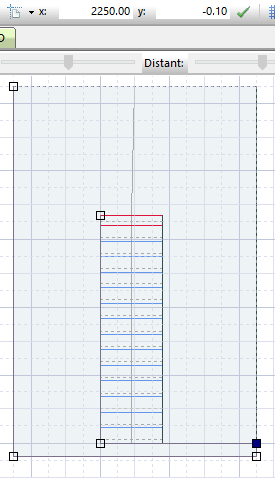
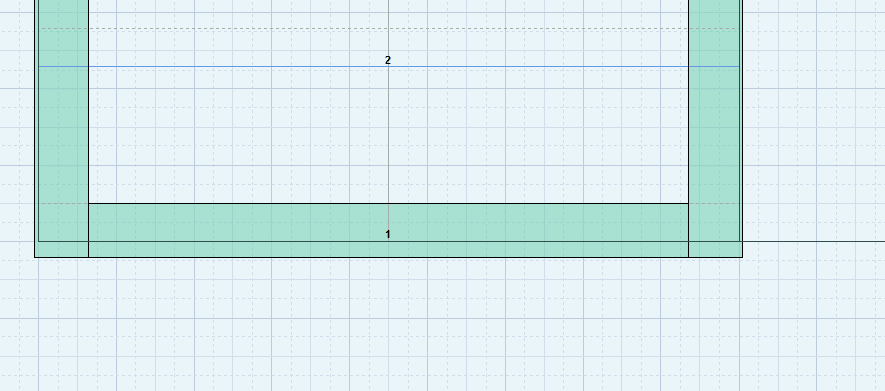
The next step is to define the well hole which is done by adding a second landing step which we will edit to a specific shape to create the floor joist.
We add a second landing to start the creation of the floor joist.
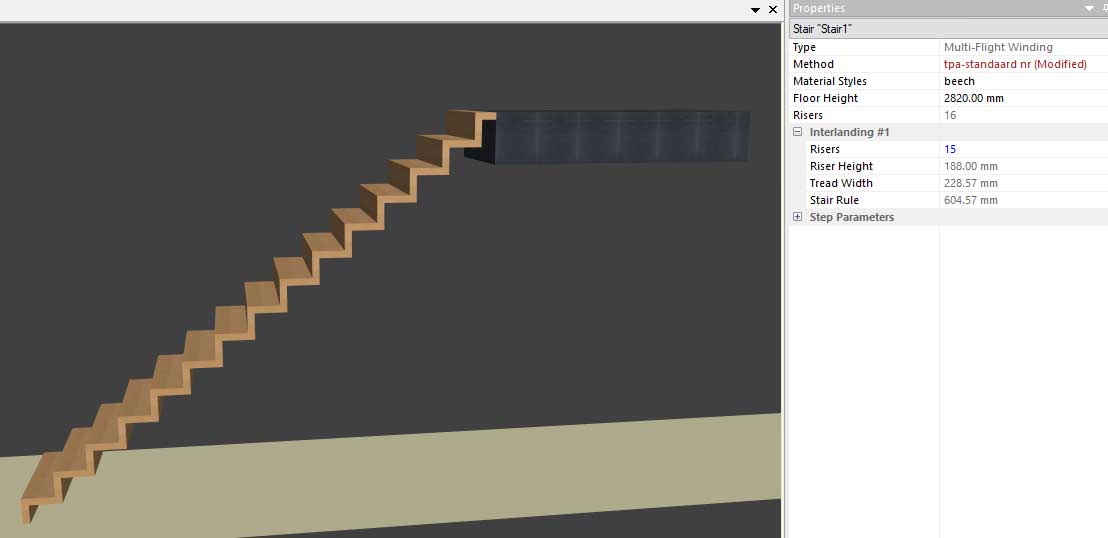
Adding a second landing in StairDesigner will redistribute the height so we need to correct this.
The first landing step needs to be reset to the total height which in this case must be 2820mm.
Also, we will set the floor joist thickness at 360 mm and give it a tile texture.
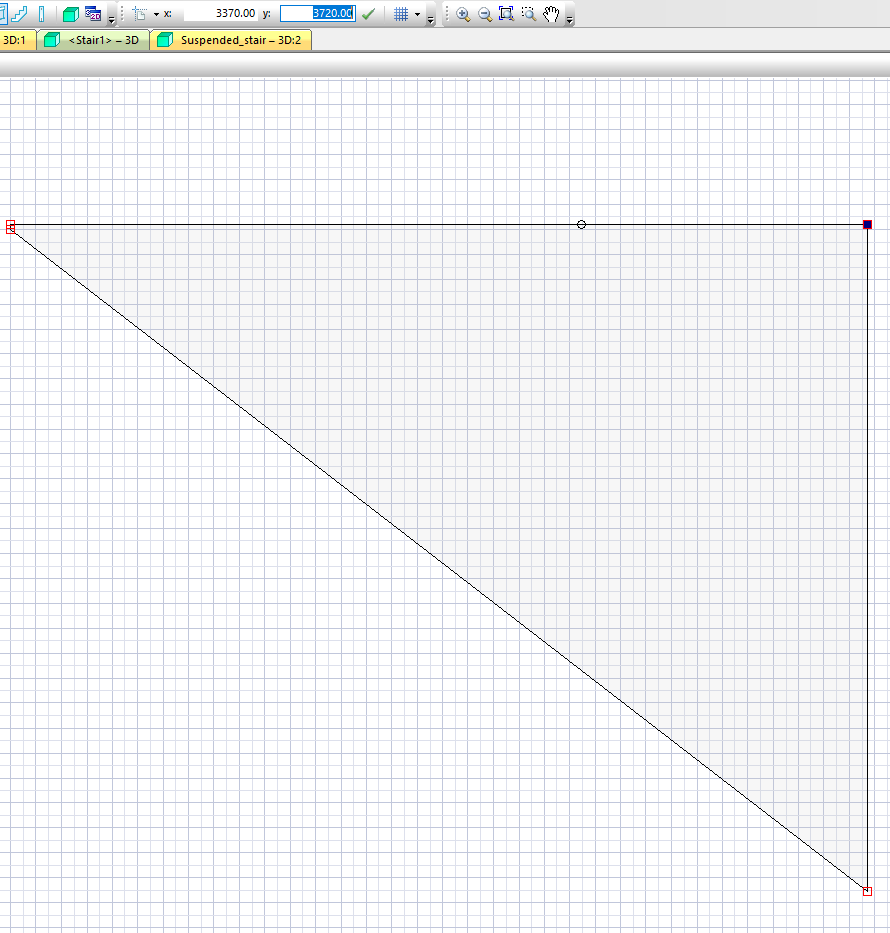
Now we can start modelling the well hole around the stair.
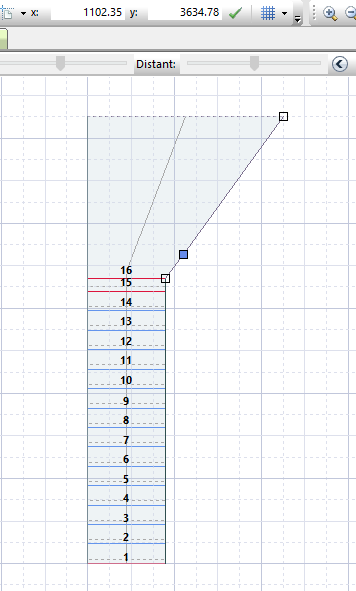
Double click on the right side of the landing step to enter the editing mode.
You can now select the points and drag them around. A better option is to use the coordinate system which allows a precise allocation of your points however. A double click on the line adds and removes points.
This gives you total flexibility in shaping the floor joist.
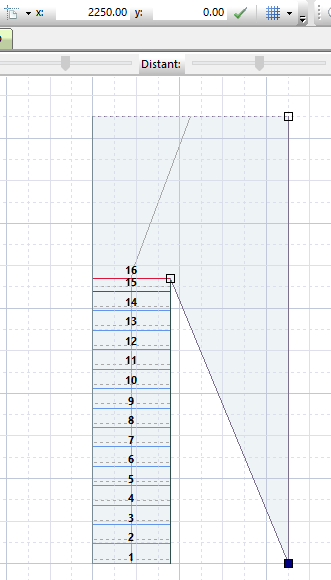
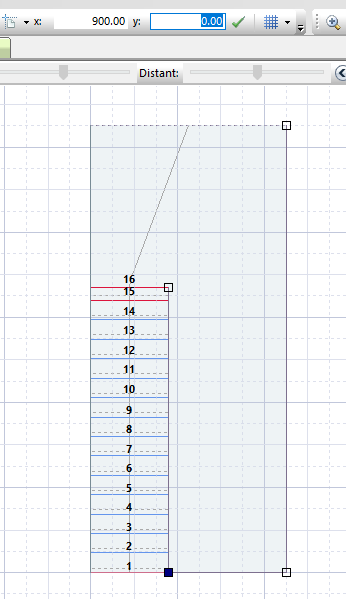
Do the same for the left side.

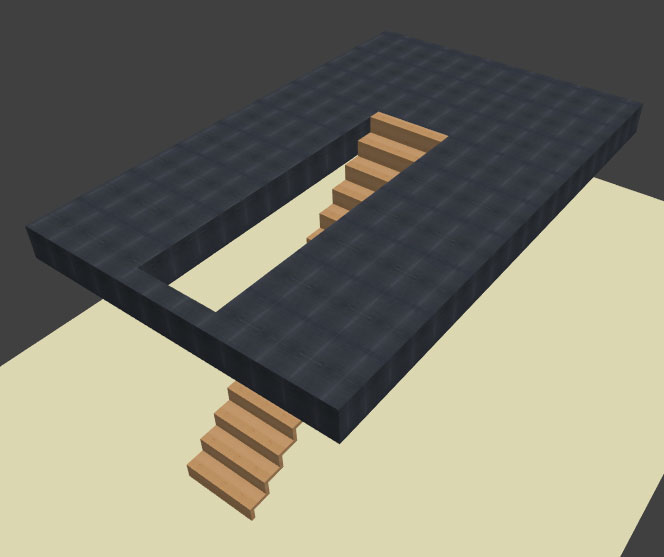
The floor joist and well-hole are now designed. This is the result in 3D:
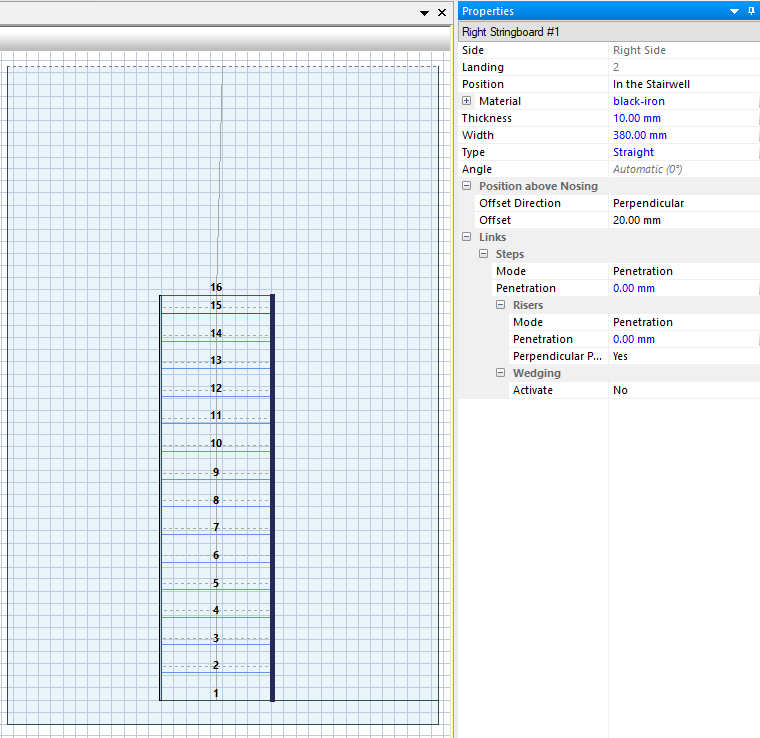
The next step is to add metal plates inside the well hole. These are represented by stringboards and will be used to fix the metal bannisters so that the stair will be suspended from the floor and be carried by the floor joist.
Add a stringboard left and right from the flight with the corresponding parameters. Also, add a stringboard on the front side of the well-hole to close the balustrade.
You also need to remove all penetrations in the links parameters.
Banisters and balustrade
Now this has been done we can start with the bannisters and balustrade creation.
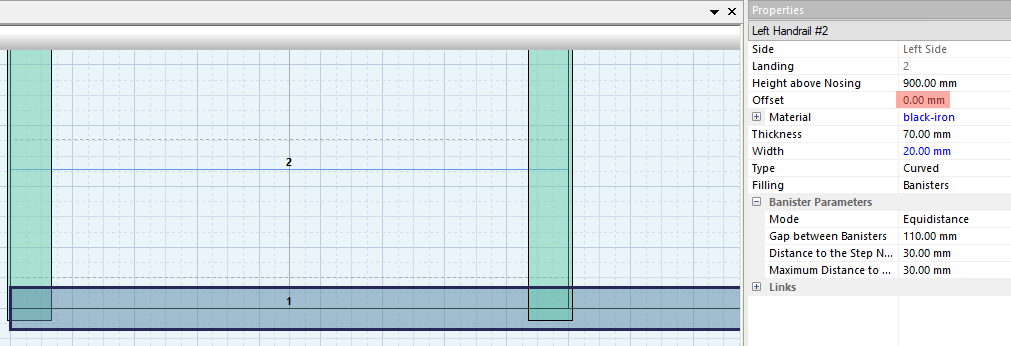
First, add a handrail to the left and right of the stair flight.
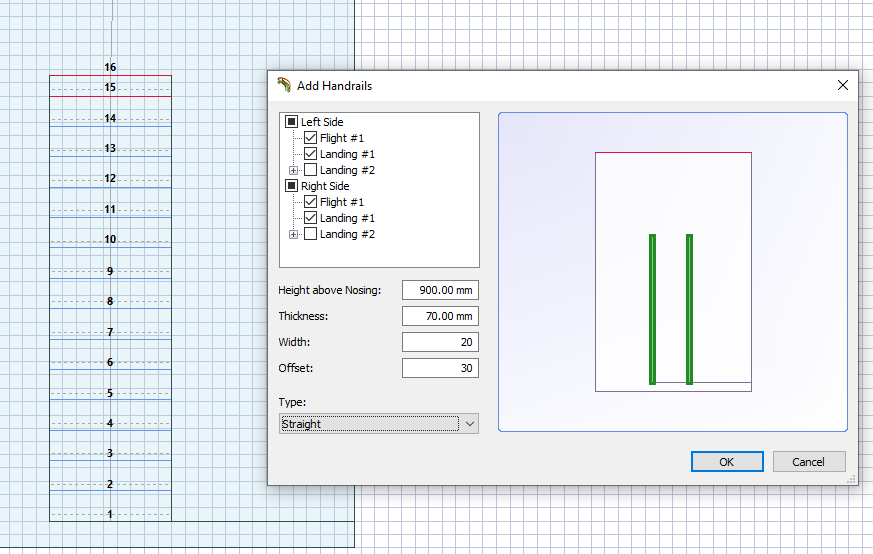
Enter the parameters and confirm.
You can also shape the bannisters in the handrail parameter and apply your preferred textures and spacings.
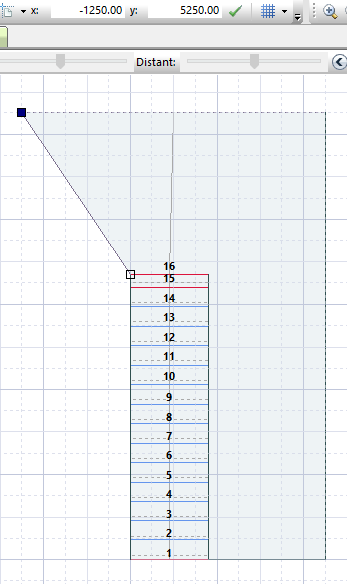
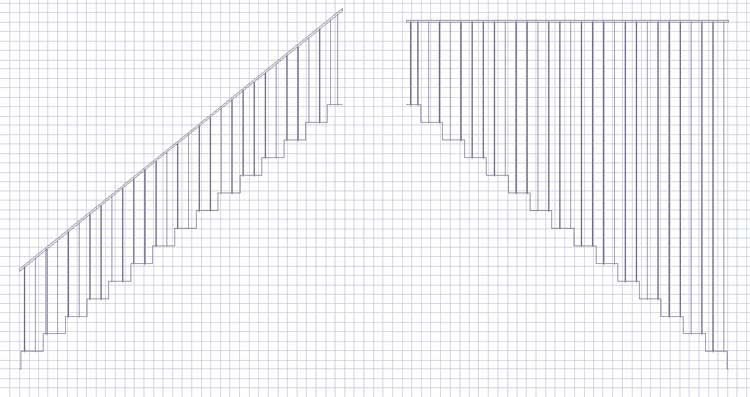
We need to turn this into a handrail/balustrade combination. We do this by editing the handrail height. Select the handrail view
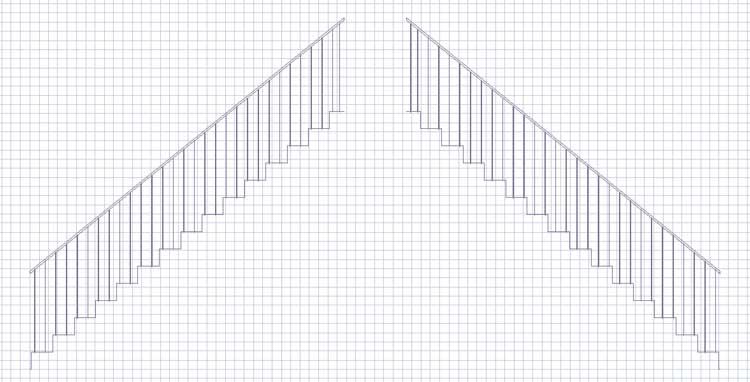
A double click on a handrail will start the editing mode. We need to move the points to their correct heights to create the balustrade. Again, the coordinate system is the best way to do this.
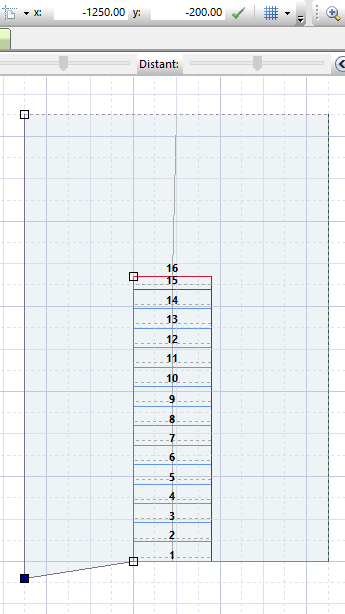
This is the result of the developed view.
Do the same for the left side and add the handrail on the front side of the well hole.
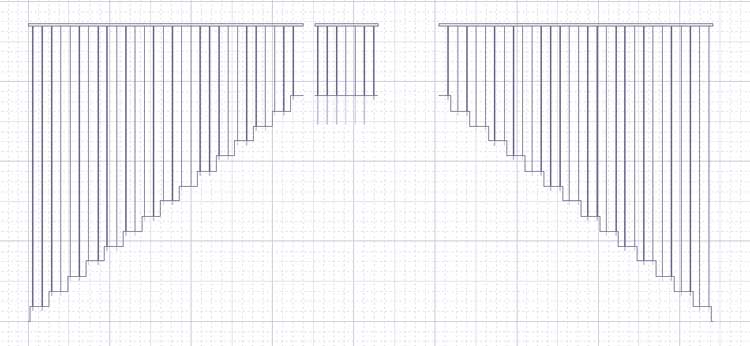
To achieve the required geometry for the front handrail we will need to adjust the position and cut the handrail to the correct size.
Front handrail creation
The front handrail is added dependent on the floor joist structure used. In our example, it looks like this:
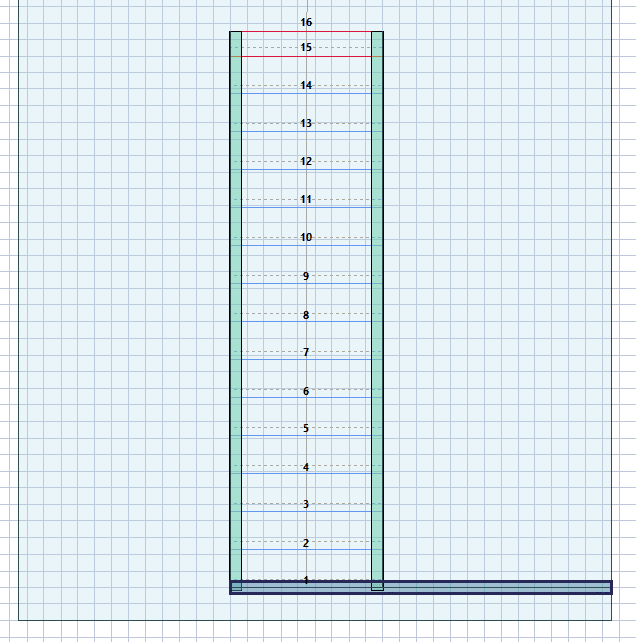
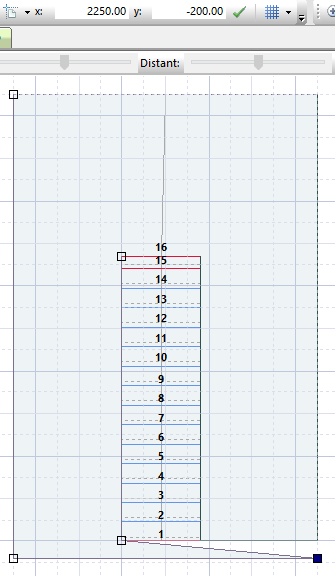
We need to align the handrail correctly and cut it to length.
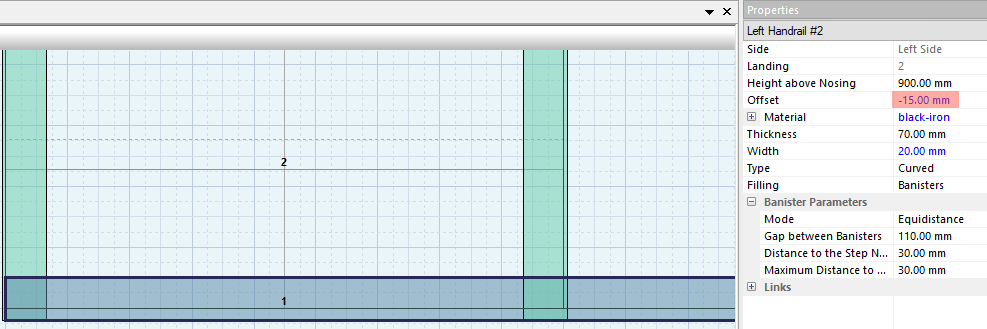
Use the offset to align the handrail correctly.
In this project, it is a -15mm offset.
Now we need to cut the length. This is also done in the editing mode. We need to edit the stairwell and add a point where you want to cut the handrail.
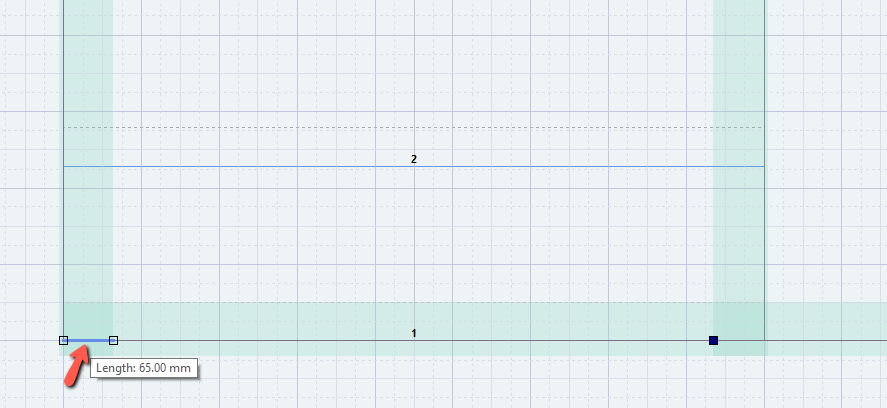
Position the point to the exact location by using the coordinate system. Hovering the mouse over the line will give you the length of that line so that you can check and adjust accordingly.
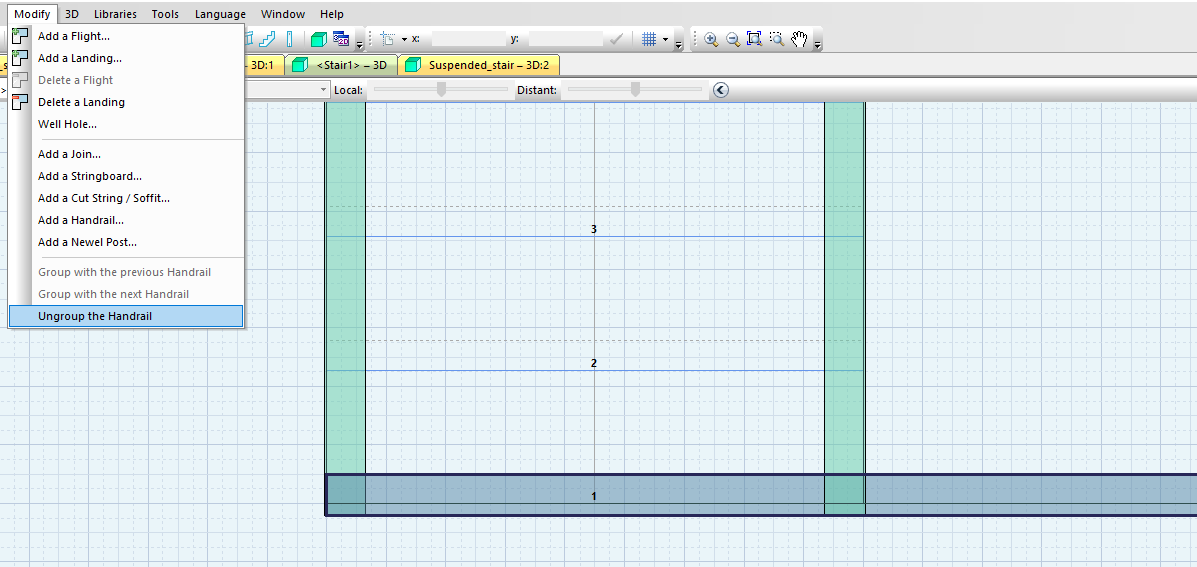
Now you exit the editing mode and select the handrail. Go to the “modify” menu and ungroup the handrail.
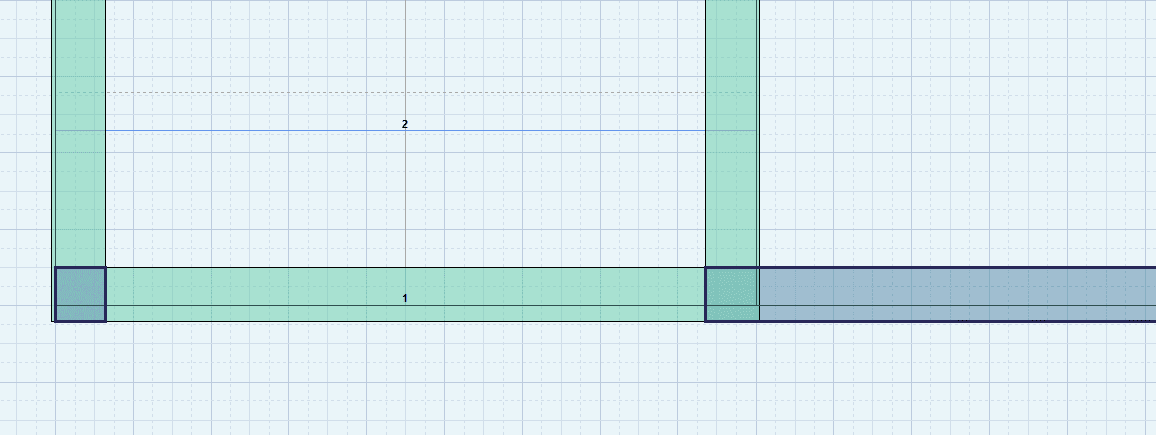
When done you can now delete the excess handrail parts.
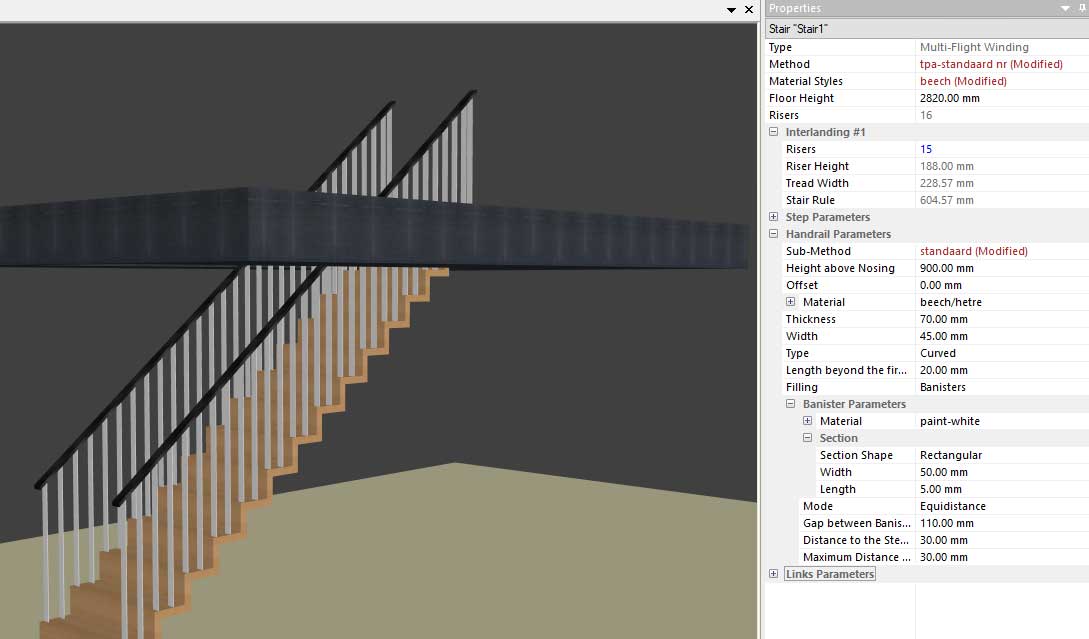
Finished suspended stair design
The project is now finalized, here’s the result in 3D:
Suspended stair download
The StairDesigner .stair model is available here for download.
Click here to download suspended stair model
You can also click here for more details on our stair designer software, and to test it out yourself.
Working on anything exciting?
Do you have a nice project you’d like to share with us?
Please contact us here and send us your project
Explain your process with images and any other project details you have and we’ll pick a good one to showcase in a forthcoming newsletter.
Thanks for reading!