Create cutting list
Panel cutting list
Now that the stock is set up, it’s time to create the cutting list of parts for optimization.
There are a number of ways this can be accomplished.
Manual import
One option is a manual import. Click on the New panels cutting list icon here (the new bars cutting list icon is right next to it):
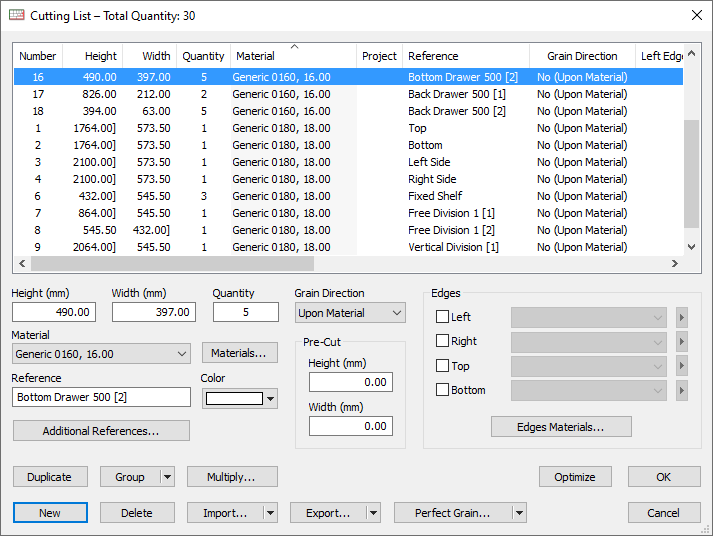
The cutting list window opens.
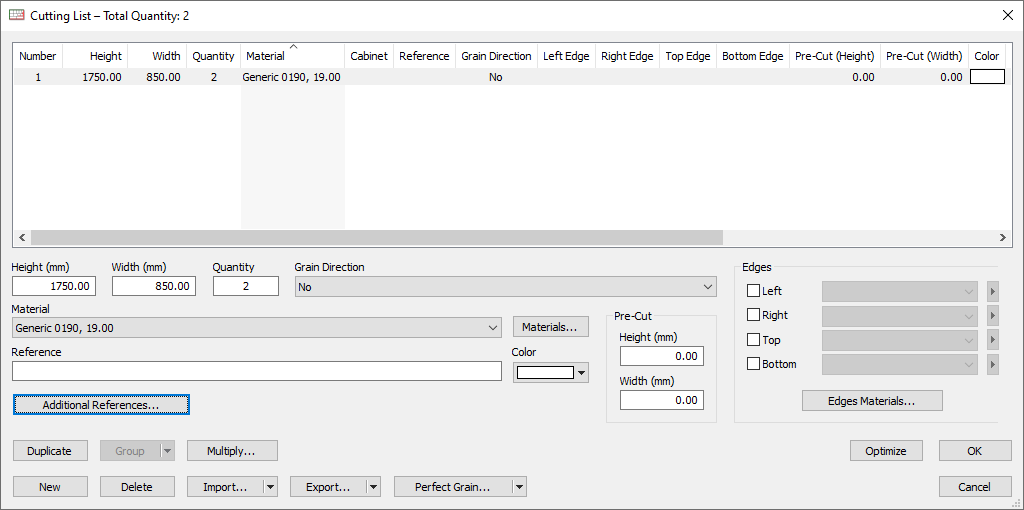
Select New and start adding the details of the first part.
Here we’ve kept things simple and added:
- Height
- Width
- Quantity
- Material: from our already configured list of materials
Additional cutting list management buttons
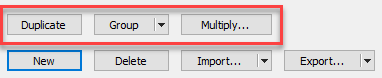
- The Duplicate button creates a copy of the selected line
- The Group button groups identical lines into a single line
- The Multiply button allows you to quickly add additional identical parts
With the Multiply option, select any row or group of rows or even to the entire cutting list and create more of the same.
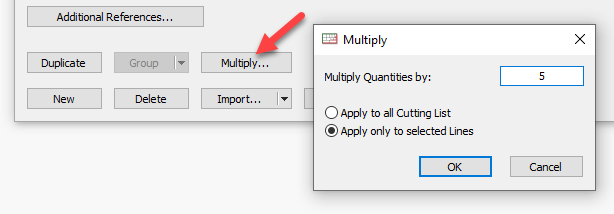
★ Tip ★
Use the shift key to select adjacent sets of lines. Hold down the control key to select multiple lines.
Spreadsheet/csv/text file import
The cutting list can be imported from a spreadsheet just like the stock as discussed previously.
Here’s a six column spreadsheet outlining a basic panel cutting list.
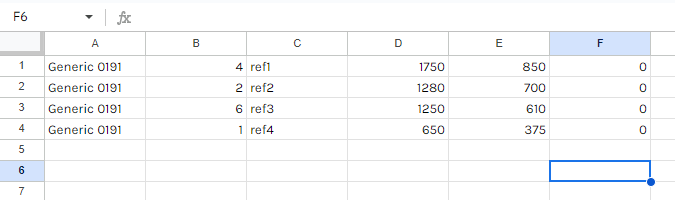
The columns detail from left to right:
- Material
- Quantity
- Reference
- Height
- Width
- Grain (0 = no grain, 1 = grain)
Now the import options must be set up to match.
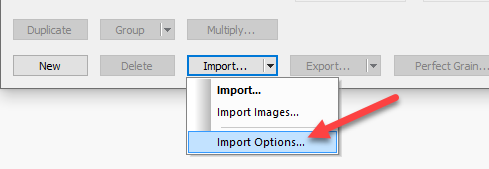
The image below shows the cutting list import options for panels.

Check that the units are correct, and note and if necessary change the separator. When saving the spreadsheet as a csv or text file, the separator used in the file must match this setting.
Drag field names between the two windows or use select and use the arrows to move. Select a field and use the Move up and down buttons to adjust the order.
The Import format window shows the six spreadsheet fields in the correct order required to match our spreadsheet.
★ Tip ★
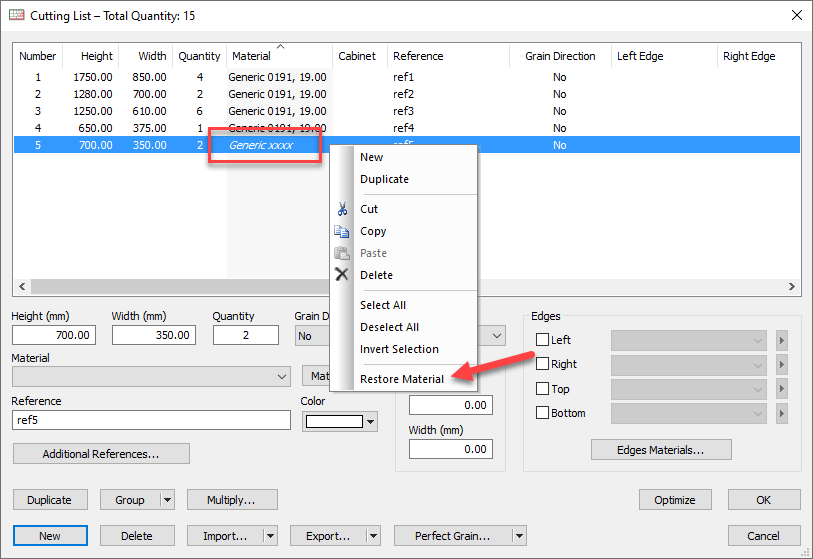
If a cutting list references a material that is not yet in OptiCut, it will show as greyed out.
To quickly add this material:
Right click on the part > Restore material.
The material will now be available within OptiCut. Note, it will still be necessary to define the stock relating to the new material before optimization.
DXF file import
Parts for a panel cutting list can be imported as DXF files.
These files are essentially just a drawing of a part, OptiCut will take the dimensions from the DXF file and add this to the cutting list.
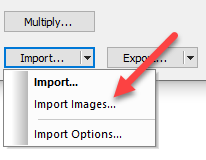
Image import
Again, just for panel parts, images can be imported. The image dimensions equate to the part dimensions.
PolyBoard import
PolyBoard integrates seamlessly with OptiCut, and this includes sending the cutting list to OptiCut completely ready for optimization.
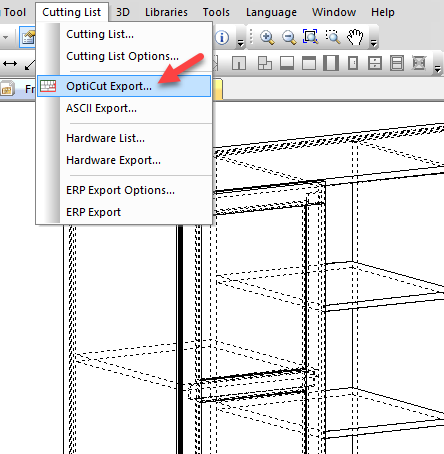
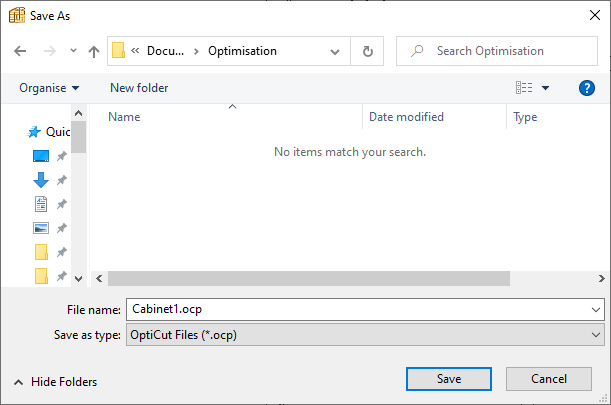
With your finished cabinet open in PolyBoard, go to Cutting list > OptiCut export.
Select a location to save the resulting OptiCut file. If your project includes panels (filename.ocp) and bars (filename.ocb), two files will be created.
These OptiCut files contain the cutting list information. Once an optimization has been run, this along with the optimization results will also be included in the file.
Open this file subsequently to access all this data.
The cutting list then opens directly in OptiCut.
When imported from PolyBoard, along with the part dimensions, quantity and material, a whole range of additional parameters are automatically imported, including:
- Grain direction
- Perfect grain, more on this later
- Edging
- Oversizing
- Additional references for machining and label management
Alternative software integration
OptiCut can be started from another software using a Windows command line. This will import the cutting list to OptiCut and export the results file following optimization.
Please contact us for details.
Grain direction
Grain direction follows the longer side of the panel or part as a default.
If a part has a grain, OptiCut will place it on the panel so that the grain matches the panel grain.

The different grain direction settings are:
- Upon material: follows the grain imported from the material, as specified in PolyBoard (-1)
- No: ignores grain direction, OptiCut does not take grain into account when placing the part (0)
- Yes: activates grain direction (1)
- Reverse grain: reverses the current grain direction (2)
The values required for import from a spreadsheet and csv and text files are shown in brackets.
Edging
Edging can be applied to any or all edges.
The thickness of the edging is subtracted from the part dimensions. These are the net cutting dimensions.
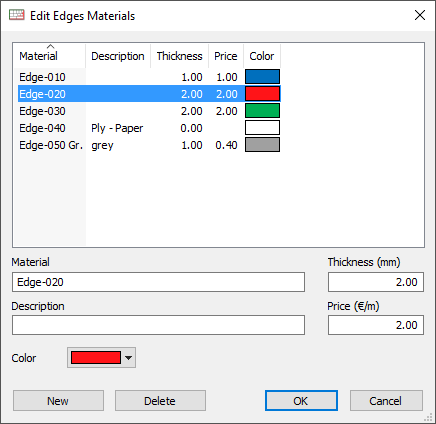
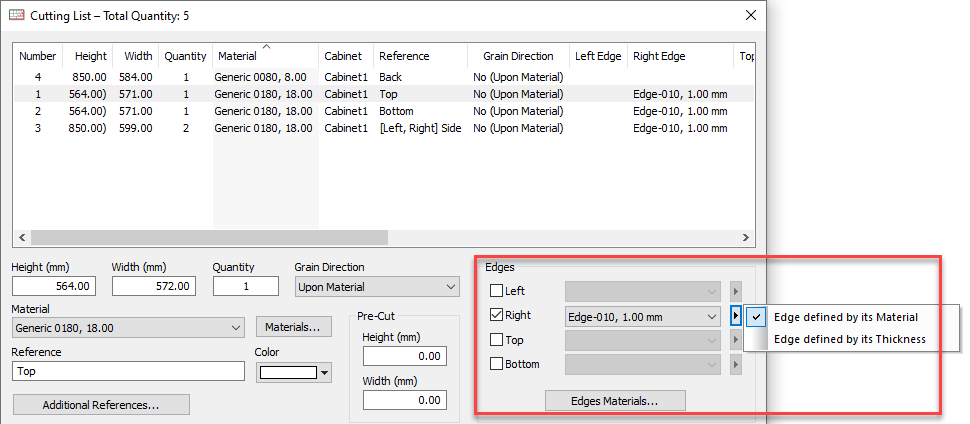
Edging materials are chosen from the drop down menu, and are stocked in the Edges materials library (Stock menu > Edges materials) shown below:
Edging can be defined either by its material or by its thickness. Some third party software will only import edging as a thickness, the 2nd option shown below can be selected in this case.
Defining edging by thickness can be set as a default in Tools > Preferences > Panels:
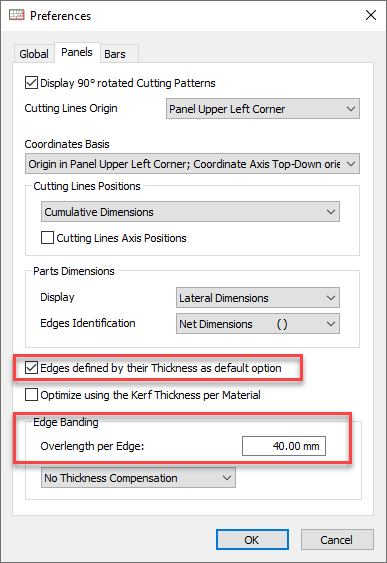
Also note the Overlength per edge setting. This is useful to accurately calculate the edging required as most edgebanders require some additional edging lead-in.
Pre-cut
The pre-cut or oversizing value is added to the part dimensions.

This is useful if you are cutting on a manual saw that doesn’t cut to the accuracy you need, and if used prior to machining on a point to point (part by part) CNC machine.
The parts will be cut on the saw slightly bigger than required to accommodate any inaccuracies, then the CNC performs an exact cut around the part edge prior to machining.
Additional references
Extra reference text fields can be added and associated with each line of the cutting list. They can be added manually or imported directly from data fields in PolyBoard.
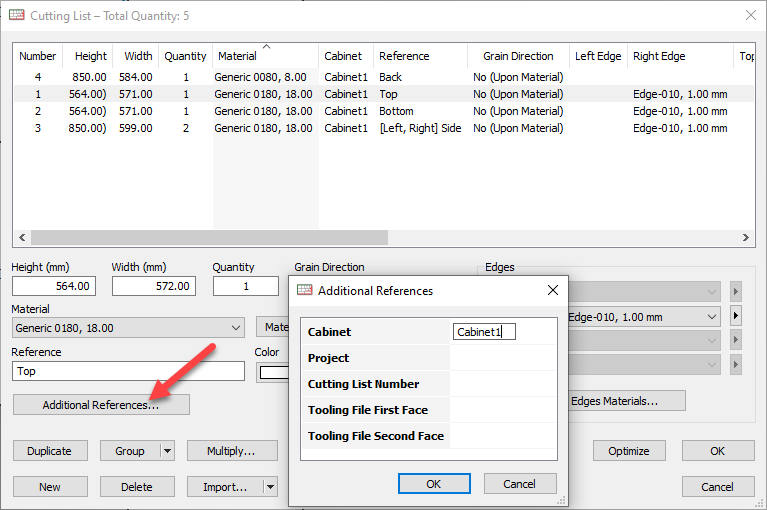
As an example, this allows the integration of machining information (CNC files) on the label output.
More details:
PolyBoard to OptiCut post processor label synchronisation
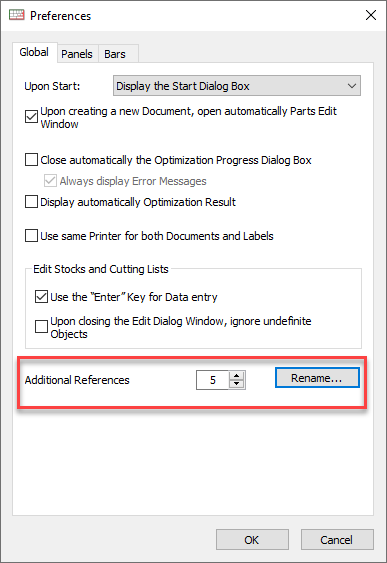
These references can be edited from the Tools > Preferences > Global window:
Bar cutting list
The set up for bars is similar to panels.
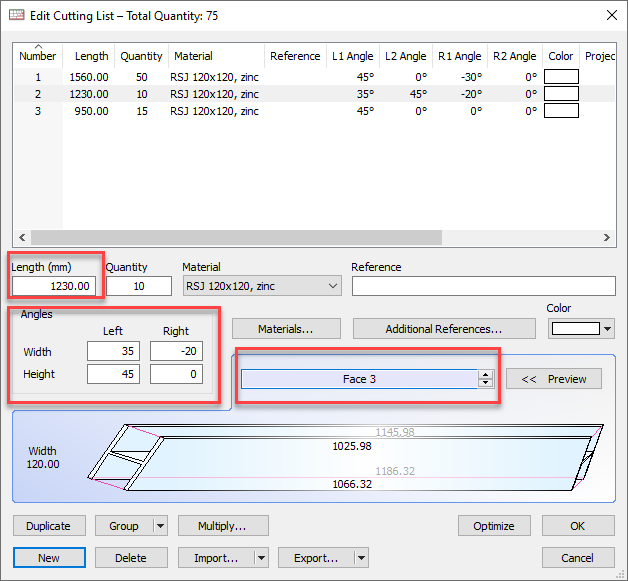
The key differences are:
- A length only is shown, instead of height and width for panels
- Angles can be defined for each end of the part, and in both axes
- A part preview is available, click through the faces to view from all sides
- Grain and edging is not relevant
- DXF and image import is not available
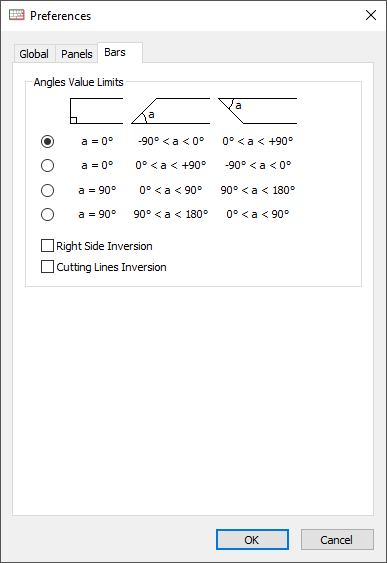
Tools > Preferences > Bars includes settings for the way you wish to input angles. For example, whether you would like to show a straight cut (at right angles to the part side) as 0° or 90°.
As a reminder, we have a video at the start of the Essentials section that includes the manual set up of a cutting list of metal profiles: