Stock set up
To carry out any optimization, the material stock must be set up first.
There are two elements to setting up the stock, which should be carried out in this order:
- Creating your materials
- Creating the stock of those materials e.g. the actual panels or bars
Material set up
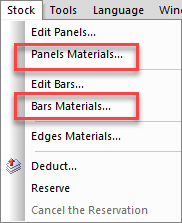
To view the panel materials library, go to:
Stock menu > Panels materials (the first option is highlighted below):
The library window lists all current materials:
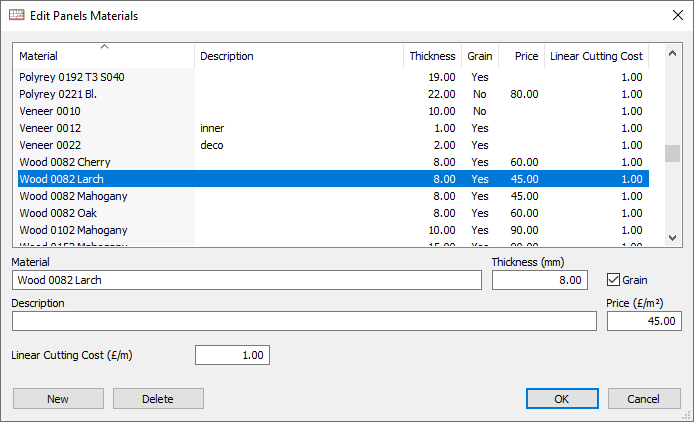
Click on New and complete the data fields to add new material:
- Material (name)
- Thickness
- Description (optional)
- Grain: whether the material will follow the grain or not (more on this later)
- Price: of the material itself
- Linear cutting cost: to cut the material
To delete a material, select it > Delete.
You only need to create a material once, you can reference this for multiple panels or bars of different sizes.
To view the bar materials library, go to Stock menu > Bars materials.
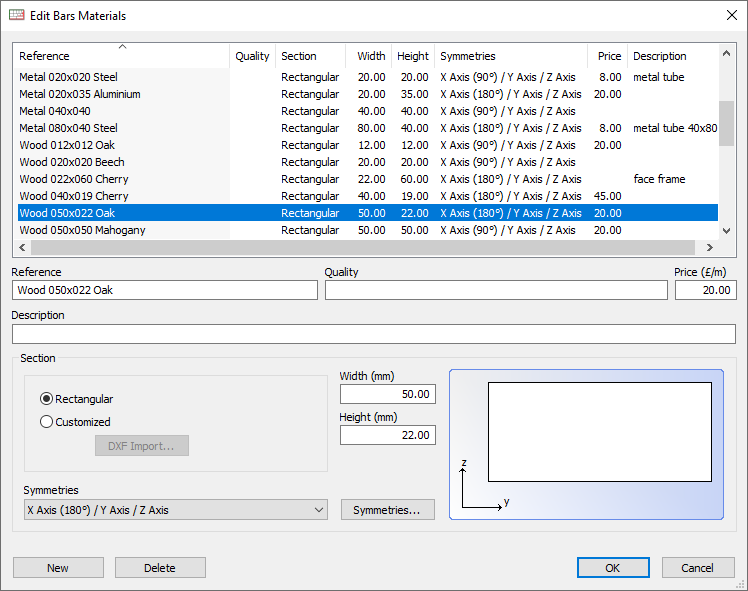
Data fields for setting up a bar material include:
- Reference: name
- Quality (optional)
- Description (optional)
- Price: of material
- Section details: a simple square or rectangle, or a more complex imported DXF shape used for steel joists or window profiles, for example
Symmetries is an advanced parameter useful for bar materials that are cut at an angle.
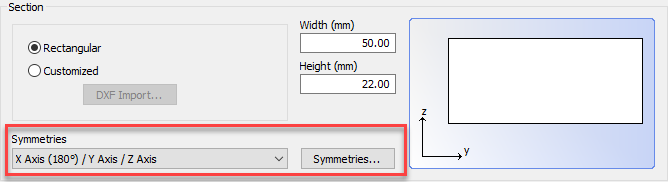
We can define how the parts can be flipped and rotated during the optimization to limit waste, allowing angled parts to fit as close together as possible.
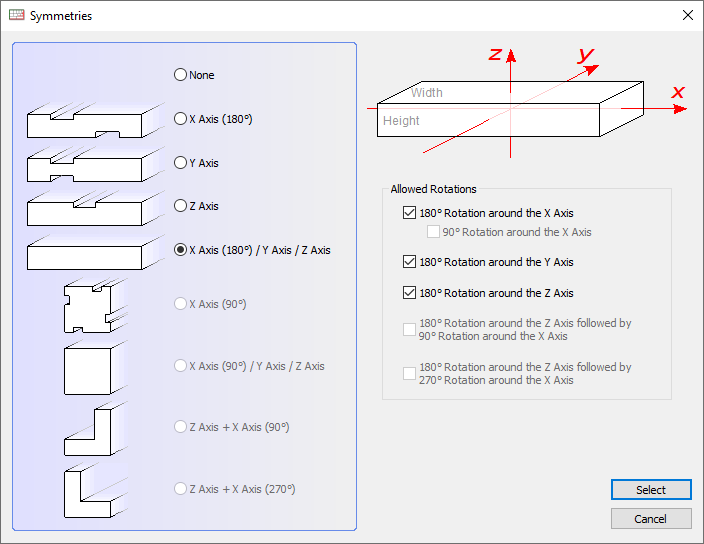
Please note, this specialist feature is only available in OptiCut Pro and Pro-PP.
PolyBoard integration
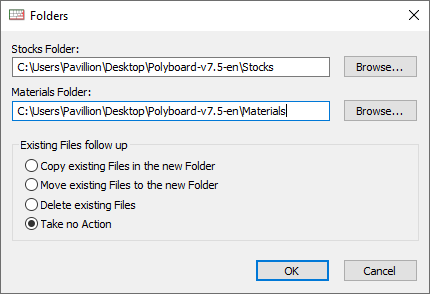
If you are using OptiCut with PolyBoard, you don’t need to create your materials in OptiCut, only in PolyBoard.
The PolyBoard installation automatically links OptiCut to PolyBoard’s material library.
Go to Tools > Folders in OptiCut to confirm that this link is in place to the Stocks and Materials folders in PolyBoard’s Quick Design libraries.
Material stock set up
Now we have the material, we can create the stock of panels or bars by selecting one of the options below.

Manual import
We will look at panels first.
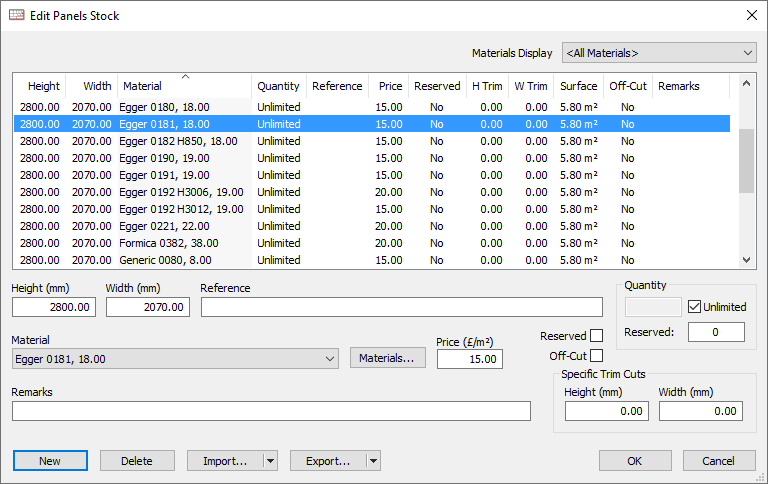
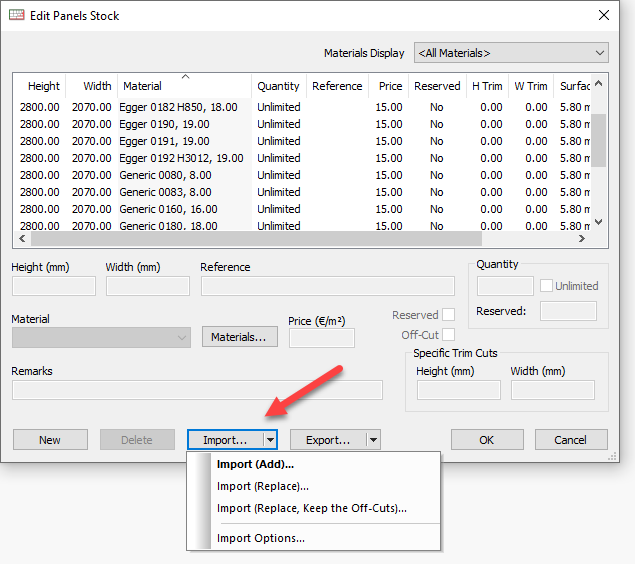
To add stock items one at a time, select New and complete the panel information:
- Height
- Width
- Reference (optional)
- Material drop down menu: select from the panel materials library
- Price: feeds into cost report, takes priority over material price
- Remarks (optional)
- Quantity: unlimited or enter a specific number of panels held in stock to fully manage stock levels
- Reserved: stock item will not be used for the optimization, can be reserved in full by checking box, or for a specific part quantity can be set
- Off-cut: whether a particular stock item is an off-cut from a previous optimization
- Trim cut dimensions
The trim cut is used if your panels are rough cut, the cutting pattern boundary will be set inside the panel by this amount.
The bar stock window is similar but there are no height and width dimensions, only length.
The trim parameter here is useful if the bar material stock comes with a rough end that requires a preliminary trim cut.
The advanced parameters window is included to define angles on the end of each bar stock item. It will also show the cut angles of any off-cuts that have been added back into the stock.

Spreadsheet/csv/text file import
Alternatively, stock can be imported from a spreadsheet into a csv file or text file and then into OptiCut:
New stock can be added to the current stock or can replace it.
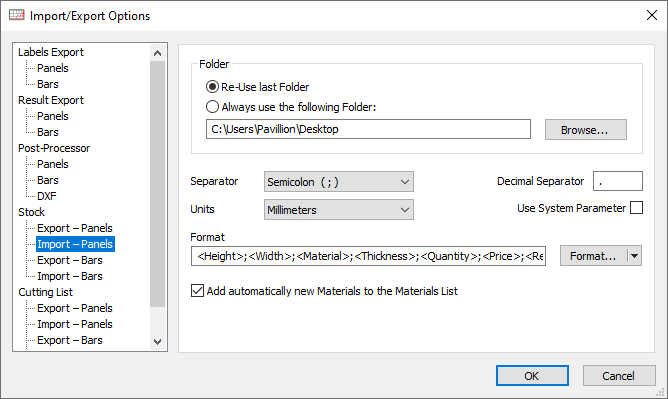
The bottom option in the drop down is Import options.
This opens the Import/export options window which is used in lots of different circumstances. In this case, we’re looking at the Stock > Import – panels settings:
Select Format to open the Import format window and match the fields and field order in the spreadsheet/csv/text file to those shown in the ‘Fields to be imported’ window:
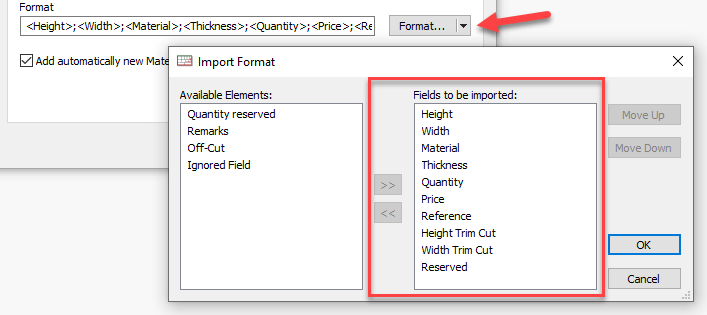
The field names can be dragged from left to right and vice versa, or select the field name and move using the arrows. There is also an option to change the order using the Move up and down buttons.
Also make sure the separators match, as shown in the previous Import/export options window.
Once this is configured, and providing the file column structure is maintained, the import will populate new stock automatically every time.
Bar stock is imported in the same way.
★ Tip ★
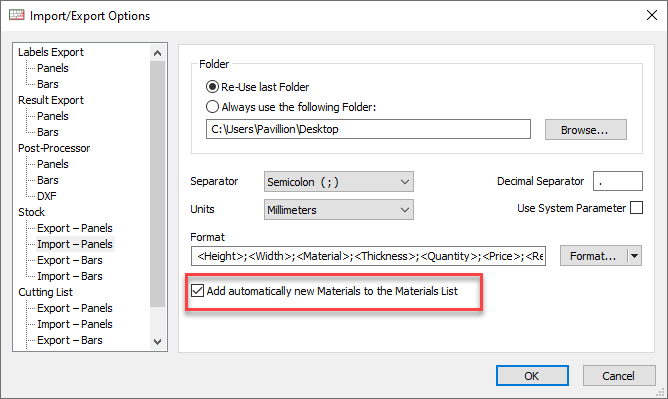
Select the checkbox shown below to automatically add unknown materials from the import.
Multi stock management
It’s possible to create multiple groups of stock and switch between them. This might be useful if you are operating different production lines.
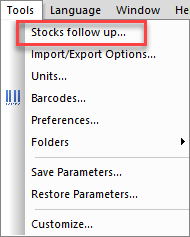
Go to Tools > Stocks follow up.
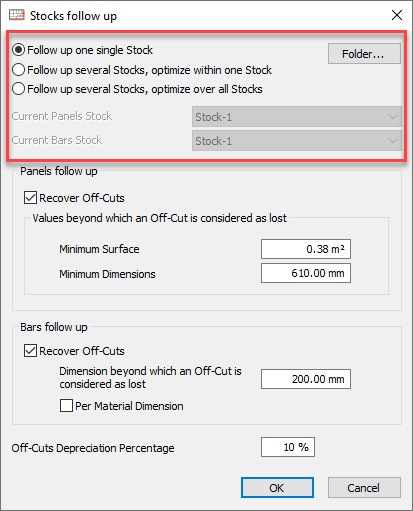
The top option, Follow up one single stock, disables multi stock management.
The other two options allow you to create multiple stocks, and determine whether each optimization accesses a specific stock or all.
When one of the multiple stock options is selected, back in the Stock menu additional Current panels stock and Current bars stock items are available.
These allow you to select and edit your active stock.

And now if we select the Stock > Panels stocks or Bars stocks menu items, a new intermediate window opens to allow us to:
- Create a new stock group: select New stock
- Edit a current stock group: double click on it, or right mouse click > Edit
