Labels
The creation of labels is a key benefit of OptiNest and helps to ensure that production and assembly is fast and accurate.
Labels can be output in a number of ways and the data shown is completely configurable too.
An example sheet of labels is shown below:
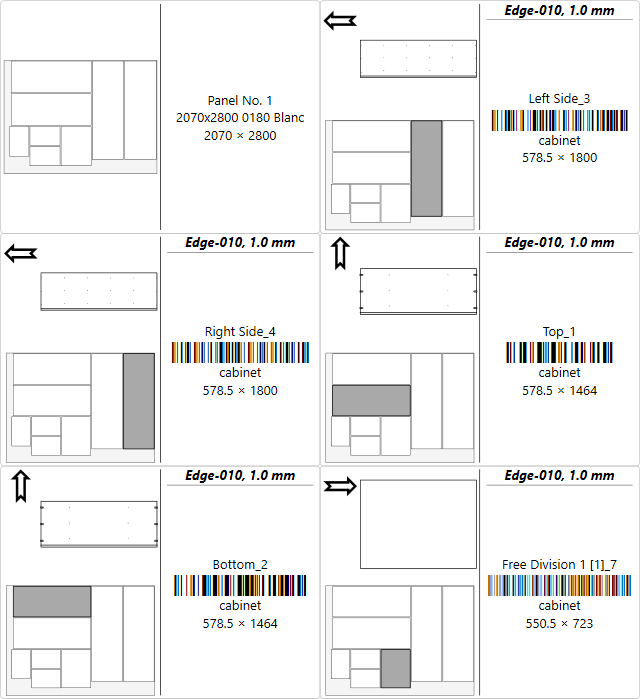
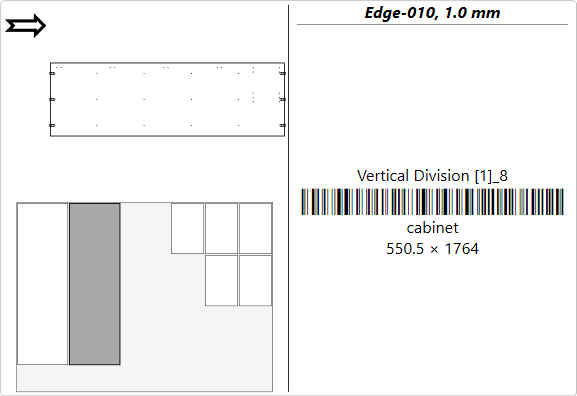
The printer can be set up to print single labels rather than a sheet too.
To set up the labels, go to File > Labels setup.
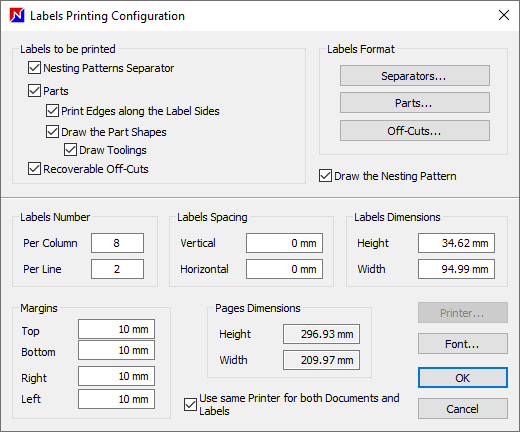
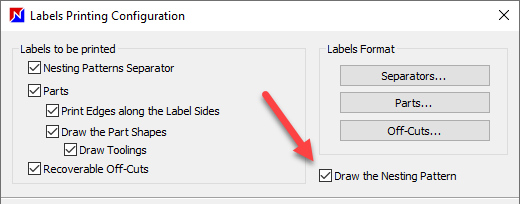
Labels to be printed
Choose which labels to print, from:
- Separators (this is the panel label)
- Parts
- Choose to show the label edge as a line
- Show a drawing of the part shape
- Include toolings on the drawing
- Recoverable off-cuts
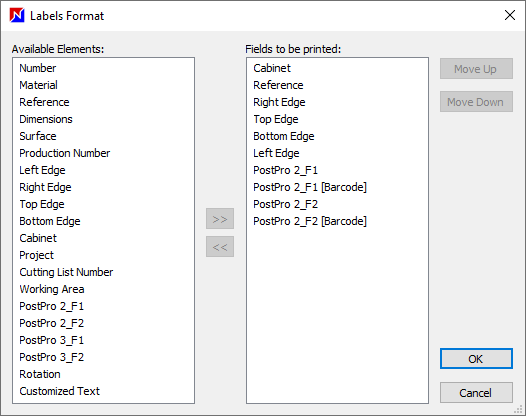
Labels format
Choose what to show on each label. This is an example for a part label:
Placement, orientation and edging
To display the position of the part on the panel and nesting pattern, select Draw the nesting pattern option.
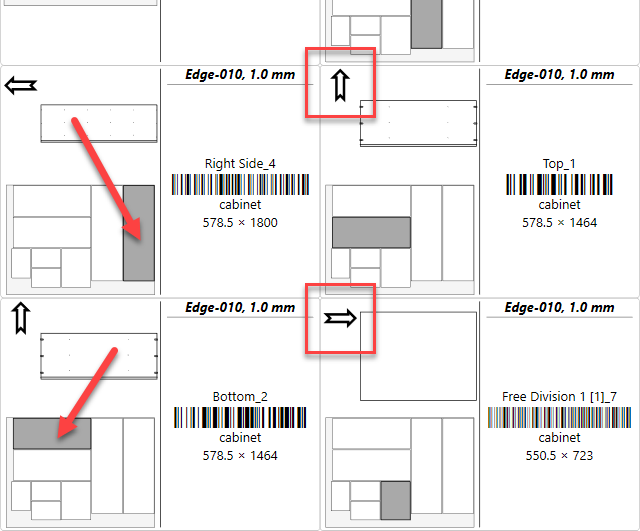
Edging can be selected in the Labels format window for display, it will show the position of the edging on the label and the edging material.
The arrow reference is used to ensure that the label is fixed on the part correctly. The edging position shown on the label will then match the part edge that requires that edging.
Always rotate the label before placement so that the arrow points upwards in relation to the nesting map shown on screen and in the print out.
Please note, if the arrow is not displayed adjust the print settings to print larger labels.
Barcodes
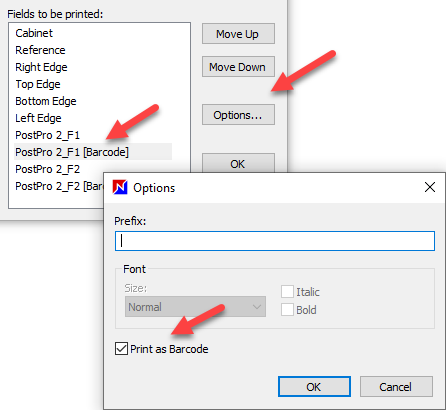
Data, for example the part file name, can be printed as a barcode.
Go to Labels format > select the field > Options.
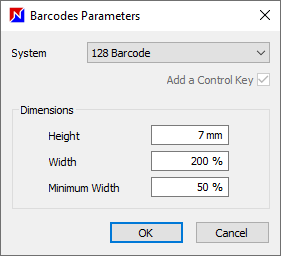
Additional barcode parameters are available in Tools > Barcodes.
Label export as a csv file
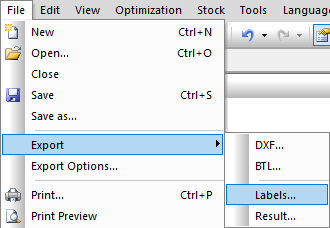
To output labels as a csv text file, go to File > Export > Labels.
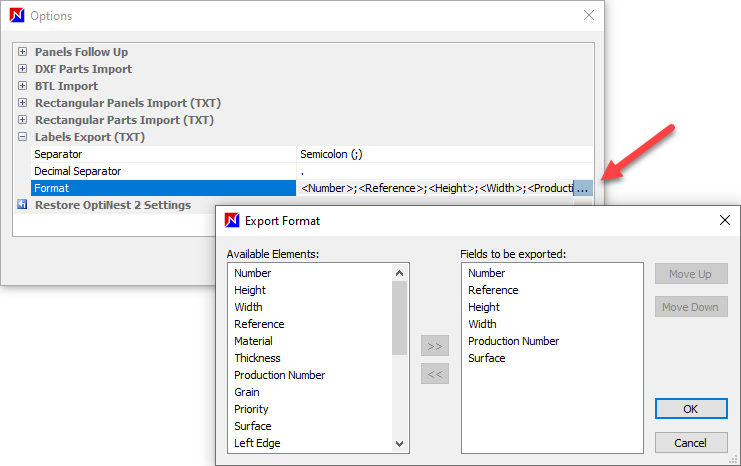
The export can be configured in Options > Labels export (TXT) to match your requirements.
Label export as a bitmap file and G-code
Some production setups require the output of labels in these formats. It enables automatic printing and placement of the labels on the panel, typically before cutting.
More details:
OptiNest integration with your CNC machine
Printer, paper, font configuration
The bottom section of the Label printing configuration window covers standard printer settings and defines how many labels are printed on each sheet.
There is also a check box to choose whether to use the same printer for the labels and optimization report, or not.
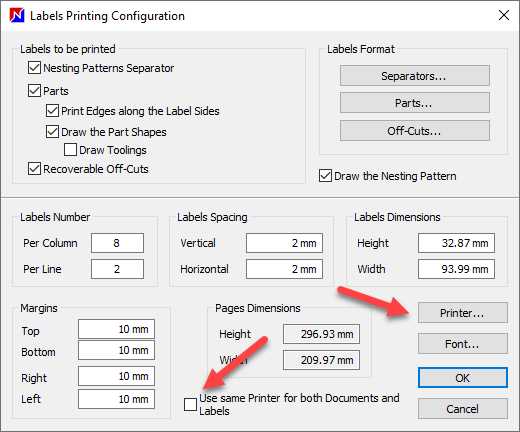
You may have a dedicated label printer, in which case leave this box unchecked. This gives you access to an additional label printer setup option.
Quick print touch screen functionality
OptiNest includes a touchscreen feature to print off individual labels. Right click with your mouse to enable this mode:
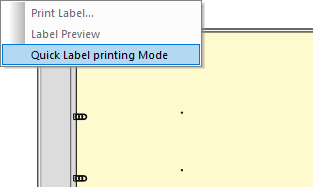
The same menu allows you to exit the quick print mode as well.
Once this mode is active you will see the quick print icon on screen. Use a touch screen to print individual labels, which then turn pink.
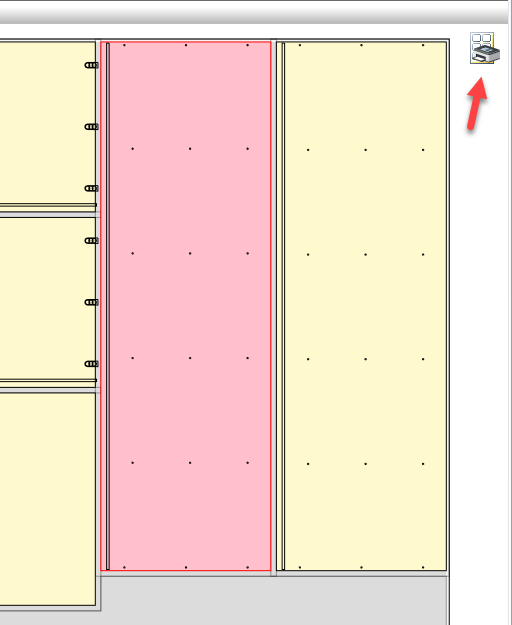
Alternatively, a single mouse click will print the label, or you can right click with the mouse to access the print and print preview commands.
If you wish to work with a second touchscreen workstation, an additional heavily discounted OptiNest licence is available. Please contact us for details.
