Quick Design libraries: add new elements
When installing a new version of the Quick Design libraries, you may only need specific elements and would like to continue working with your current libraries.
Please read this advice before proceeding:
How do I update my Quick Design libraries?
The normal way to do this is to create a cabinet using the newly installed libraries and transfer the different elements by restoring them to your current (old) libraries.
With this method, all kinds of elements can be transferred:
- Manufacturing methods and sub-methods
- Materials
- Structures
- Rules
- Hardware
- 3D accessories and shapes
Hardware is an exception in that it can also be exported as an XML file and then imported into another library.
Create a cabinet with the new elements
When the new libraries are installed, PolyBoard will be automatically linked to these libraries.
You can now start a new cabinet using a manufacturing method that you do not yet have in your old libraries.
In the same cabinet, you can add specific hardware and rules that you would like to transfer, as well as selected structures.
When everything has been added, save and close the cabinet.
Relink PolyBoard to the old libraries
PolyBoard is automatically linked to the new libraries after you install them.
To link PolyBoard back to your old libraries:
- Open PolyBoard and go to Tools menu > Folders > Parameters
- In the libraries section, click on the 3 dots icon
- Navigate to your libraries folder and select the corresponding folders for Method, Material and Texture
- Launch PolyBoard and open the cabinet you created above
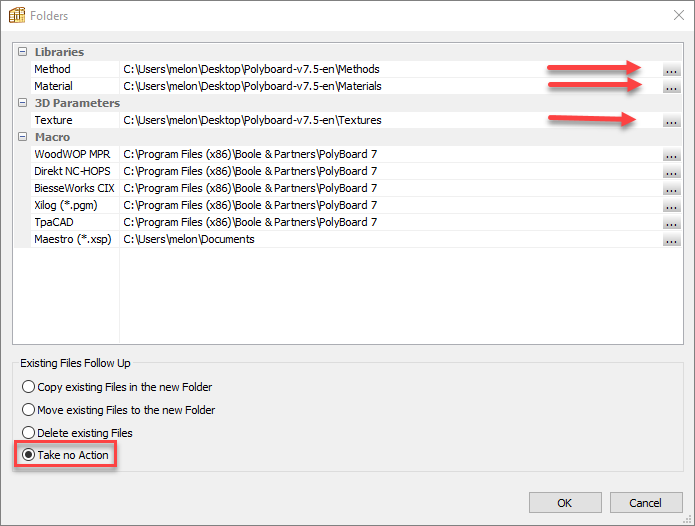
Important
In the section “Existing files follow-up”, make sure “Take no action “is selected before proceeding.
Other reasons for a broken link
If you rename or move your libraries folder to another location, the link between PolyBoard and the libraries will be broken.
In this case, restore the link as shown above.
Transferring elements
Manufacturing methods
First, click on the Manufacturing methods icon in our Quick Design toolbar.
This opens the Methods screen, and you can see that the method currently in use only exists with the extension “@lower kitchen”, which is the cabinet name.
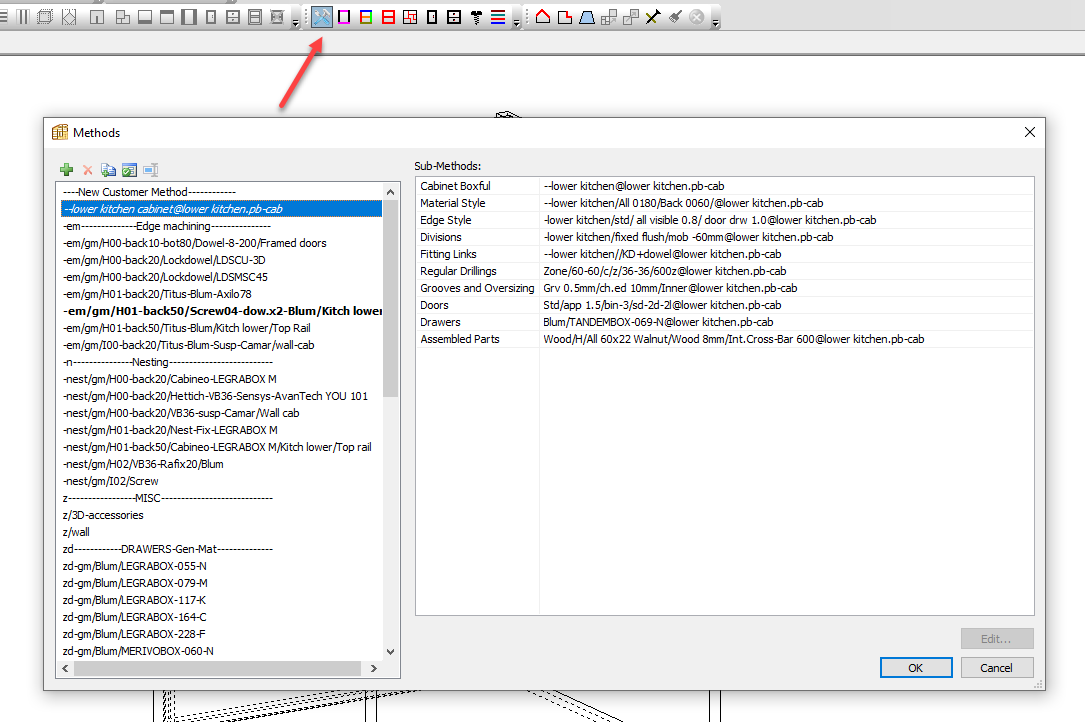
This means that the current method, along with all other elements, are contained within the cabinet and, therefore, not available in your libraries.
Click on the duplicate icon.
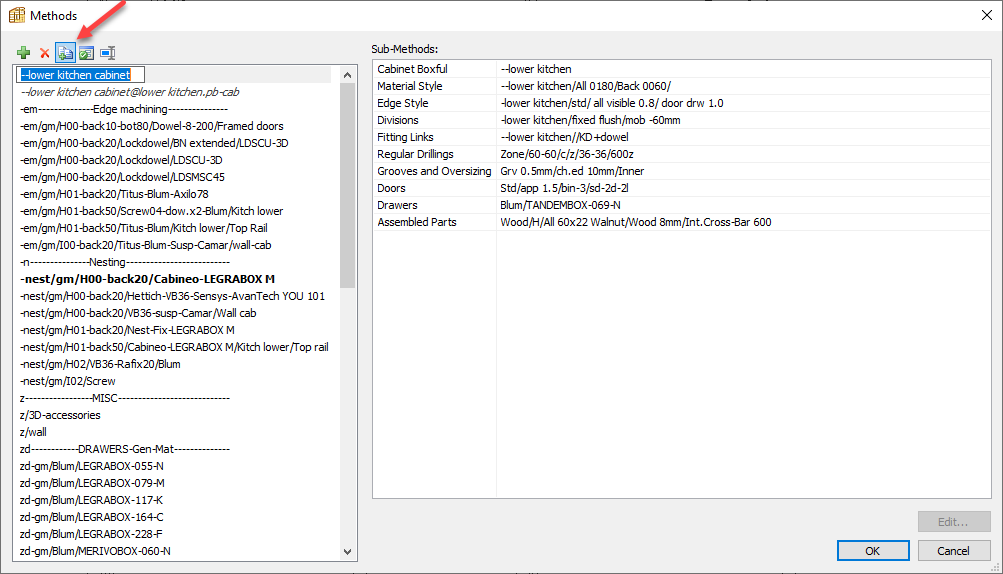
This will insert the method and all sub-methods into your libraries. You will see that the “@lower kitchen” is no longer displayed as it is now part of your libraries.
Materials
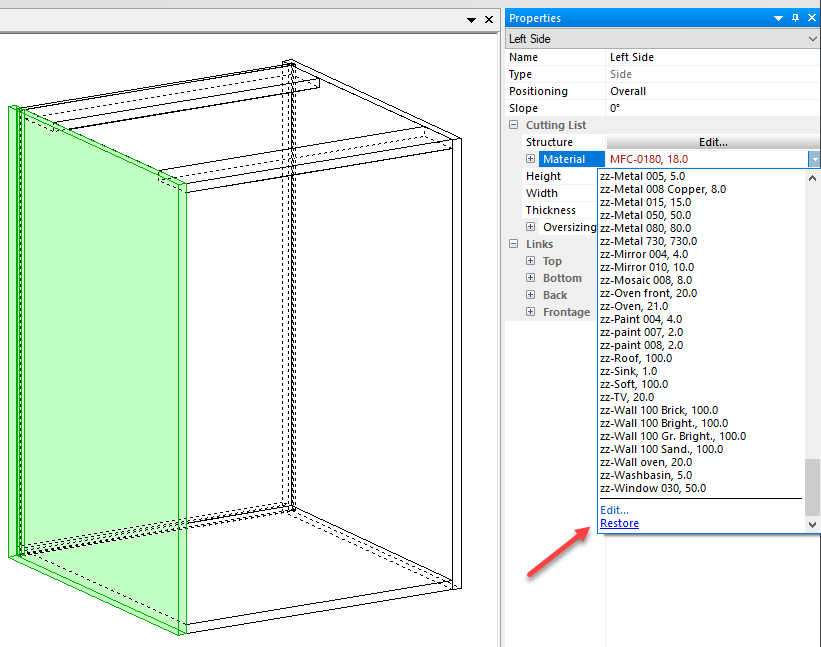
When selecting a panel, you can see in the Properties menu that this material is displayed in red. This means that the material is not yet available in your Materials library.
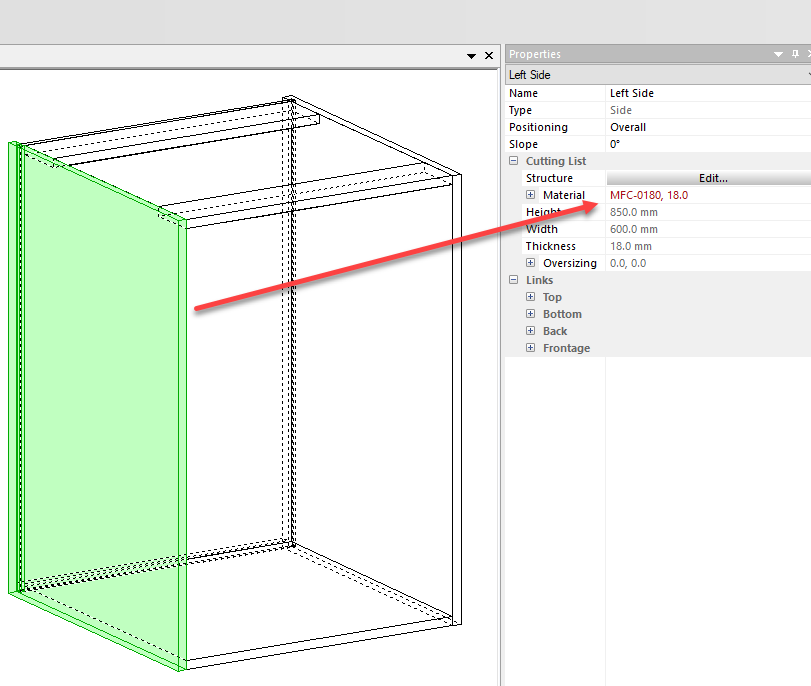
Open the material tab in the Properties menu and scroll to the bottom of the list. There, you will find the restore function.
Click on it to add the material to your library, and it will no longer be displayed in red.
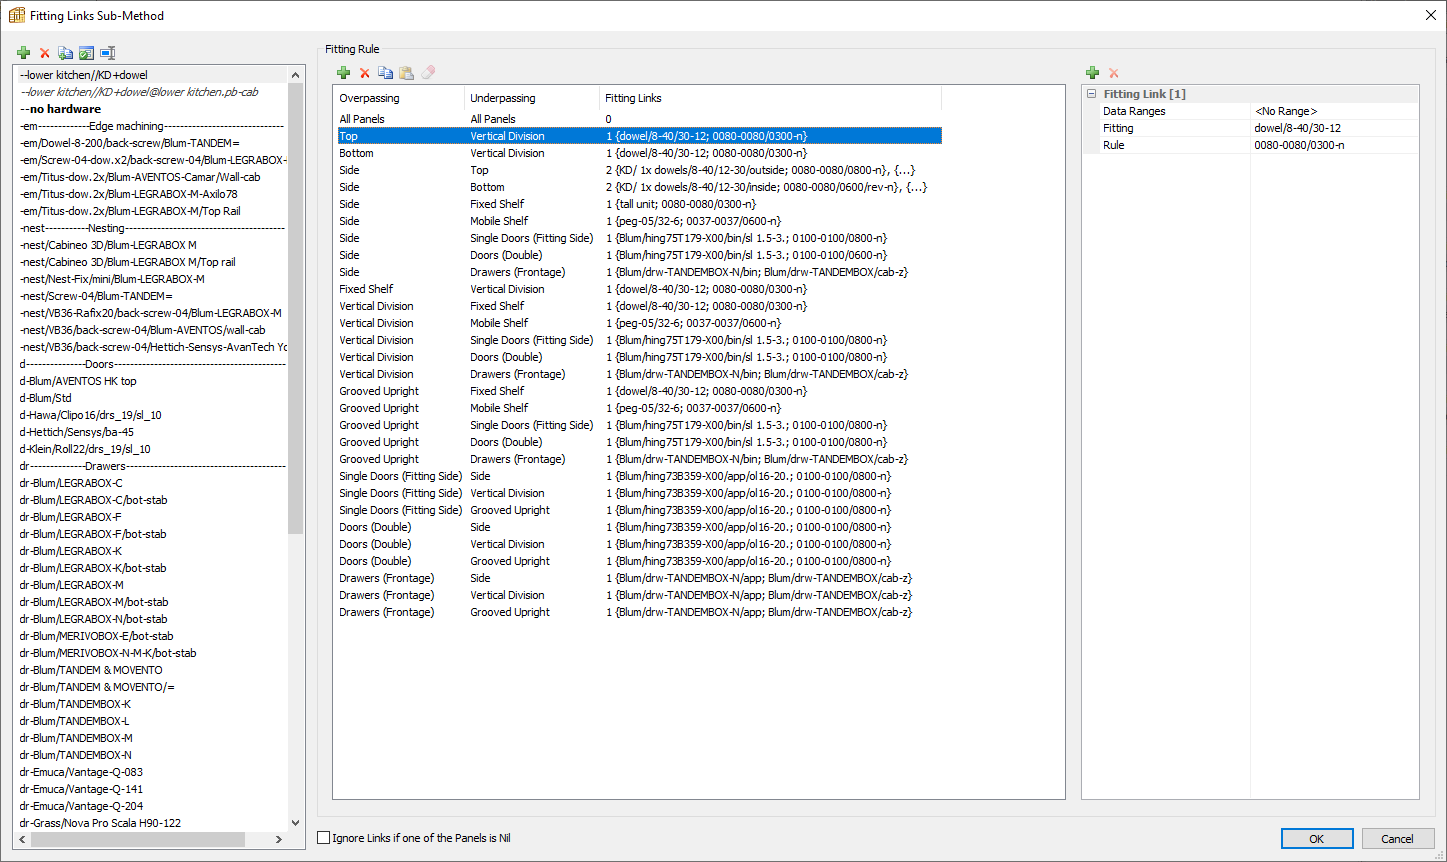
Hardware and rules
Open the Fitting links method by clicking on the corresponding icon from our Quick Design toolbar.
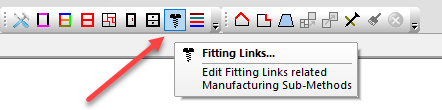
This opens the Fitting links sub-method.
All hardware and rules that are not available in your library are displayed in red.
Select the corresponding lines, open the Fitting and/or Rule tab and click on restore.
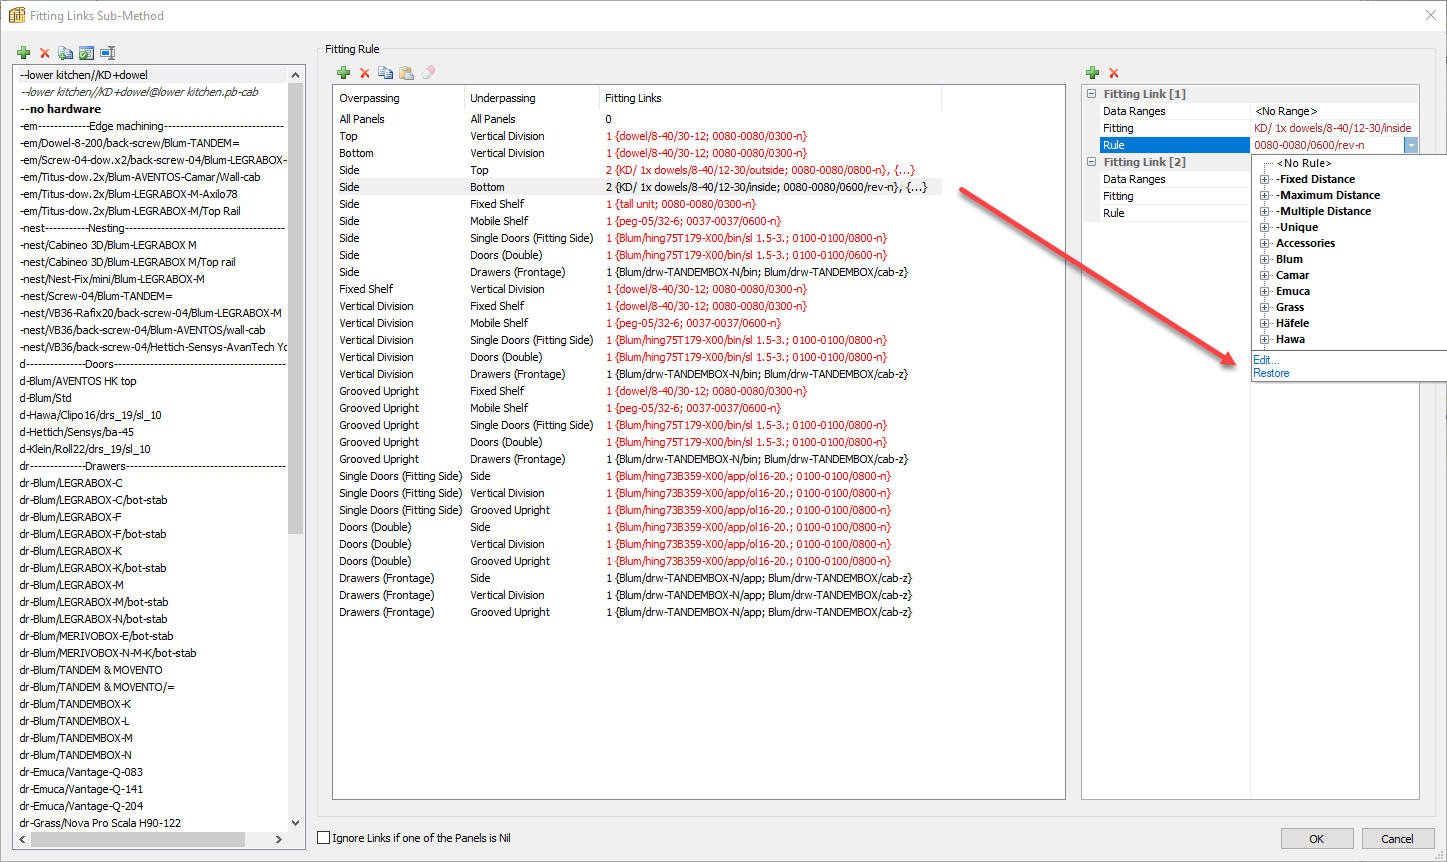
Once complete, no item will be displayed in red and they will all be available directly from your libraries.
Hardware and single panel fittings direct import
These elements can be exported from the Fittings or Single panel fittings libraries.
To export both, click the export button and select “Export all fittings”.
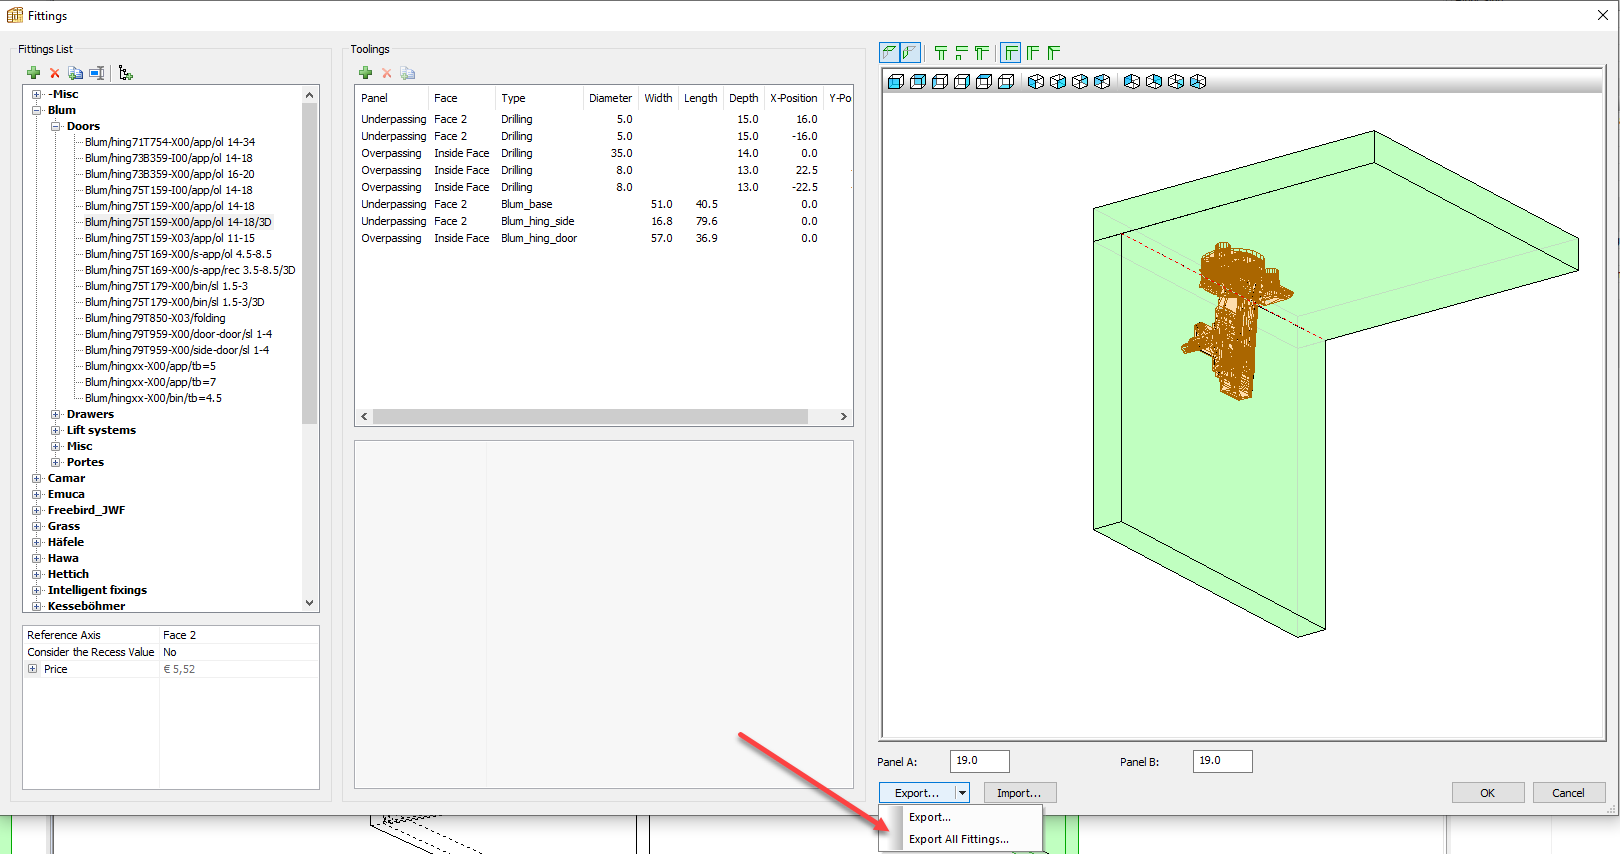
This opens the Fittings list, where you can select all fittings or a partial quantity by checking the corresponding boxes.

This will generate an XML file, which you can save on your computer.
This XML file can be restored using the import button regardless of the version of the software you are running.
Hardware direct import is the only feature that is not version-dependent, so exports from newer versions can be transferred to older versions.
Structures
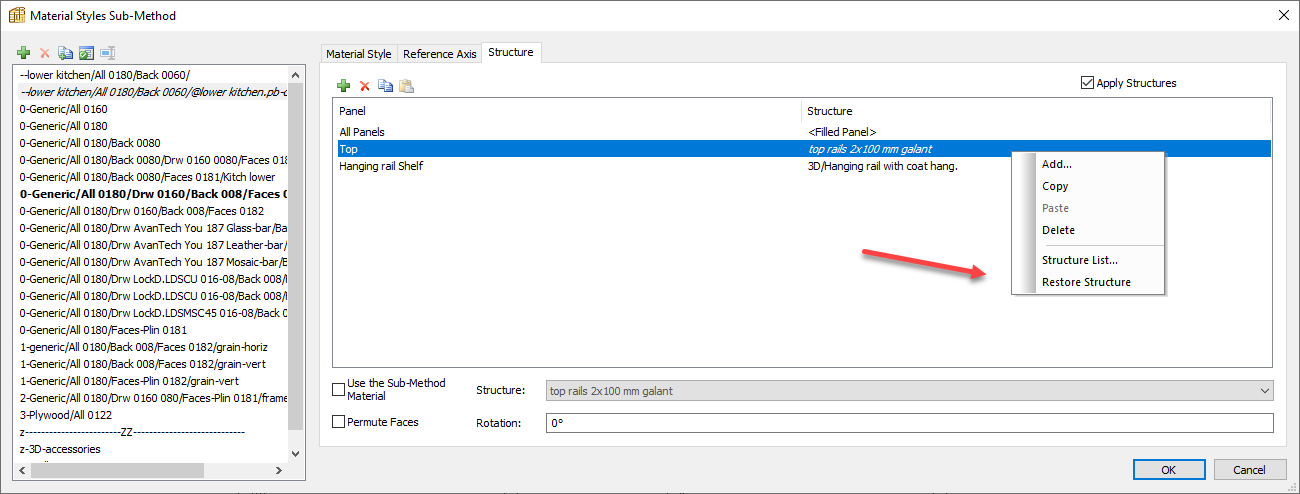
Specific structures that are applied on a cabinet can be found in the Materials style sub-method under the Structure tab.
Open the sub-method using the Quick Design icon and go to the Structure tab.
You will notice that the Top structure is not available as it is greyed out.
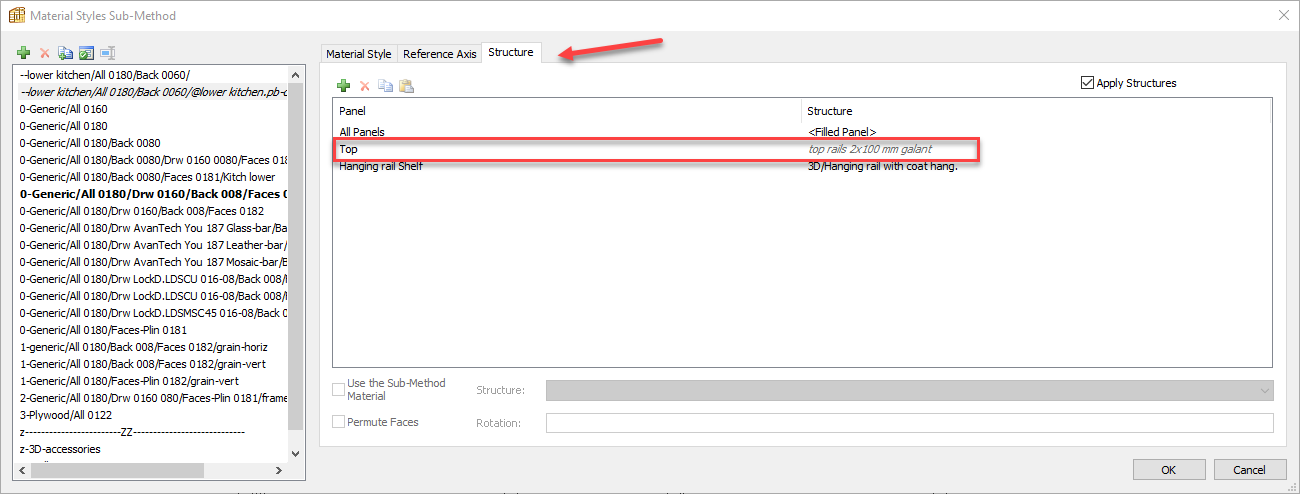
To restore this structure, select the line and right click with your mouse.
In the new window select Restore structure.
The structure will now be available within the structures library.
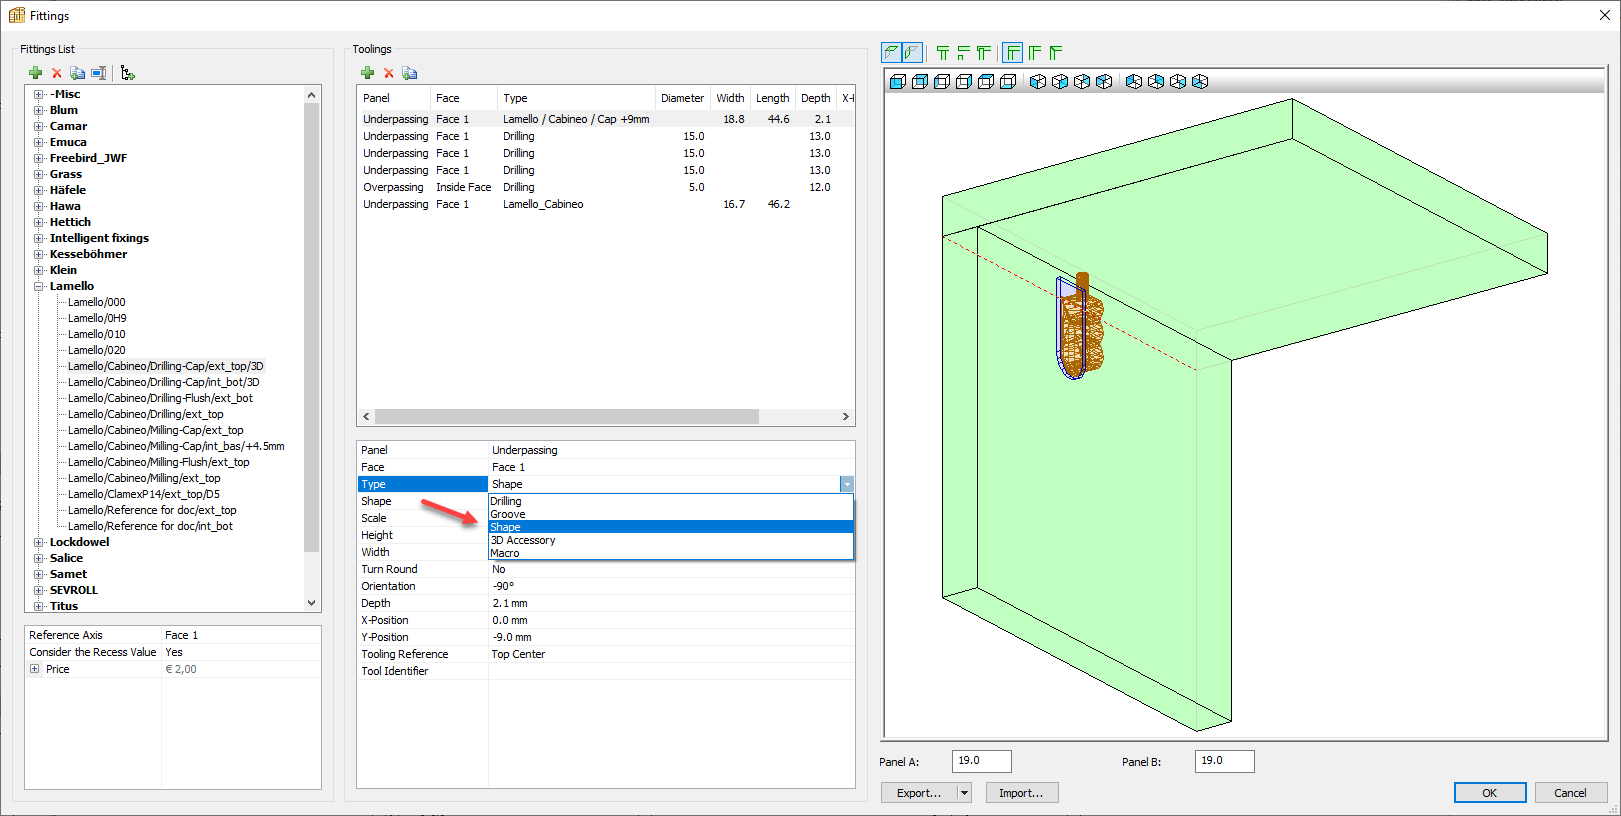
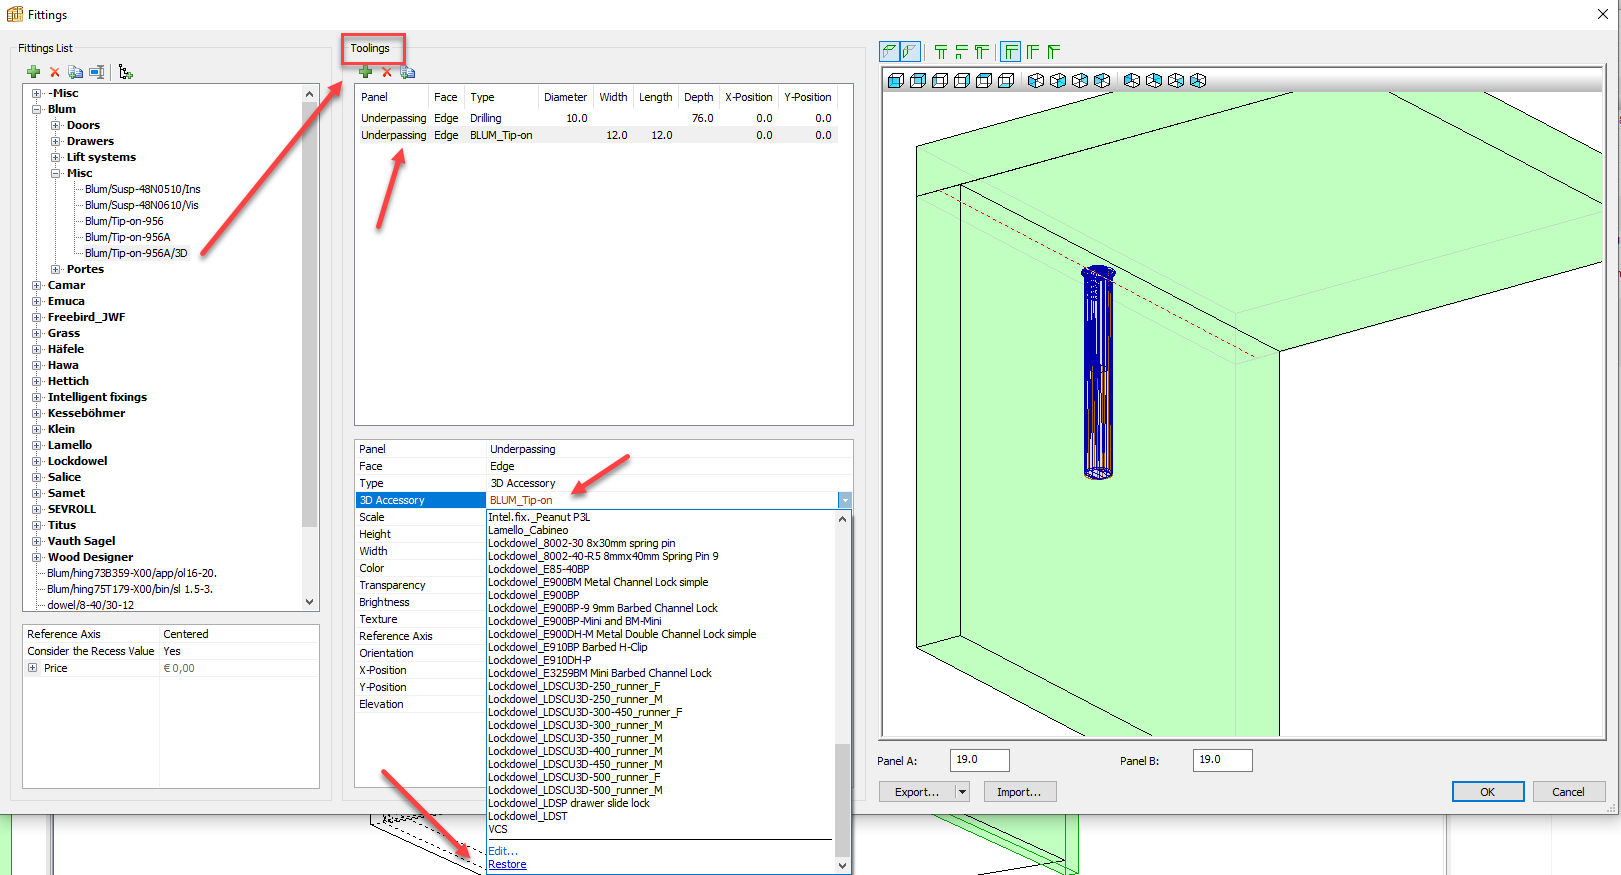
3D accessories and shapes
These are restored from the Fittings and Single panel fittings libraries.
Select the corresponding line in the tooling window. You can see below that the type is set to 3D accessory. Below that is the actual 3D accessory displayed in red.
Open the Accessory tab and scroll to the bottom of the list.
Click on Restore, and the accessory will be added to your 3D accessories library.
The same procedure applies to 3D accessories in the Single panel fittings library.
Shapes found in the Open and Closed curves libraries can be restored in the same way.