Upgrade from OptiNest 2 to 3
- This guidance is for OptiNest version 2 users upgrading to version 3
- OptiNest 2 must be on the same computer as OptiNest 3
- Follow these steps before uninstalling OptiNest 2
If you wish to save and restore your settings in OptiNest 3 or above only, please read the FAQ: How do I save and restore my settings?
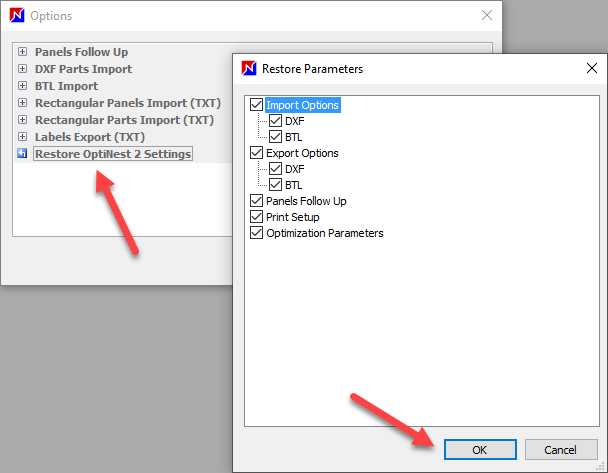
Save and restore your settings
In OptiNest 3 go to Tools menu > Options > Restore OptiNest 2 settings.
PolyBoard (optional)
Only applicable if you use OptiNest with PolyBoard.
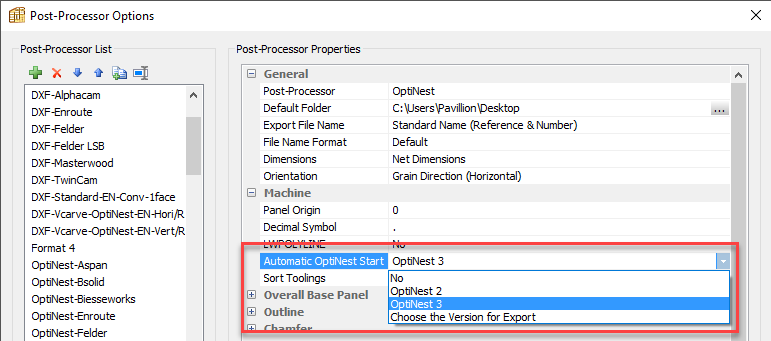
PolyBoard post processor settings
PolyBoard users must upgrade to PolyBoard 7.10u or higher to activate the following post processor setting for exporting to OptiNest 3.
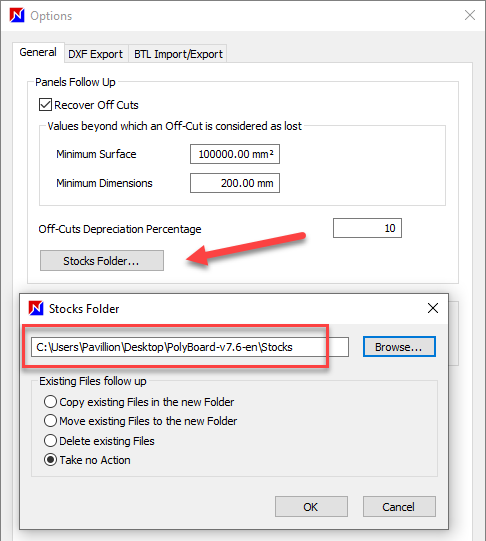
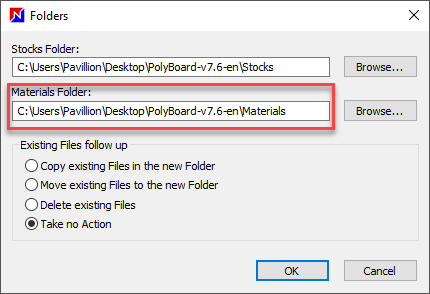
Restore panel stock
Note that each panel must be associated with a material.
In OptiNest 2 go to Tools > Options > General > Stock folder.
Copy the access path.
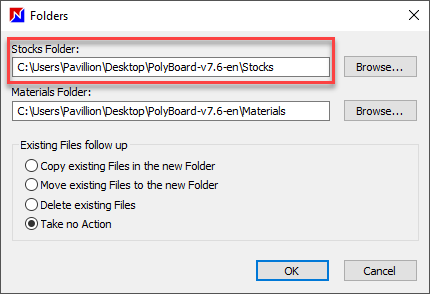
In OptiNest 3 go to Tools > Folders > Settings.
Paste the previously copied path to the Stocks line.
Multi-material function
OptiNest 3 has a new multi-material function, you can now use the same library of materials for PolyBoard 7 and OptiNest 3.
In PolyBoard 7 go to Tools > Folders > Settings.
Copy the materials path.
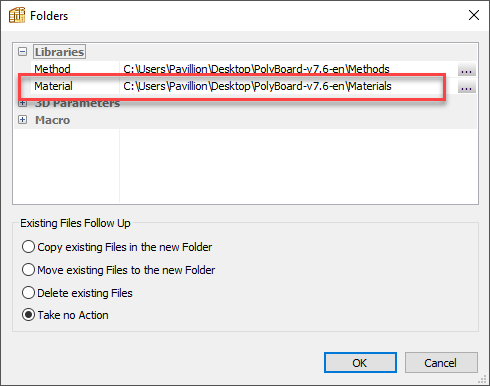
In OptiNest 3 go to Tools > Folders > Settings.
Paste the previously copied path to the Materials line.
Additional references
These are now configurable in OptiNest 3 for PolyBoard 7 users.
Go to Tools > Preferences.
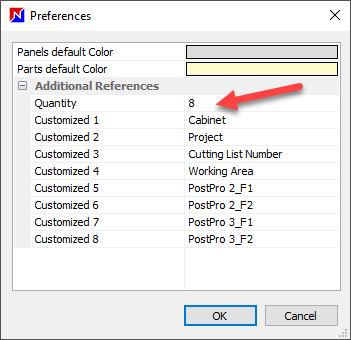
Set the number to 8 and define as follows:
- Cabinet
- Project
- Cutting list number
- Working area
- PostPro 2_F1 (related to multi post processor export)
- PostPro 2_F2
- PostPro 3_F1
- PostPro 3_F2