We are extremely grateful to Hervé Martin for sending in this wonderful story of his stair design journey, finishing with a beautiful ash and cherry half turn stair, made to fit a very irregular stairwell. It was designed with StairDesigner which was also used to create the full size part by part plans.
Hervé used our StairFile service, a great alternative to buying our pro software and perfect for a one-off stair project.
In his own words… (click on any image to enlarge)
My old methods
Several years ago, I acquired a LUREM combination machine. At that point I hadn’t considered where it would lead me.
Especially how it would end up helping with stairs.
My first project, simple steps on a central metal stringer.
Next was a straight “utility” staircase with 17 steps and risers. Planed and mounted on 2 cut stringers. Pretty simple: the cut strings were cut with a circular saw, they were virtually straight, and bolted together and just sanded down. Within reach of most woodworkers.
The third staircase, also “utilitarian”, was a quarter turn stair to provide sufficient clearance into the attic; with a square landing, so I was dealing with 2 straight flights; same techniques, using raw wood.
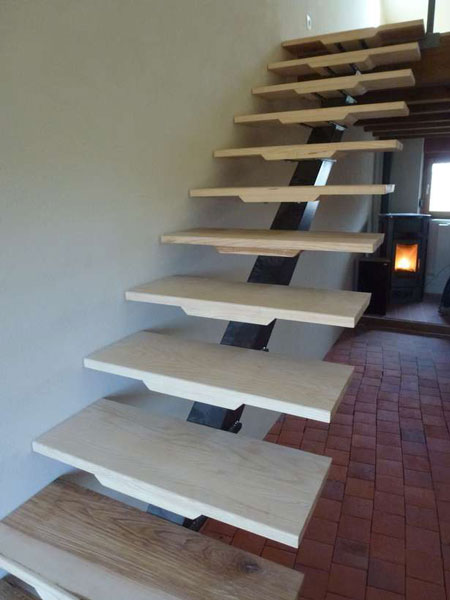
The fourth was a challenge: an indoor staircase, so requiring a better finish and with a lot of constraints. The current narrow, quarter turn, miller’s ladder just didn’t do the trick.
So I started with a double s-shaped stair. The axis of the first curve resting on the ground, and the second curve suspended from the floor above. As with the previous stairs, each step was calculated and drawn by hand.
Uh! If only I had only known…
A small wall stringer strengthened 5 of the steps.
Many many hours later, the stairs are up.
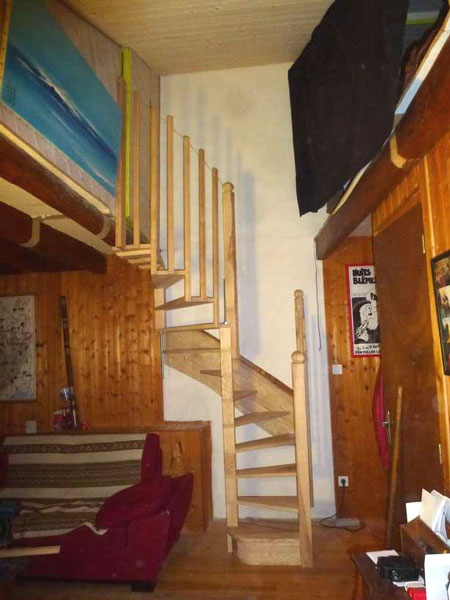
The fifth was another interior project: a half-storey, straight stair with 9 steps actually built into a wall, 800 mm wide! Very thin stringers with through grooves to slide the steps in from below.
The sixth project is the one whose manufacture I will detail below.
A new approach
Technical choices and plan
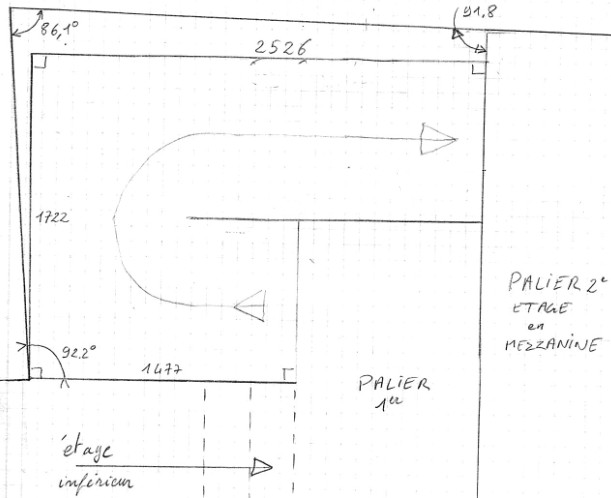
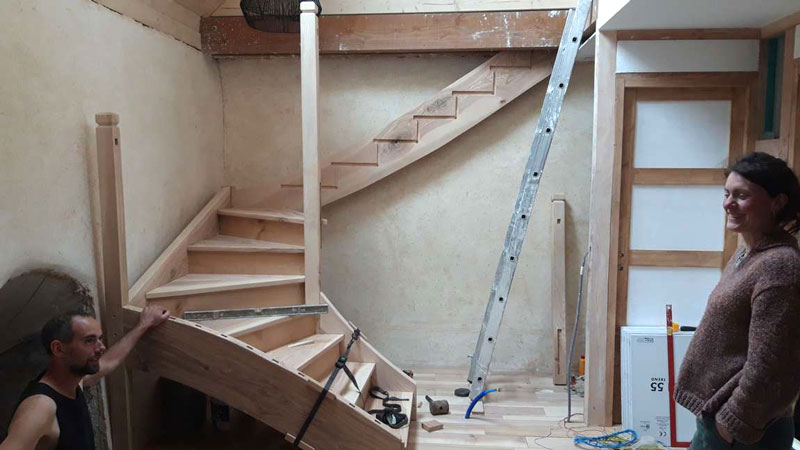
First step: taking measurements.

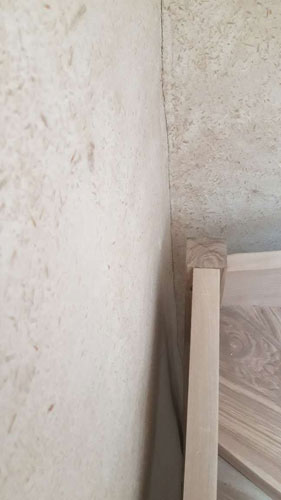
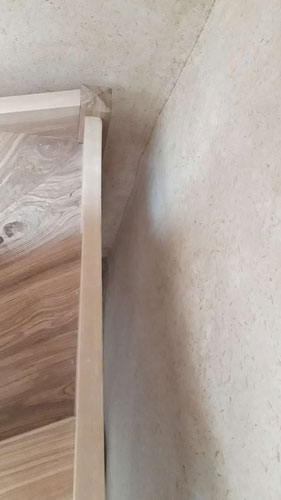
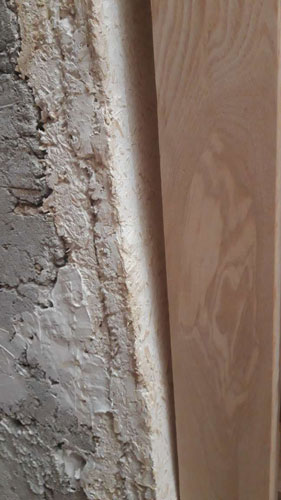
No wall was vertical or flat, no angle straight, and even the first floor landing was slightly inclined, a detail that I would only notice at the end of the assembly.
The ground was an irregular polygon. Measurements of all the diagonals and a bit of geometry made it possible to determine all the angles.
For ultimate levels of difficulty, the last 2 steps were narrower, because a structural element encroached into the staircase.
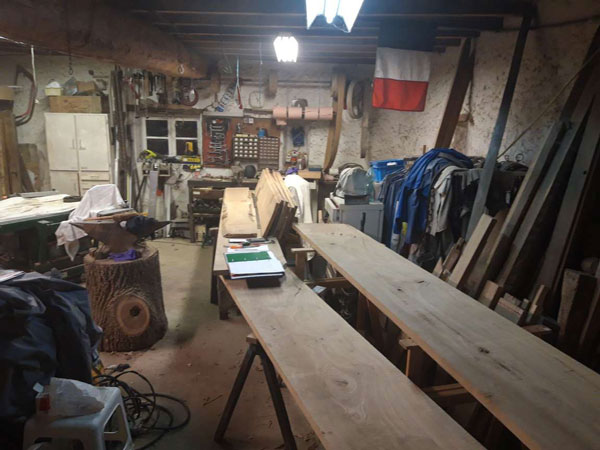
My machining equipment: a multifunction (circular saw, jointer, planer, router, mortiser) LUREM C310, the router cannot tilt so also a small Bosch router.
The wood I had: ash in several thicknesses and sections, but some with many defects, splits and knots.
Many issues with hindsight, but aesthetically very nice. Also a little cherry.
The thicknesses and sections I had worked for the posts, stringers and steps.
I decided to make a staircase that was not supported by the walls. That would have caused too much complexity in the angles and machining difficulties for an amateur like me.
It would therefore be resting on the floor joists, with the newel posts extended down to the floor below as well.
The risers and spindles would be in cherry, the other elements in ash.
StairDesigner was an ideal tool for making different 2D plans and 3D views before choosing the best solution.
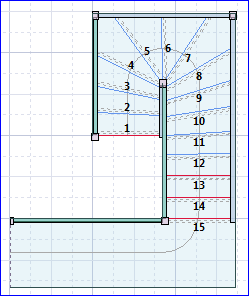
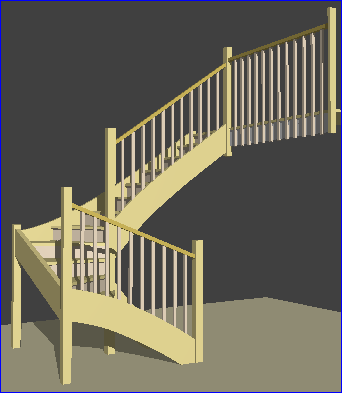
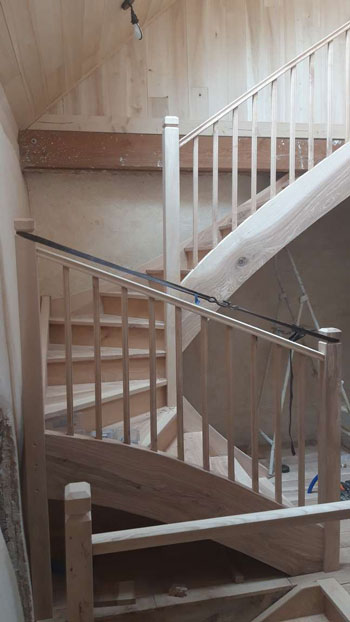
In this case it would be a half turn to the right, with balanced steps.
The arrival has the newel post embedded in the joist.
Thanks to Michel from Atelier Bois for his expert advice.
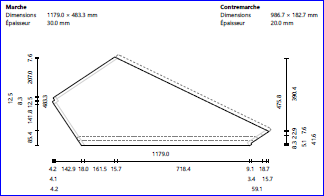
StairDesigner gave me a file of 50 pages and more than 90 part by part plans.
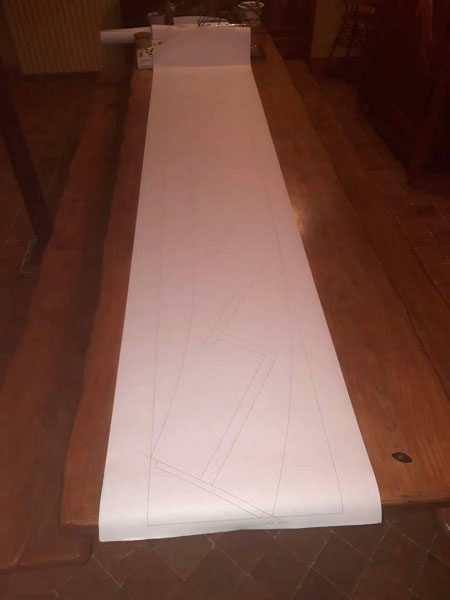
Finally, full size printed drawings of the plans completed the preparation, again created by StairDesigner.
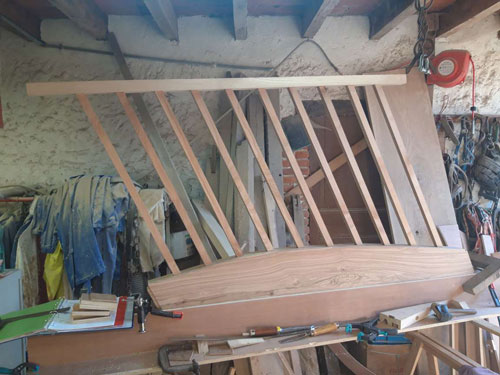
The stringers
Cut outside, with a chainsaw.
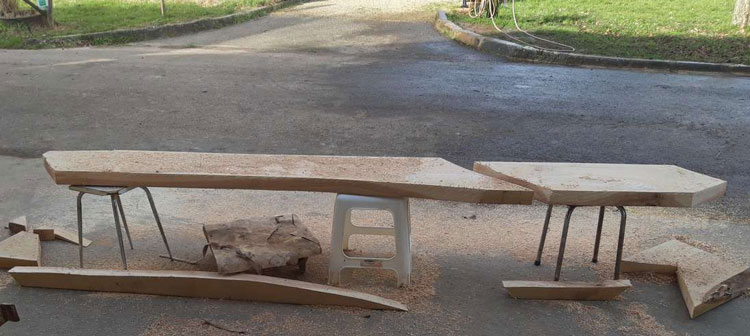
The small LUREM C310 (which stands for 310 mm) didn’t allow me to machine stringers from 1 to 3 m nor from 350 to 400 mm wide. So I made an assembly from 2 L-shaped plywood rails and a slider in which I could position my router.
All this, placed on 2 trestles, carefully checking to be horizontal. A little wax on the sliding surfaces too.
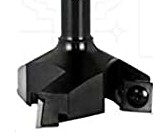
I bought a small surfacing cutter with 35 mm inserts.
I wedged the raw material in place, from below. It was only necessary to plane off the excess.
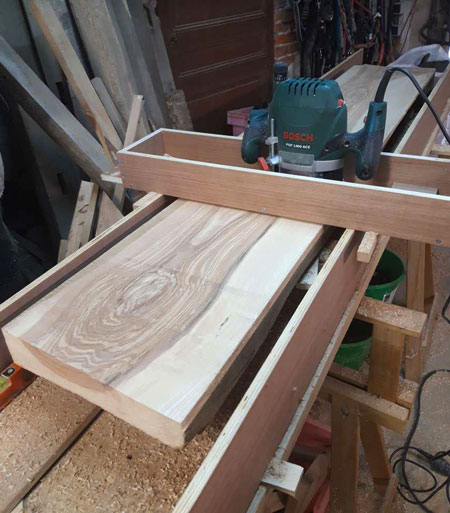
Forwards, backwards, 30 mm to the right, forwards, backwards, 30 mm to the right, forwards, backwards… Pfffff. 30 minutes later, the first surface was planed. The wood was wedged again from below, but this time with wedges calibrated to provide a constant thickness. And I repeated the operation until I got the desired thickness. Then, I repeated the operation for the other 4 stringers.
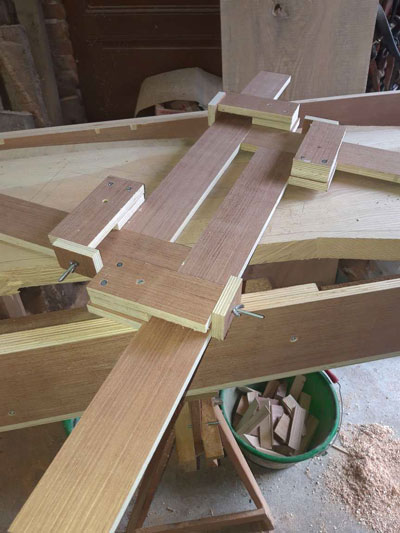
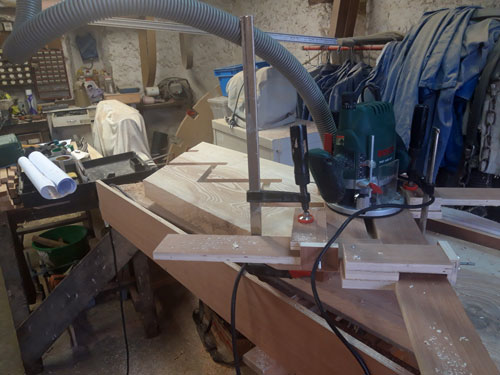
Plotting out the part shape: with full size plans, it’s child’s play. I just put the plan on the part, and used a sharp point to mark the angles and intersections of lines, then a pencil and a ruler and all the cutting lines are transferred to the wood.
I made myself a small adjustable jig to rout the grooves for the treads and risers. The post tenons were also made with a router.
To continue…the steps!
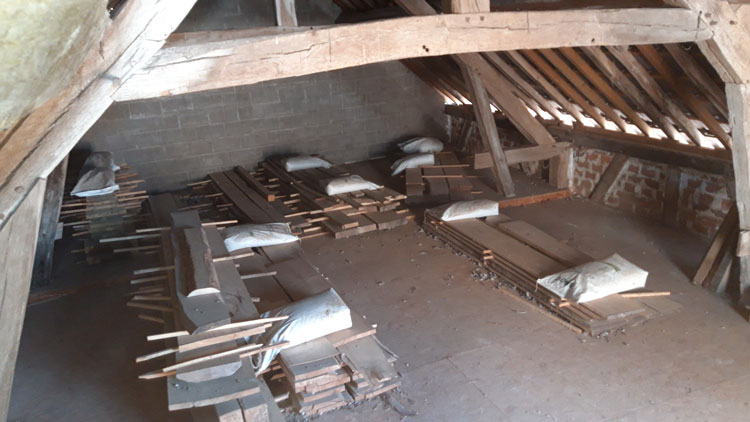
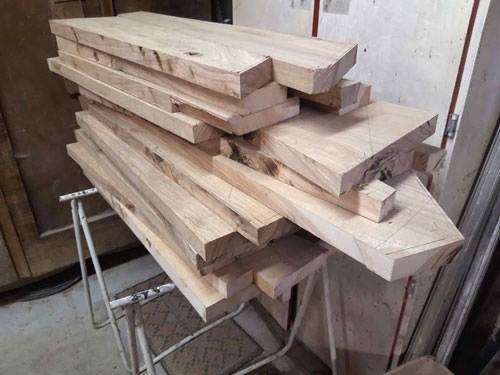
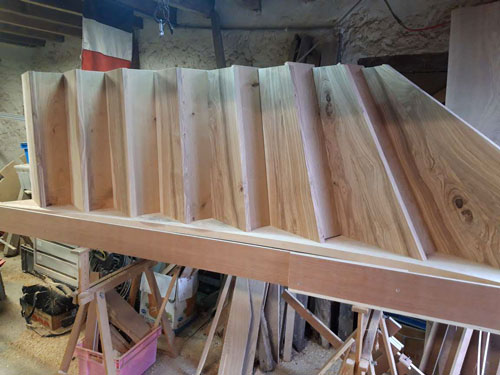
All the steps were jointed and glued. As I said, there were a lot of defects in the wood that I had to work around whilst trying to minimise waste at the same time.
All the boards were laid flat with all the planes of the steps and I had to find which part went where. It was a puzzle that I only won after many hours. It also didn’t fail in upsetting my wife who could no longer move in her part of the workshop.
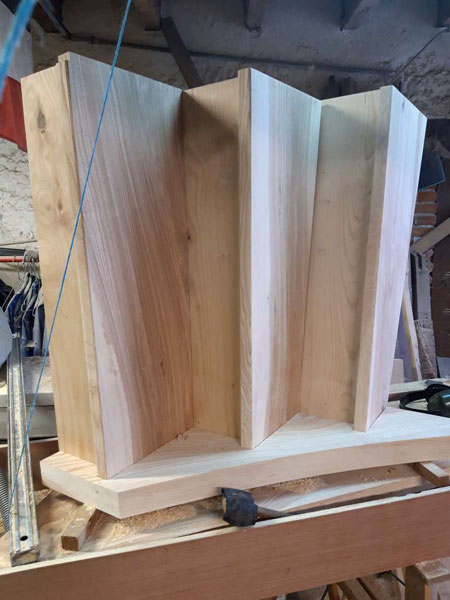
Jointing and planing were carried out by machine.
This was followed by gluing, drying, drawing, always with the 1:1 plans, then the machining of the riser groove and the rounded stair nosings with a router.
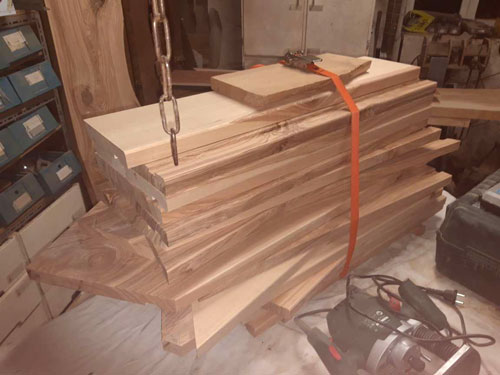
Everything was then set aside.
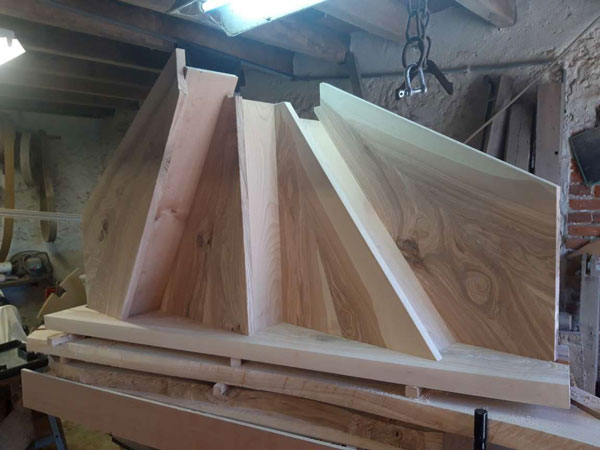
After making the risers, which were simple rectangles in cherry wood, I could test out the assembly with the stringers.
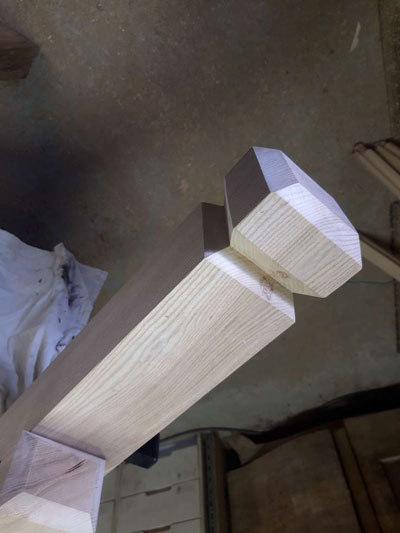
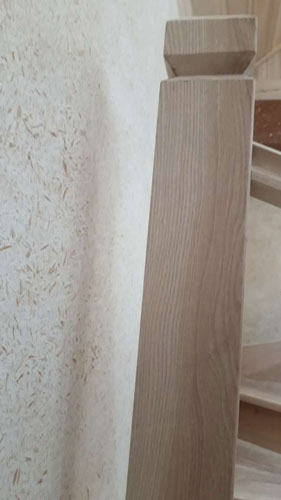
Newel posts and handrails
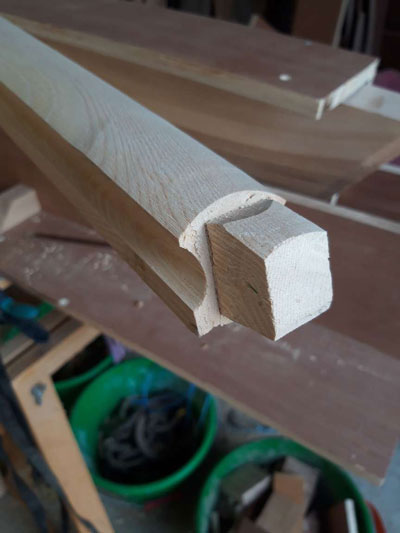
The 2,500 mm long newel post was made on the same assembly as the stringers, the 7 others went through the planer on the LUREM then to the mortiser to manage the connection with the stringers and the handrail. The angles of the mortises were finished by hand, with a chisel.
To add some extra beauty, a small decoration was added to the top with a circular saw…
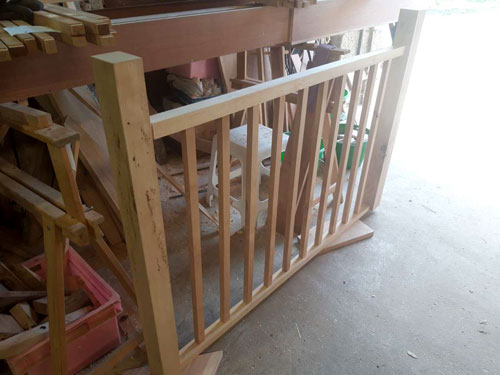
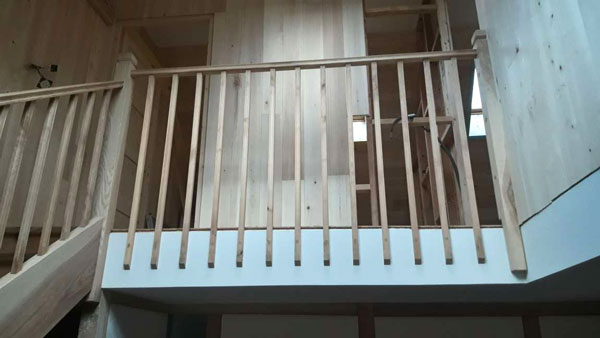
The staircase had 2 handrails, but the mezzanine floor and a further descending staircase each required one more. It was therefore 4, composed of 4 handrails and 45 spindles that I had to make. I didn’t feel experienced enough, nor equipped, to manage a curved rail. It would have been prettier, but I decided on 4 straight rails instead.
The spindles, rectangular and in cherry wood, were easy to do.
The mouldings required 2 passes per angle on 2 angles, made with a router (45 spindles, 180 passes).
The mortise and tenons for the horizontal railings were machined with a router and a mortiser.
Where it got tricky was for handrails 1 and 3, as the angles of the spindle inserts and the lengths were all different. A saw, chisels and a mallet came into play, manual work only!
Laborious…
But the end was in sight.
We just had to wait for the end of the Covid lockdown to assemble it.
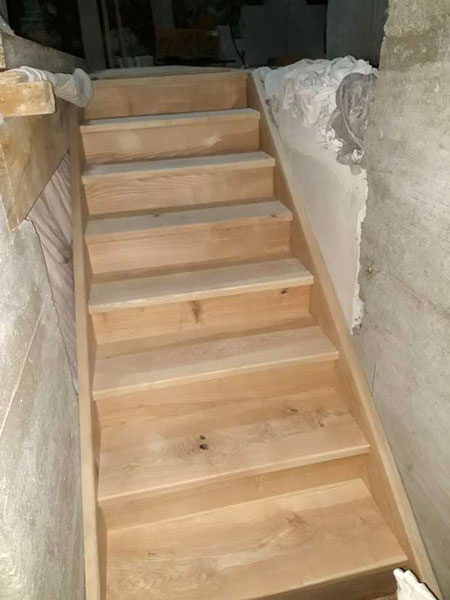
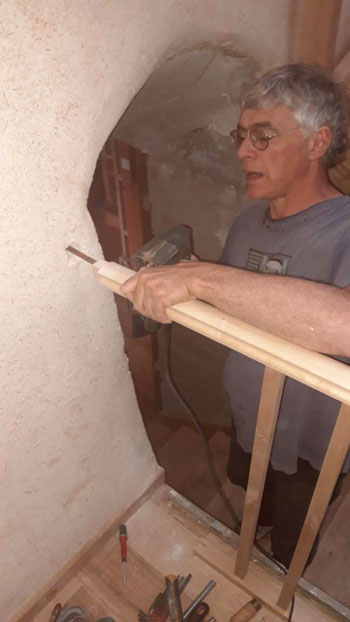
Assembly
Now we were on to the actual installation of the staircase…
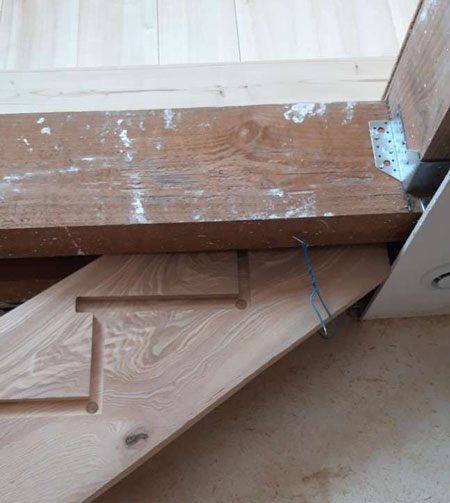
With some apprehension, the stringer had to pass behind a truss, where it would be bolted at the end of the assembly.
In the meantime it was just supported with strong wire.
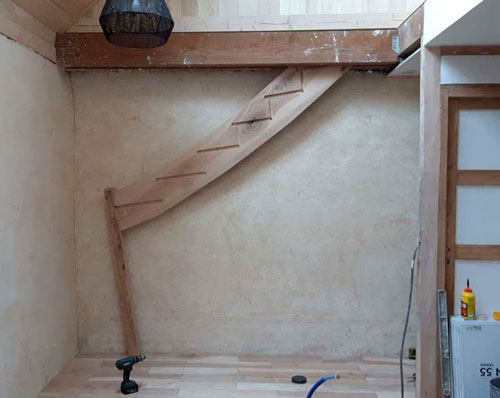

The stringers were mounted, and screwed through the posts.
The assembly was done at an angle to allow the screwdriver access behind then straightened in place.
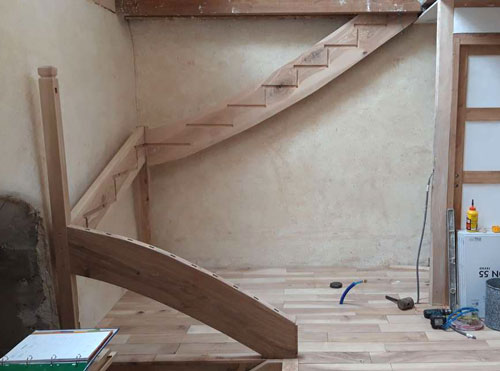
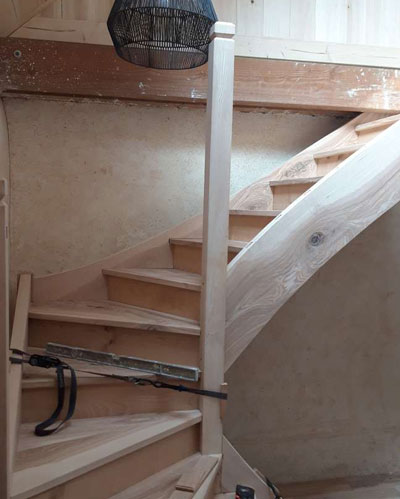
I continued with the installation of 5 steps inserted into the central post (and not 4 as shown in the photo, yes I had to dismantle it!).
And then the lower flight with its stringer, all held in place with a ratchet strap. The steps were screwed into the stringers later, when everything was fitted and strapped in place.
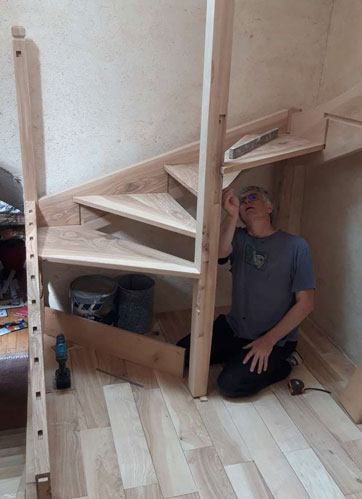
Now on to the top flight.
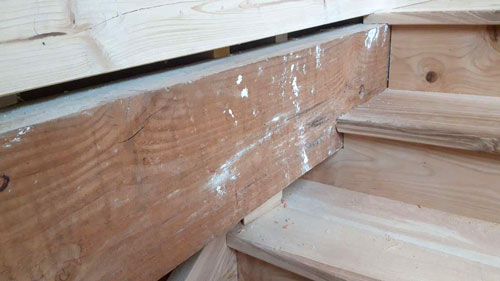
The top newel post was screwed to the stringer then the assembly was installed on the central post. Risers and steps were put in place between the 2 stringers and then everything was strapped in place. The penultimate riser was notched to allow space for the wooden beam to pass.
The last riser, the penultimate step and the landing step, which were narrower, were put in place later.
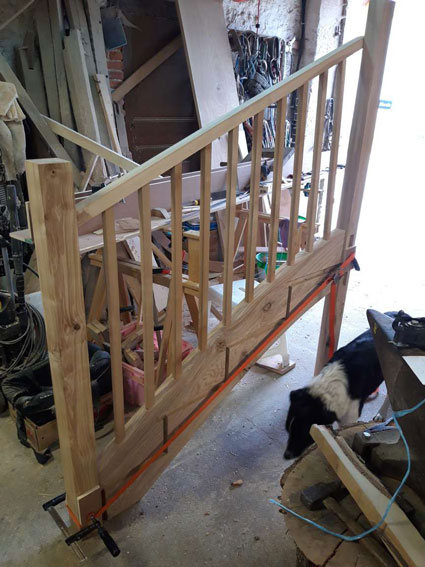
Then it was time for the handrails and spindles.
Top rail first, which finally secured the top, recessed newel post to the large cross joist, then the hidden stringer was bolted to it.
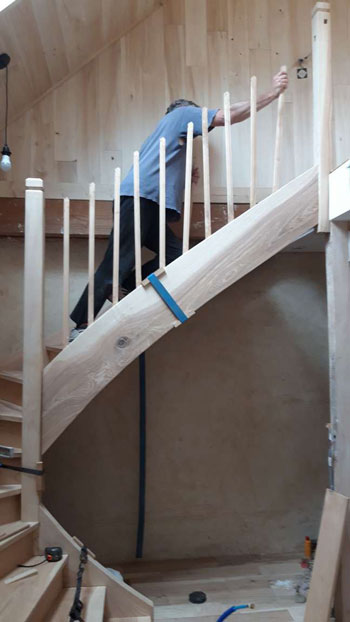
The lower flight railing was installed, glued and screwed.
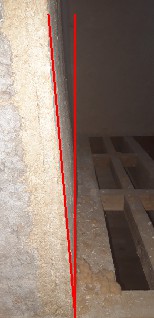
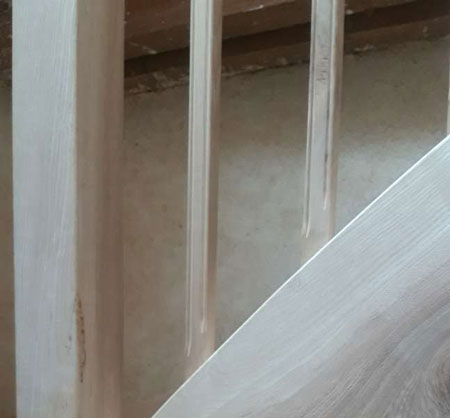
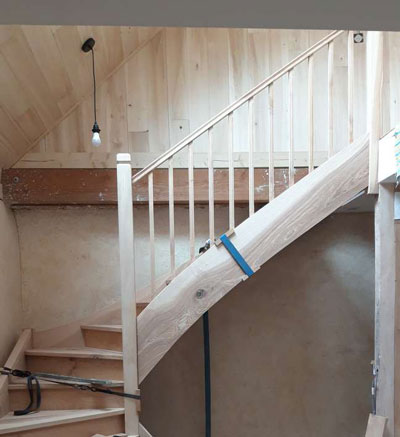
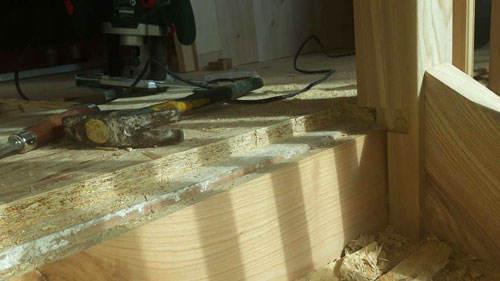
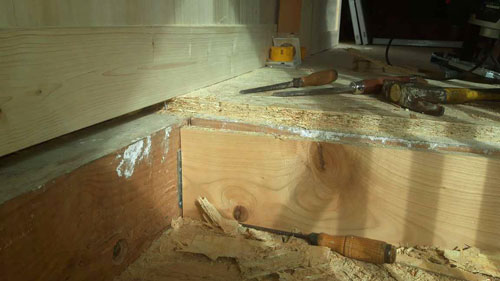
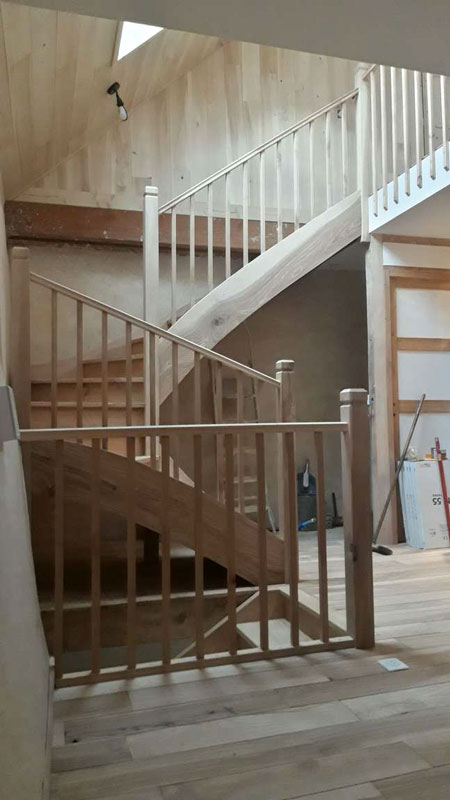
These few images highlight really well the irregular walls that influenced my design choices.
The last riser was cut to length and inserted into its groove, and also the penultimate step which was screwed from below onto the truss.
Finally, the landing step dimensions covered half of the joist plus the riser. The chip board floor was partially cut away with a chisel to introduce the step flush. From below, the riser was pushed back into the groove of the landing step and so firmly fixed in place.
Installation of upper and lower landing railings.
At the top, the handrail ends on a half thickness post.
At the bottom, the wall is so skewed that the newel post I prepared was unusable.
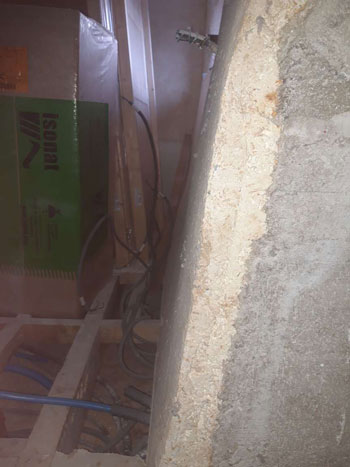
The choice was made instead to add sealant to the stone located under the lime and to fix the rail in place with a small rod.
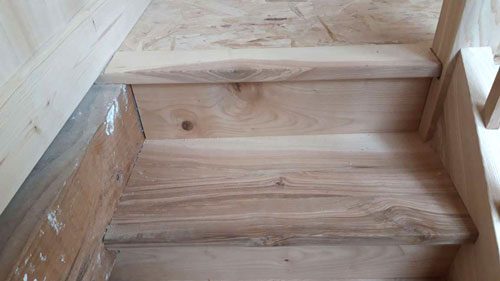
And finally, the completed project
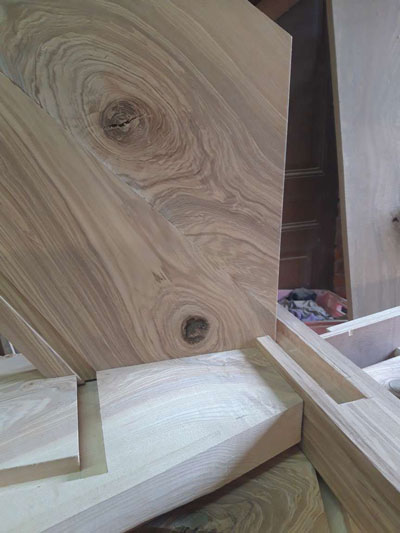
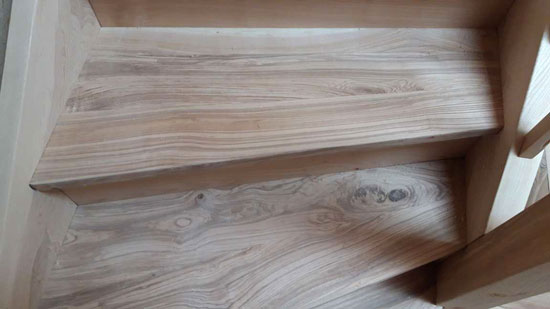
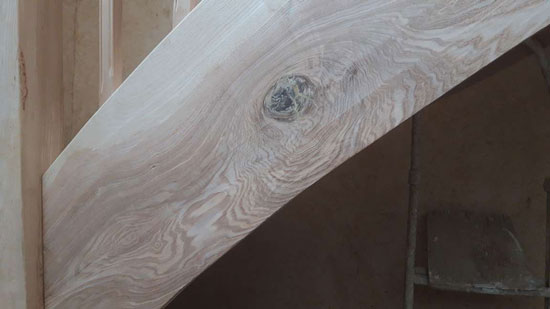
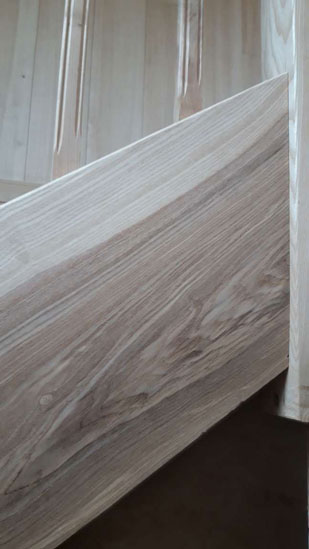
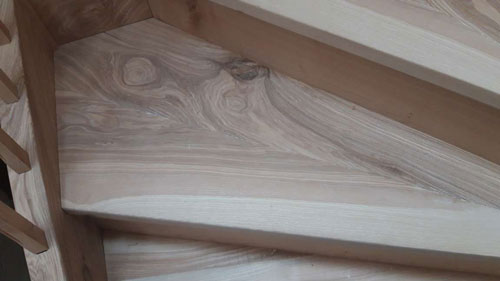
Here are some details to admire…
the grain a gift from mother nature.

How to use StairDesigner for a one-off project
Stair manufacturers would use the full version of StairDesigner for their projects, this includes full manufacturing output.
We also have the option Hervé used here, our StairFile service.
This allows you to use the free version of our pro software (all design features and 3D rendering included) and we’ll process your cut list, plans and DXF files when your design is complete. The 1:1 templates are an optional extra but still very affordable.
You can also discuss the technical aspects of your build with one of the stair experts on our exclusive forum.
Sign up to a Premium Support subscription to access the StairFile service.
What an incredible job! This was probably the challenge stair designers had in old castles. My hat is off to you.