Installation of a stair highlighting a great way to assemble strings in situ, plus more specialised techniques for fixing the strings to plaster boards.
In renovation work we often find ourselves having to install woodwork against walls that are irregular and difficult to measure precisely.
Wood work projects are made of straight lines, precise angles and high +/- 1mm precision. Fitting projects into old buildings with irregular walls that are often not straight let alone flat can be a tricky task.
Installing cabinets and fittings is difficult enough but when it comes to installing stairs, problems can quickly pile up.
The task can also be complicated when the old walls are clad in plaster board. Plaster board is a fragile material onto which it is very difficult to fix heavy items.
Fixing a stair to a plaster board wall can be tricky even in a modern house where walls are fairly even. When the plaster board walls are irregular assembling and fixing a stair can become a real nightmare.
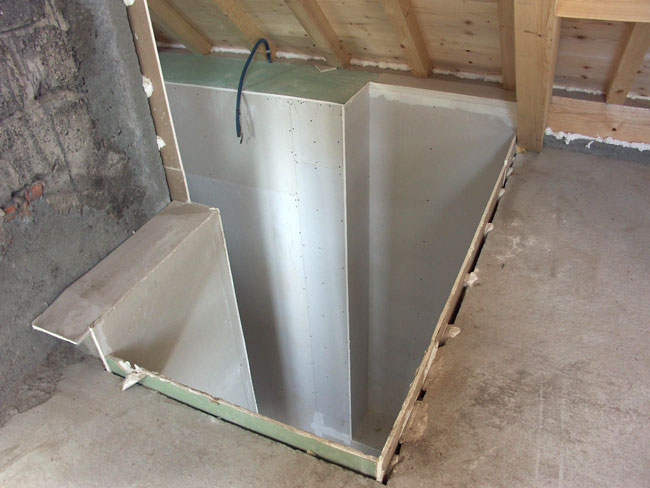
In this project we had to build a stair in an old house where the stairwell has been clad in plaster board.
The project was to build a 2 story stair with each stair having a half turn with winders.
The general shape of the stair was not particularly complex but problems arose because the stair had to fit between the two plaster board walls.
These walls were fixed to the original old house and although an effort had been made to make them cleaner and more regular the stairwell remained distorted.
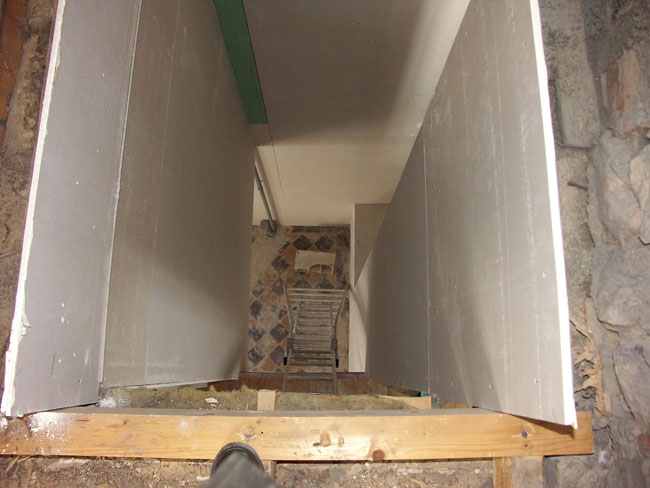
We were able to measure an irregular general twist to the left of approximately 20 to 40mm along the total 6m height of the stairwell. Although very difficult to measure precisely and imperceptible to the naked eye this distortion had to be taken into account when building the stairs.
To make the project more complex still, there was no room to assemble the stair before fitting it into the stairwell, so we had to assemble the different stair parts inside the well.
Here are a few photos of the stairwell:

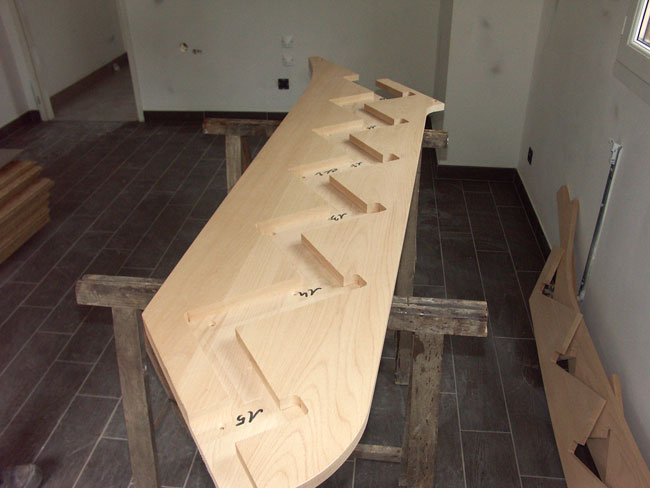
To enable us to assemble the stair inside the well we manufactured the stringers using my 3 part assembled string technique.
Each string was made of 2 x 20mm thick boards screwed together to make a total 40mm. The step and risers housings were routed out at 20mm deep and cut the inner face board into 2 parts.
We ended up with a lower step support ‘cut string’ and an upper ‘plinth’.
All steps and risers were adjusted into the strings as if we were building an ordinary housed string stair.
On site the upper plinth was unscrewed to enable us to assemble the stair in the well.
This is a photo of a string with the upper plinth detached:
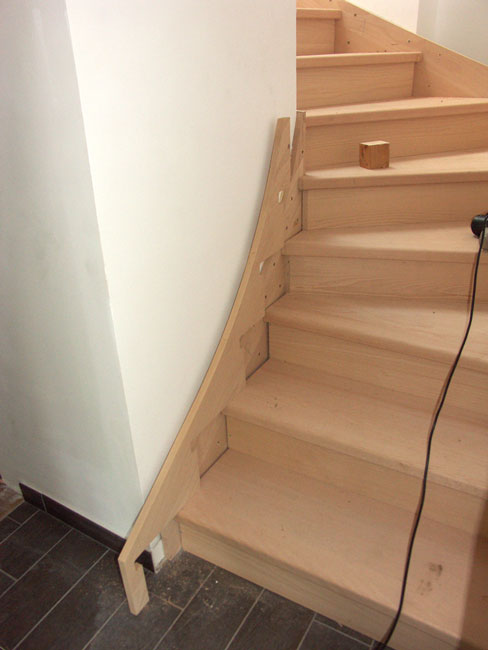
This string construction not only makes it easy to assemble the stair in the well but also allows the fixings to be hidden behind the upper plinth.
This is a photo of the upper plinth ready to be fixed:
The stair was fixed to the plaster board walls using two types of anchors.
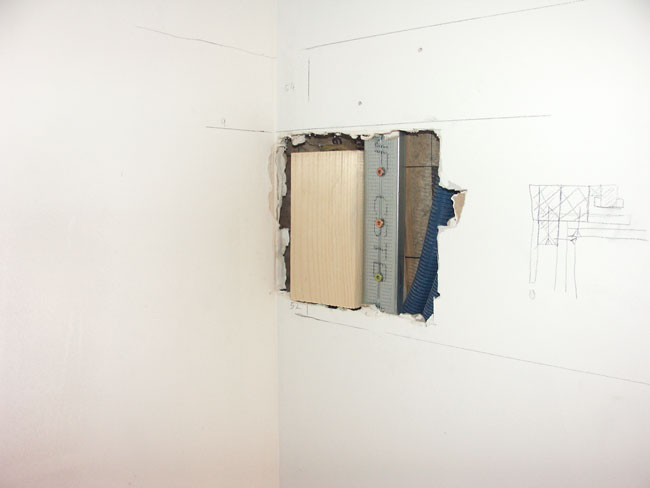
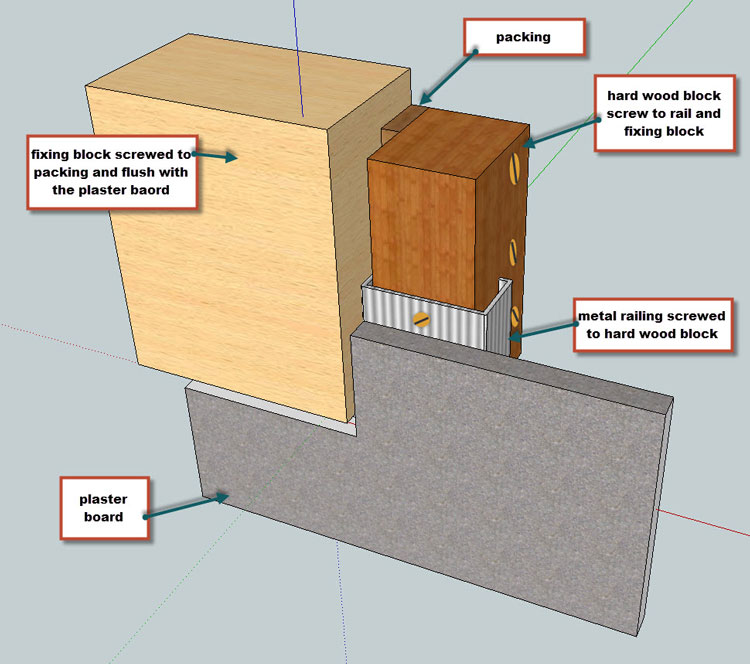
At the exterior corners the plaster board was cut away behind the strings to reveal the wall supporting rails or studs.
I then screwed blocks of wood into the rail so that the stair stringer could be screwed to the block:
These anchor points not only fix the stringer vertically but stop the string pulling out from the wall.
The wooden blocks were prepared on site according to the type of railing I found behind the plaster board.
In this case the railing was a small ‘u’ shape and I prepared the blocks as shown here:
The rest of the string was glued to the walls using polyurethane glue. This glue was injected into the space between the string and the wall after the stair had been assembled in the stairwell.
The glue I used was Montage Fix 590 which expanded as it cured and hardened to form a rigid block once dry.
This mix of gluing the strings to the plaster board and fixing the corners to the railing gave a solid fixing to the stair without having to fix into the structural walls behind the plasterboard.
The following video shows how I prepared the string and wall for gluing.
This video shows how the stair was installed.
Click on this page to see the final stair installation video.
This stair was designed using the StairDesigner software solution, click on that link if you’d like more details.
All the best, Ness